13 Gardening Tips That Actually Work for Every Gardener
There is a specific kind of frustration that comes from doing everything the internet says and still watching your plants slowly give up on you.
Tomato seedlings that looked perfectly healthy on Monday somehow develop weird reddish-brown spots by Thursday, and nobody can explain why.
Most people assume gardening is either a natural gift or something that requires years of expensive trial and error before anything actually survives.
The reality is that a handful of small, specific changes tend to make the biggest difference, and most of them cost almost nothing to try.
These gardening tips are the kind that come from actual dirt-under-the-fingernails experience, not just theory pulled from a seed packet.
1- Deep Watering Instead of Daily Light Watering
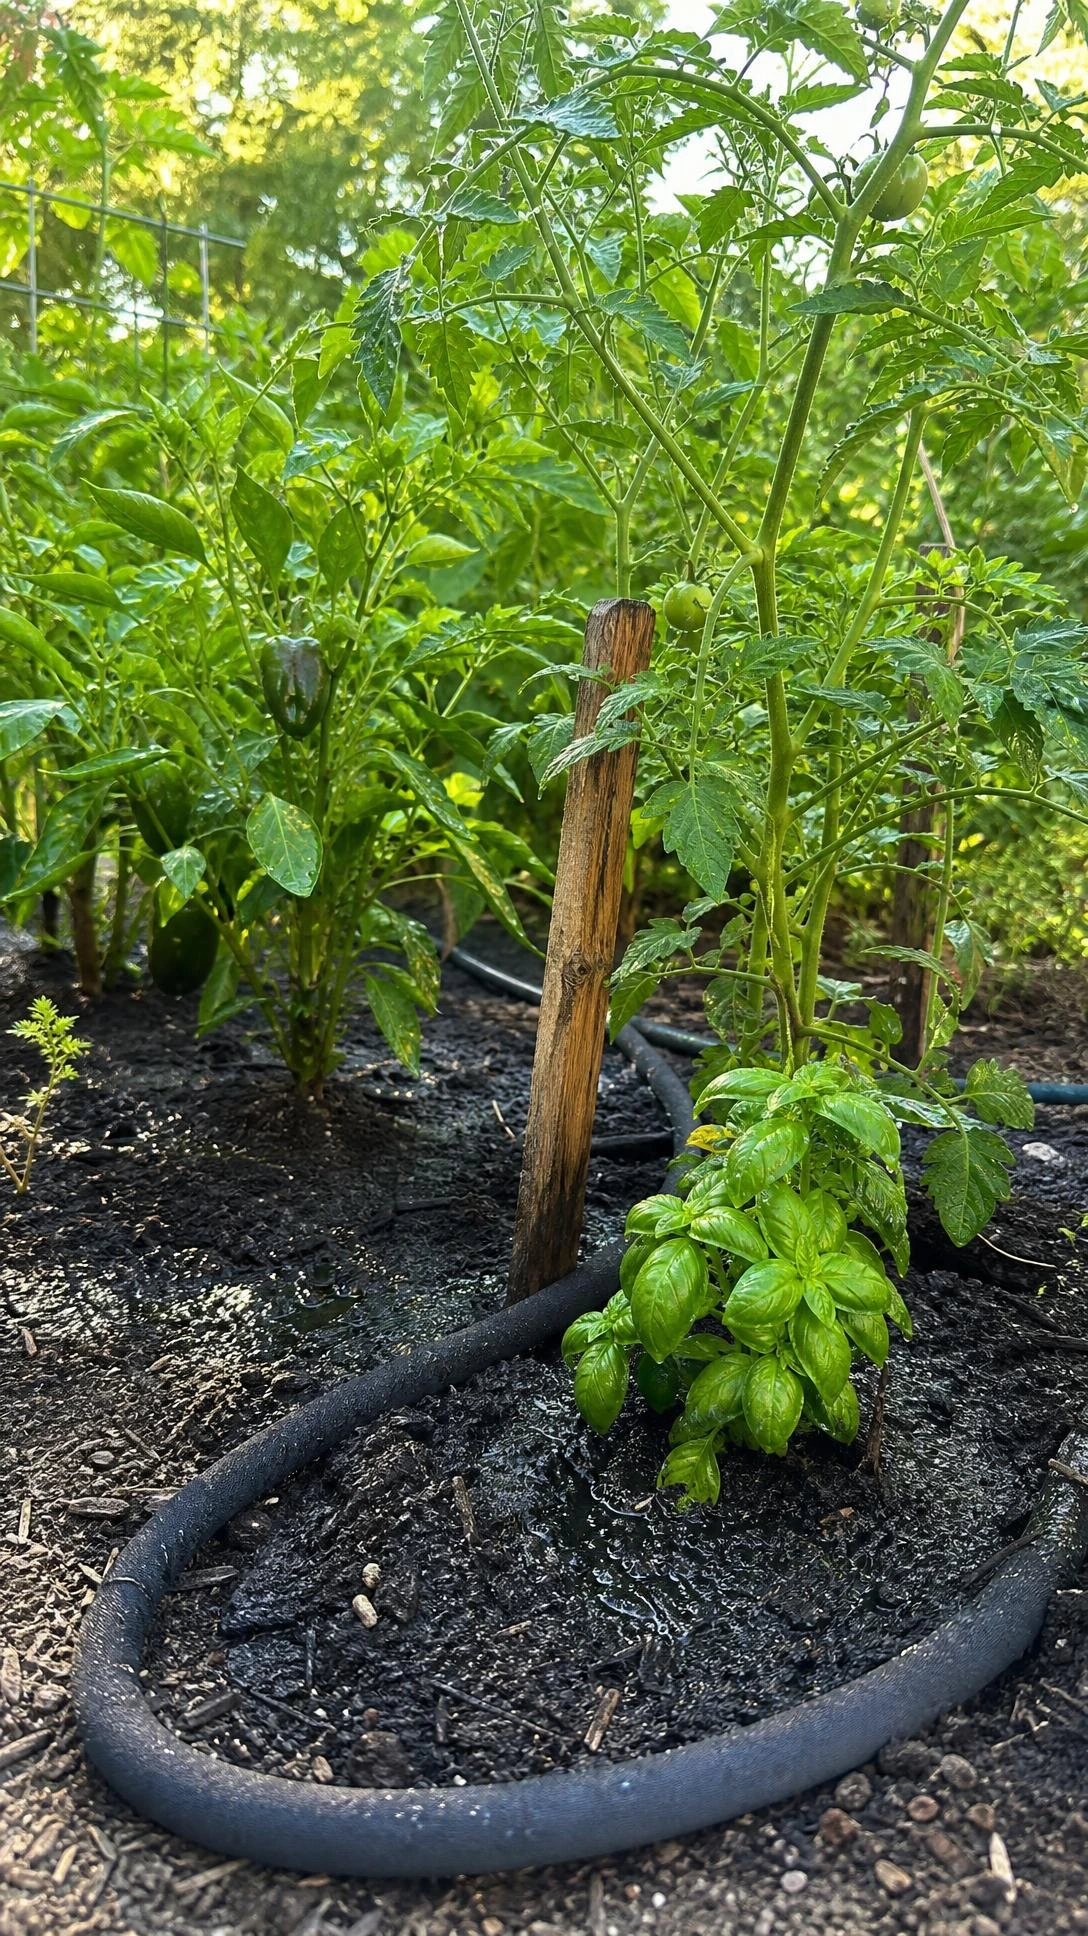
Most people water their garden every single day and wonder why the plants still look stressed by midsummer.
Watering deeply and less often, think two to three times a week, encourages roots to grow downward into the soil instead of staying shallow near the surface.
Shallow roots are basically fragile roots, and fragile roots are the reason plants wilt the second temperatures climb past 85 degrees.
A slow, deep soak for about 30 minutes with a drip hose gets the water down to where the roots actually want to go.
Once people switch to this method, most notice their plants looking noticeably steadier through hot stretches without any other changes.
2- Mulching Regularly to Hold Moisture In
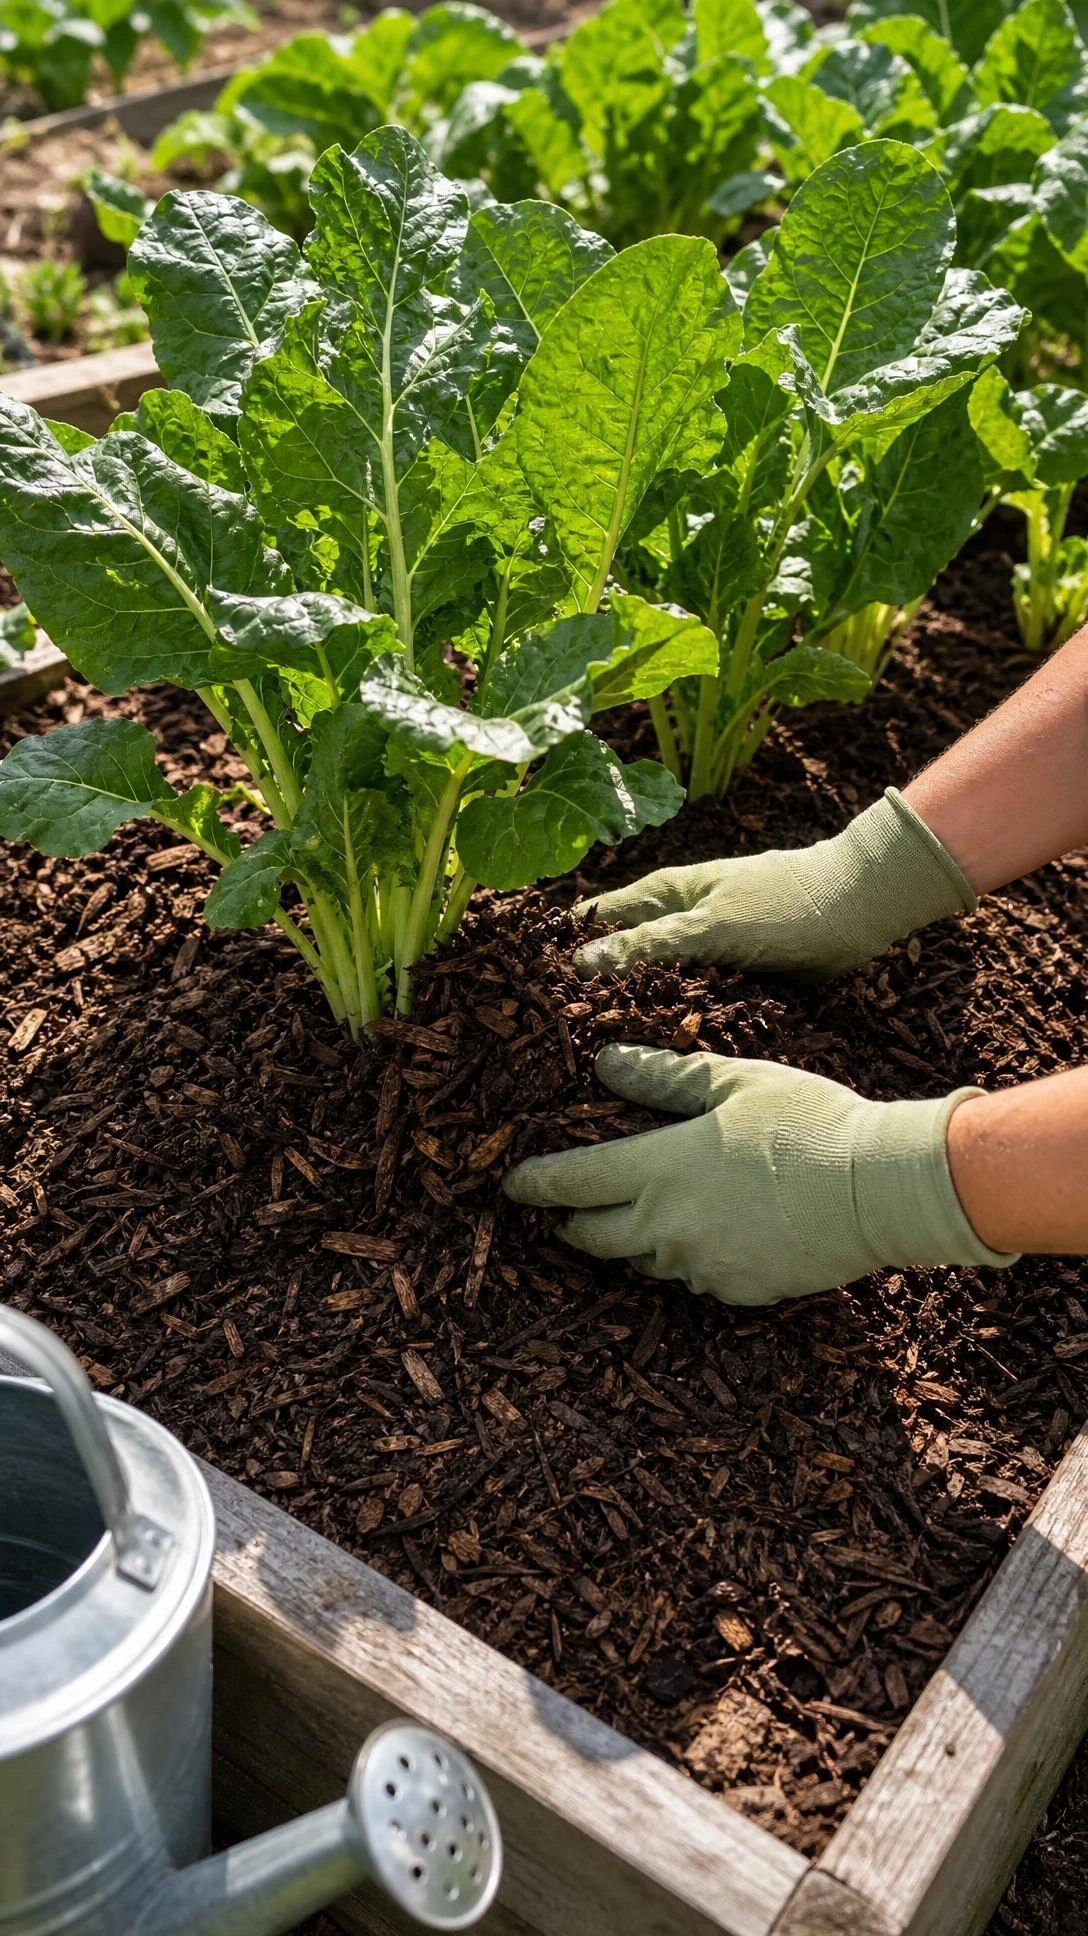
Mulch is one of those things that sounds like a bonus step but is actually doing more work than most people realize.
A 2 to 3 inch layer of mulch around plants holds moisture in the soil, keeps roots cooler during heat waves, and cuts down on how often watering is even needed.
Straw, wood chips, and shredded leaves all work well, and shredded leaves are basically free if there are trees anywhere nearby.
The no-till method pairs really well with mulching because leaving the soil structure intact helps it hold water even better over time.
Most garden beds only need mulch refreshed once in spring and once heading into fall, so it is not a high-maintenance habit to keep up.
3- Marigolds as Companion Plants for Tomatoes
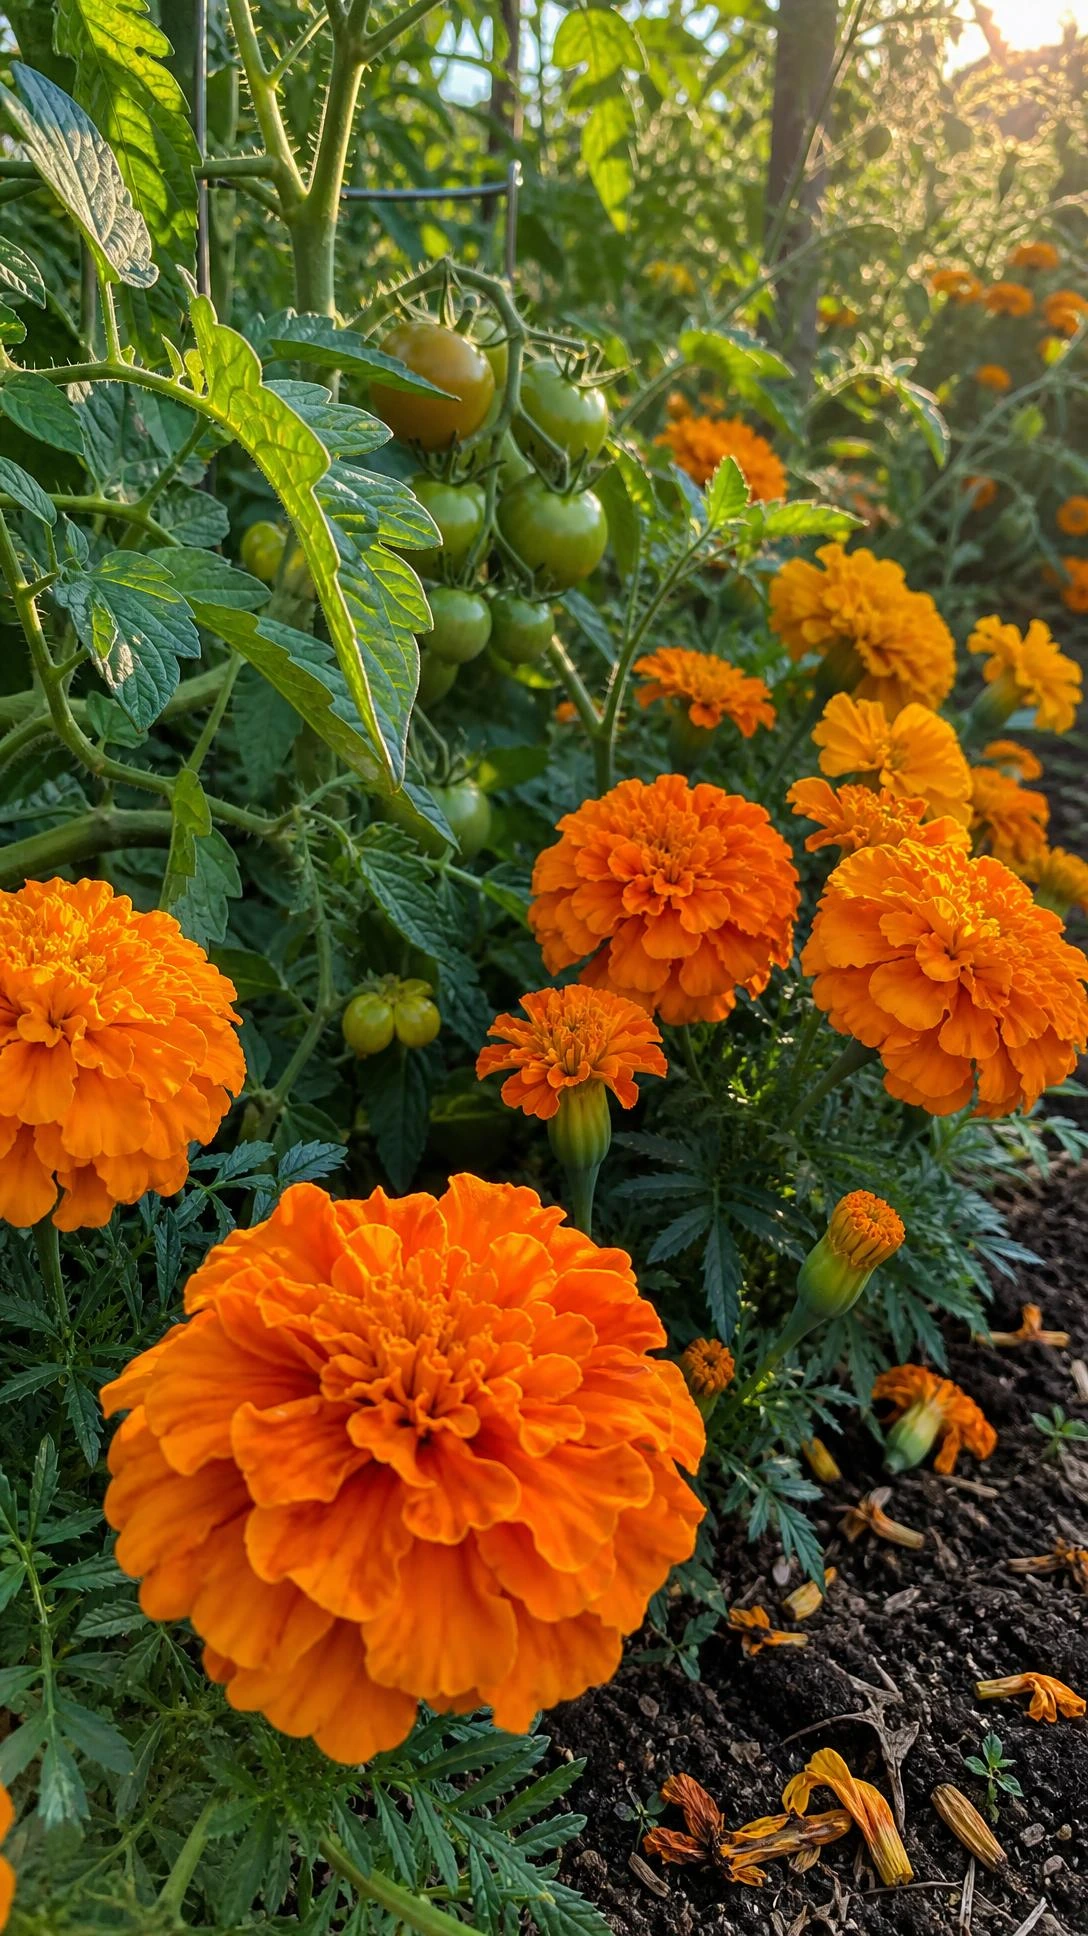
Planting marigolds next to tomatoes is one of those tips that sounds like old garden folklore until the results show up in real life.
Marigolds release a scent that actively repels aphids, whiteflies, and nematodes, which are some of the most common reasons tomato plants struggle mid-season.
French marigolds, specifically the Tagetes patula variety, tend to work best for pest deterrence compared to the larger African types.
The bonus is that marigolds also attract pollinators, so the tomatoes end up better pollinated and the pest pressure goes down at the same time.
I think this is honestly one of the highest-return things anyone can do in a vegetable garden for under five dollars in seeds.
4- How to Actually Germinate Nasturtium Seeds
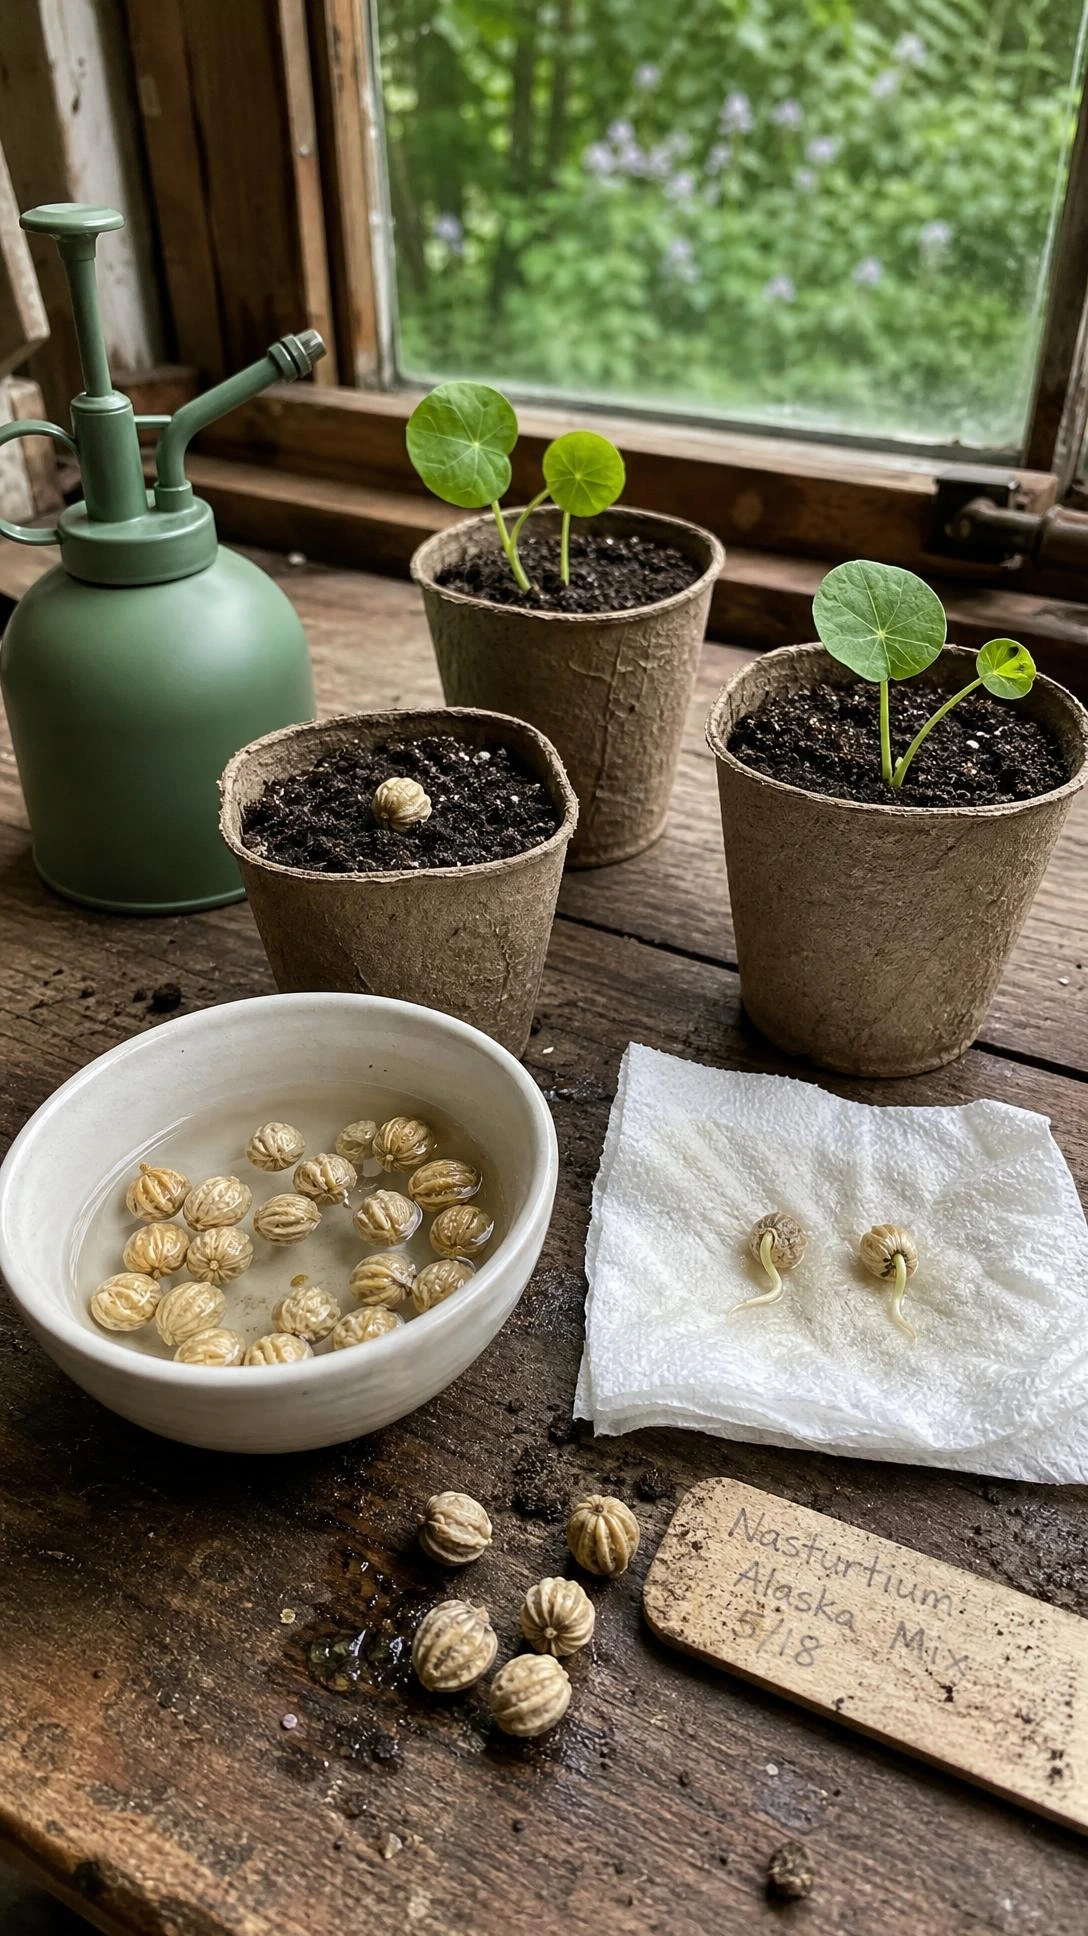
Nasturtium seeds are stubborn in a way that catches a lot of gardeners off guard, especially because they look so simple and low-maintenance on the packet.
The hard outer coat on the seed slows germination down significantly, so soaking the seeds in warm water for 12 to 24 hours before planting makes a real difference.
Some people also lightly nick the seed coat with a nail file before soaking, which sounds extra but genuinely speeds things up by a few days.
Nasturtiums also do not love being transplanted, so direct sowing into the ground where they will actually grow tends to produce much better results than starting them in trays.
Once they take hold, they spread naturally and act as a low-growing green mulch that also keeps aphids off nearby plants.
5- Chilling Tulip Bulbs for Warm Climates
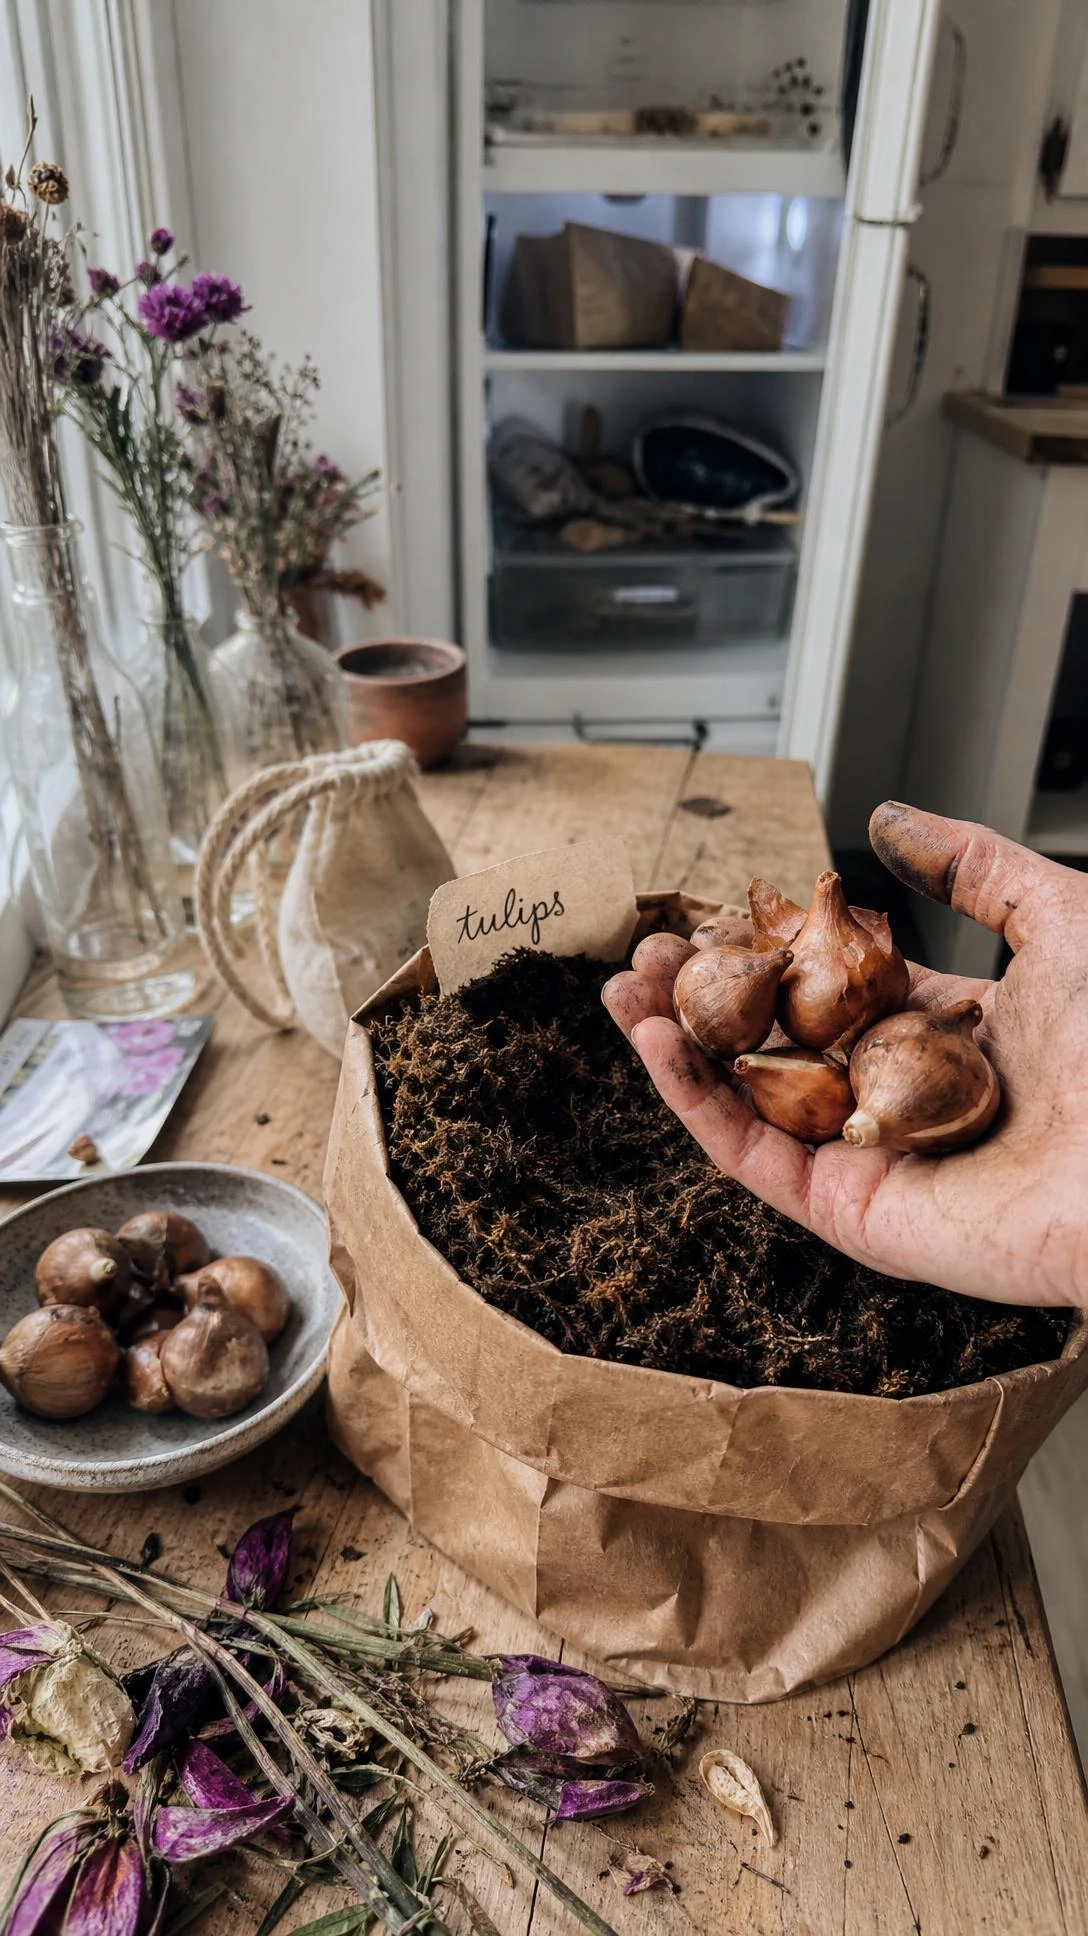
Growing tulips in a warm climate is genuinely one of the more challenging things in home gardening, and most guides skip over just how specific the process needs to be.
Tulip bulbs need a cold period to bloom properly, and in climates that do not get a hard winter, that means chilling the bulbs in the refrigerator for about 12 to 15 weeks before planting.
The bulbs go in a paper bag, not plastic, kept away from any fruit in the fridge because ethylene gas from ripening fruit can damage them.
After chilling, plant them in late fall or early winter in the warmest zones, and they will bloom in late winter to early spring before the heat sets in.
It takes some planning ahead, but it is the only reliable way to get tulips to perform in a climate that was not really designed for them.
6- Fixing Tomato Seedling Problems Early
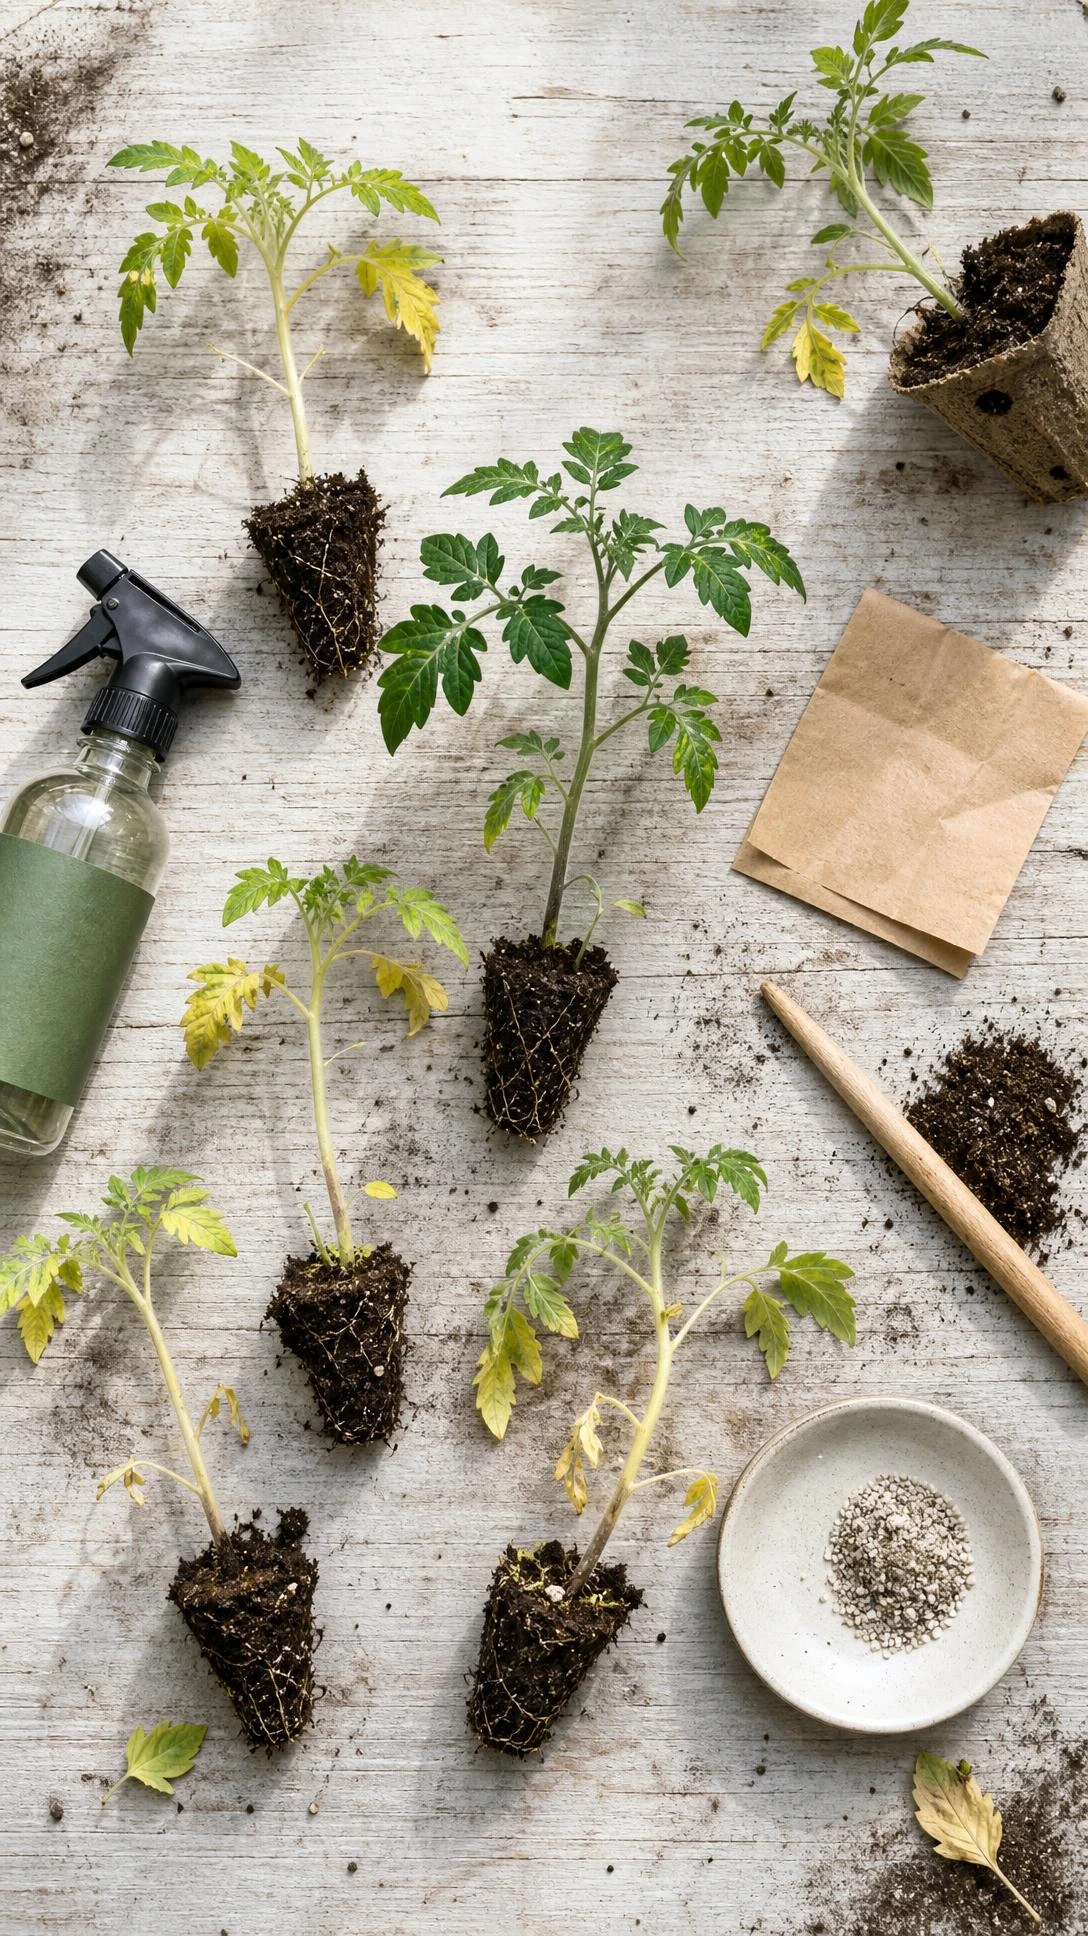
Tomato seedlings developing reddish-brown spots near the soil surface is one of those things that panics new gardeners, and it comes up constantly in gardening forums.
Most of the time, those spots are a sign of damping off, which is a fungal issue caused by overwatering and poor air circulation around the base of the seedlings.
Letting the top inch of soil dry out between waterings and adding a small fan on its lowest setting nearby can stop the problem from spreading within a few days.
The fan trick also serves a second purpose, which is hardening off the stems so the seedlings grow stronger and are less likely to flop over once they go outside.
Catching this early, before more than one or two seedlings are affected, is the difference between losing a few plants and losing the whole tray.
7- Wood Ash as a Free Garden Amendment
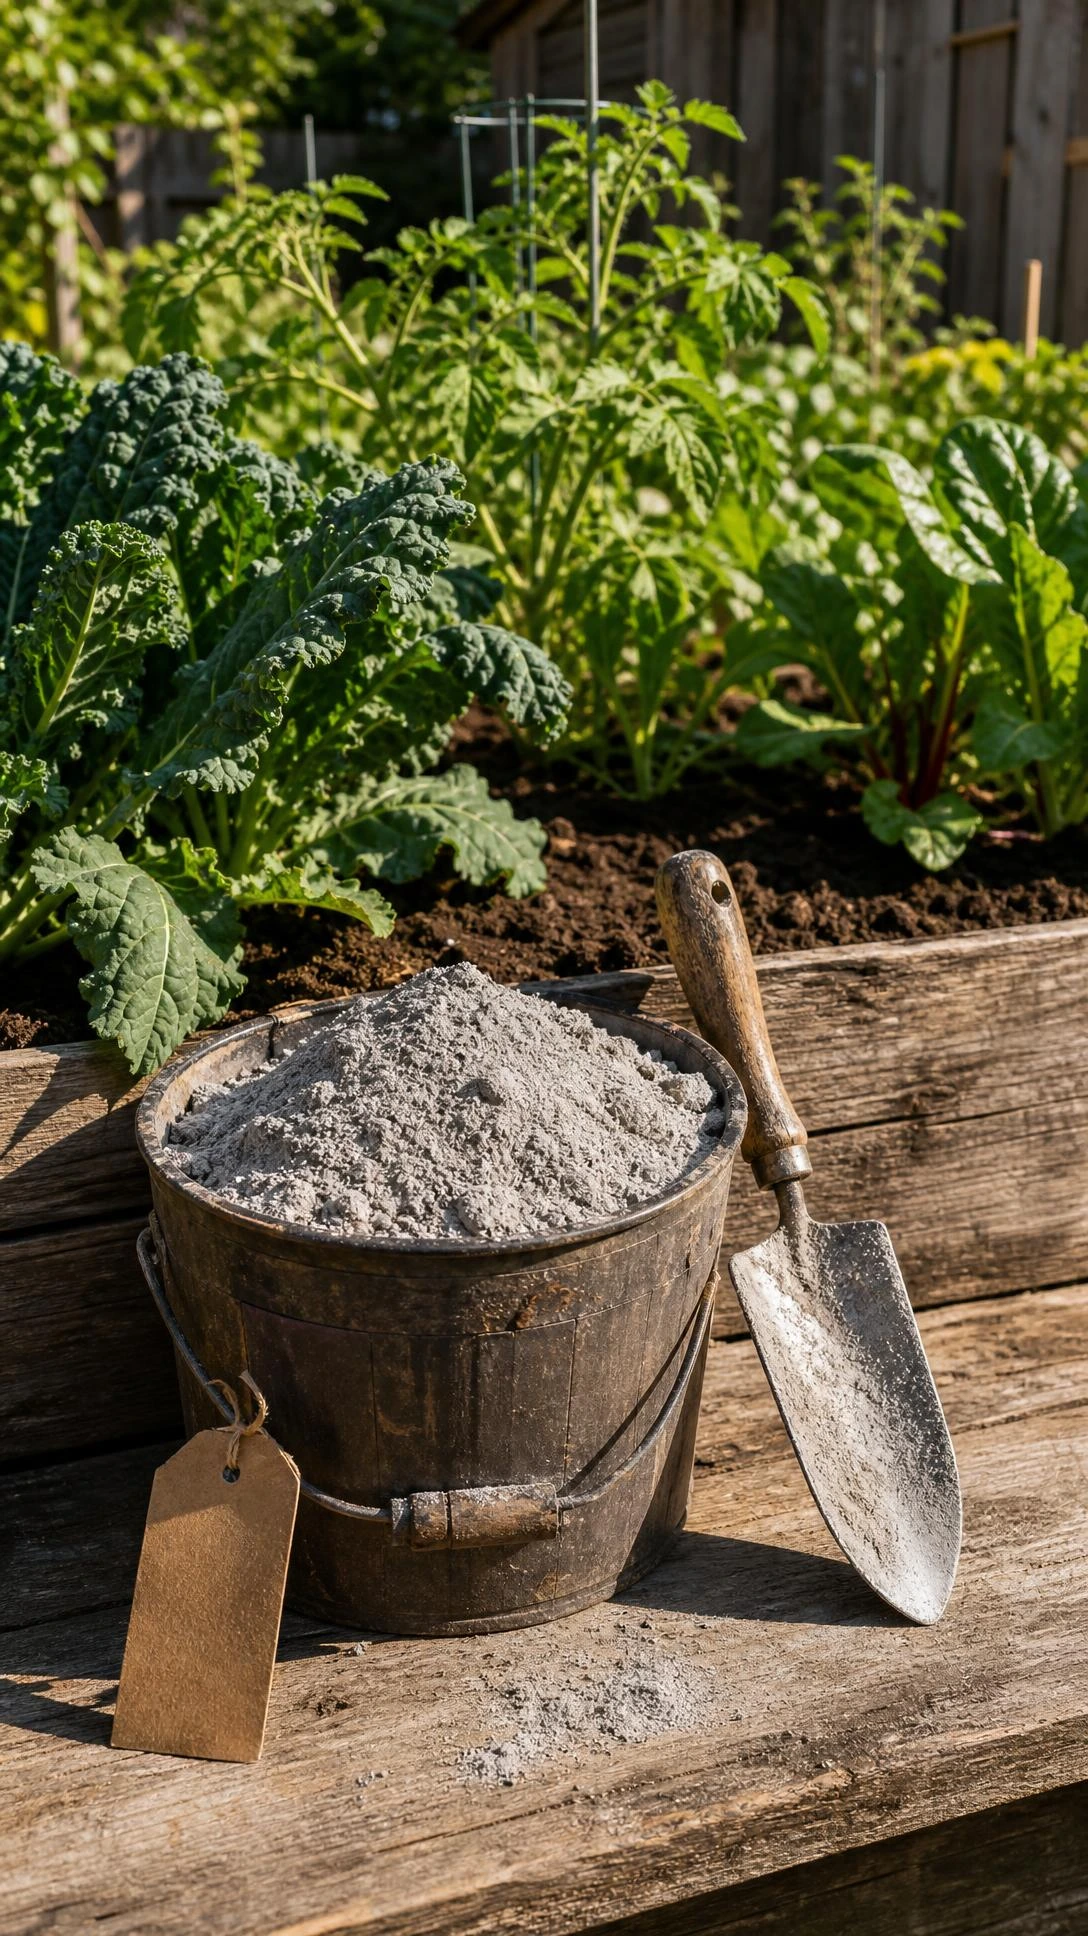
Wood ash from a fireplace or fire pit tends to sit in a bucket all winter while people wonder what to do with it, and the garden is actually a great answer.
It raises soil pH, adds potassium, and provides a small amount of calcium, which makes it especially useful in acidic soils or around plants that need a little boost like brassicas and root vegetables.
The general guidance is about 20 pounds of ash per 1,000 square feet of garden bed, worked lightly into the top layer of soil in early spring.
The one thing to watch is that wood ash is not right for acid-loving plants like blueberries, azaleas, or rhododendrons, where it can create problems instead of solving them.
Testing soil pH before adding it is a quick and inexpensive step, and most garden centers sell simple test kits for around five dollars.
8- Growing Vegetables in Containers When Space Is Small
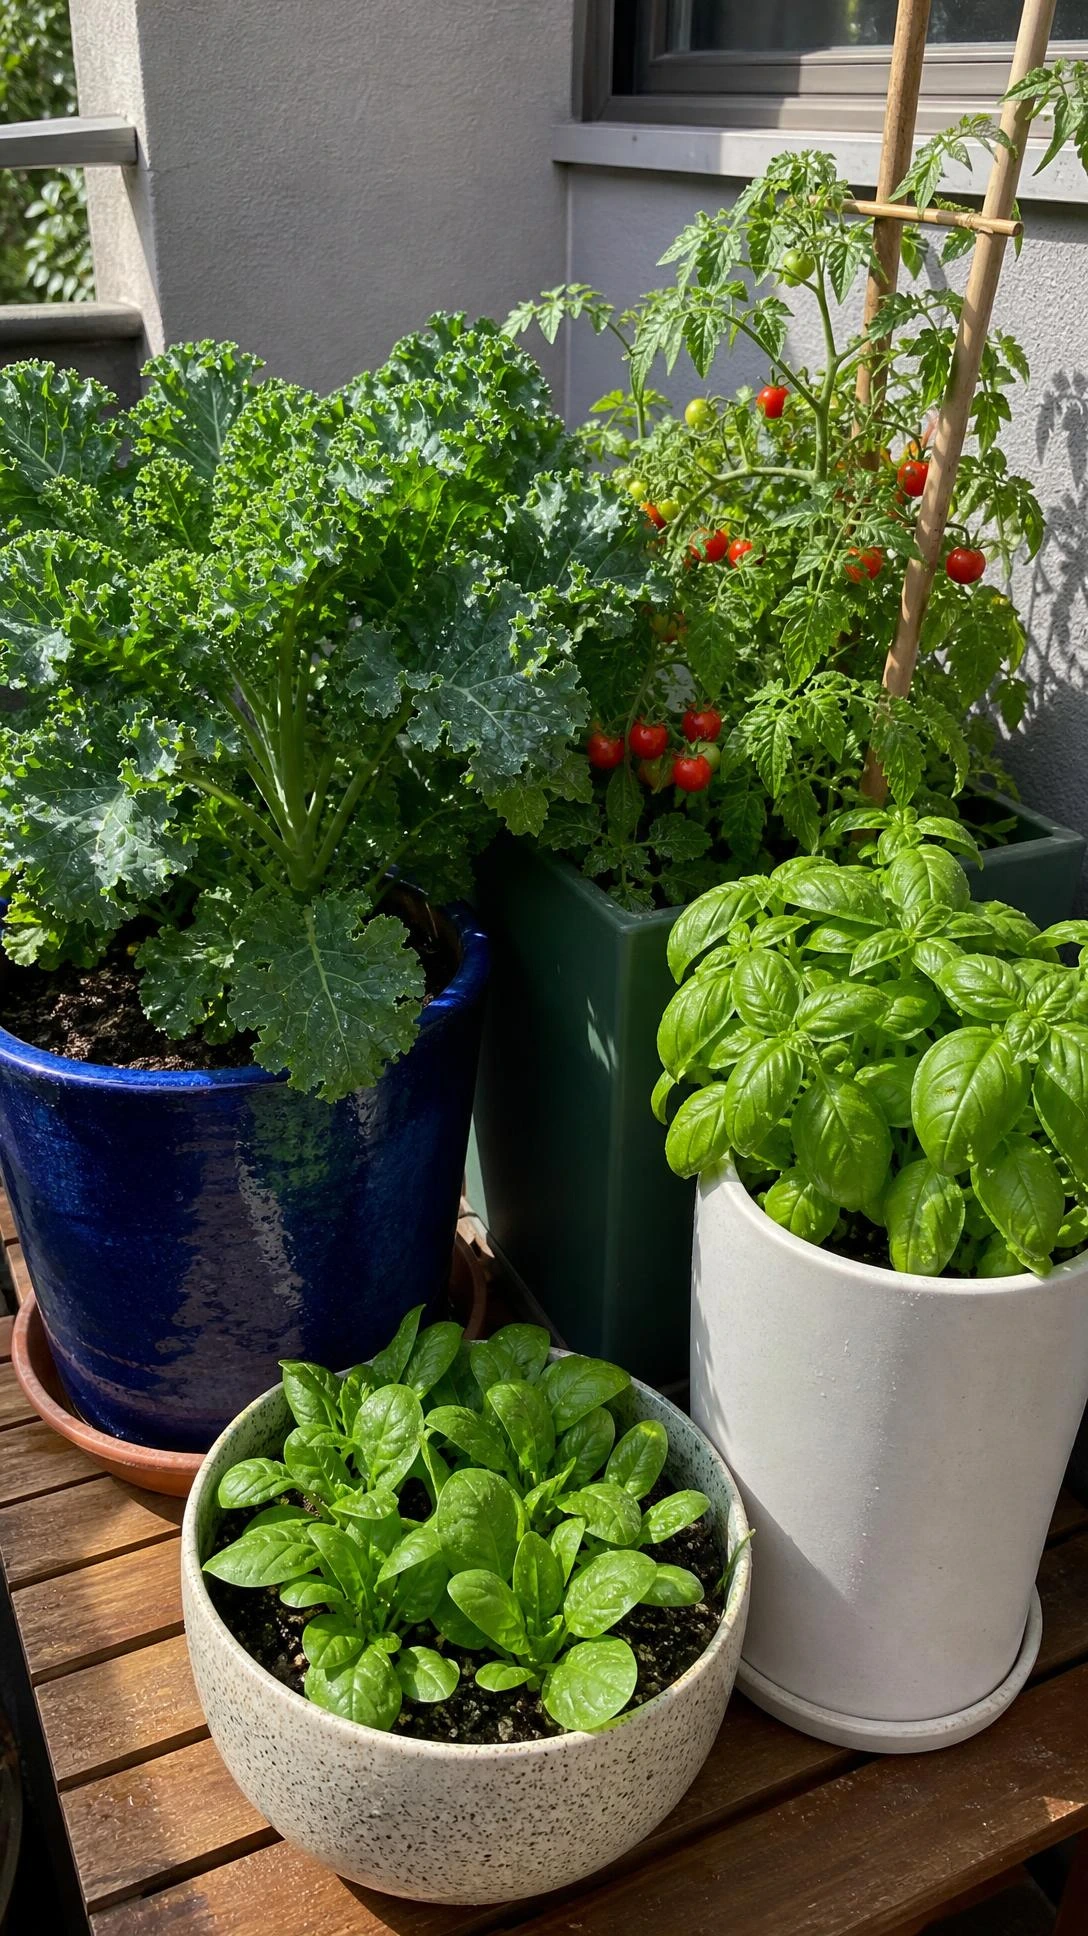
Container gardening tends to get dismissed as a compromise, but lettuce, herbs, and even some tomato varieties actually do extremely well in pots when the setup is right.
Lettuce in a wide, shallow container, at least 8 inches deep, can produce a continuous harvest through most of spring and fall when kept in a spot with morning sun and afternoon shade.
Compact tomato varieties like Tumbling Tom or Patio tend to stay under two feet tall and perform well in 5-gallon containers on a sunny balcony or porch.
The most important thing with container vegetables is that pots dry out much faster than garden beds, so checking the soil daily during warm weather is not optional.
The payoff is that containers are easier to manage, easier to move around, and honestly a lot more satisfying for beginners who are not ready to commit to a full garden bed.
9- Baking Soda for Fungal Issues on Leaves
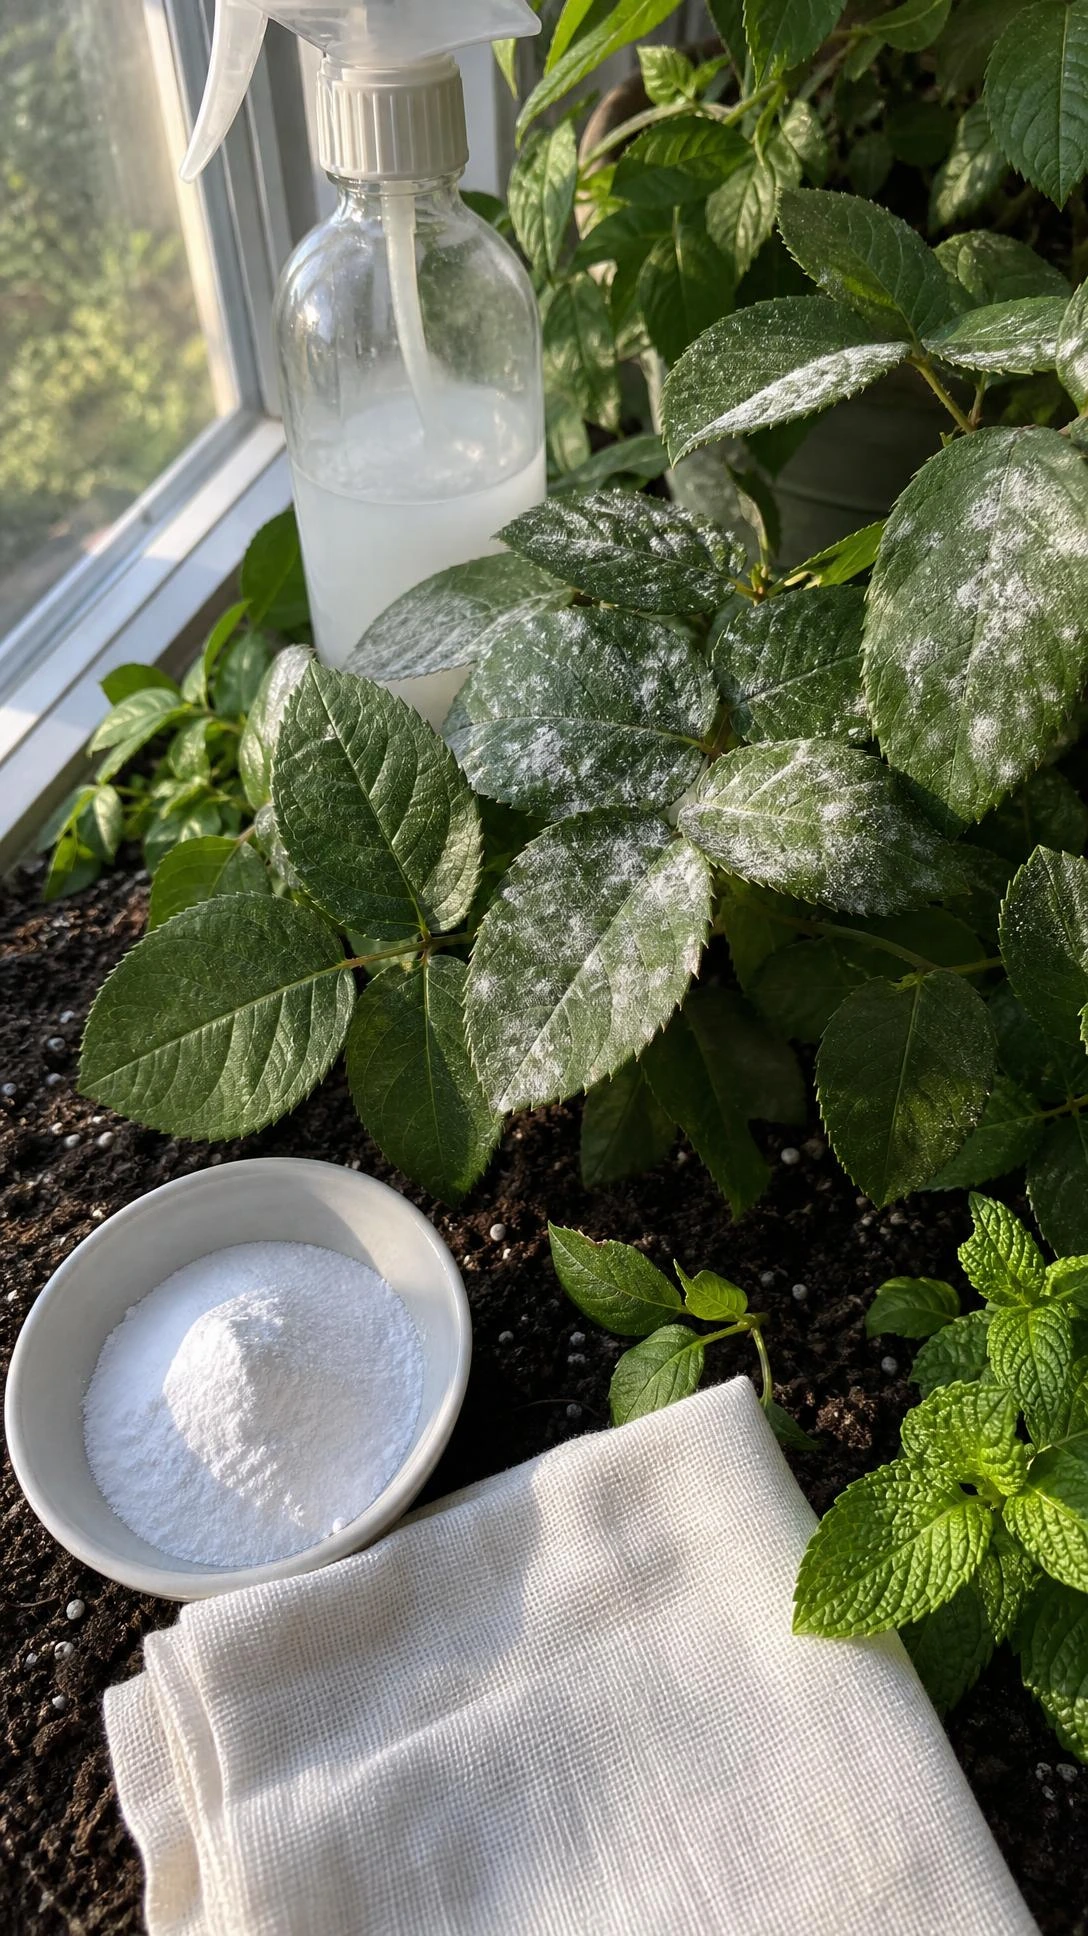
Powdery mildew showing up on squash, cucumbers, or roses is one of those garden problems that spreads faster than most people expect once it gets going.
A simple spray made from one tablespoon of baking soda, one tablespoon of vegetable oil, and a few drops of dish soap mixed into a quart of water works as a preventive and early treatment.
Spraying it on the leaves every 7 to 10 days during humid stretches of summer, especially in the morning so the leaves dry during the day, keeps the mildew from taking hold.
It works best as prevention rather than a cure, so starting to spray before the white patches appear is the smarter approach.
This is one of those gardening tips that feels almost too simple, but the results tend to be surprisingly consistent across a lot of different plant types.
10- Shade Loving Plants for Difficult Garden Spots
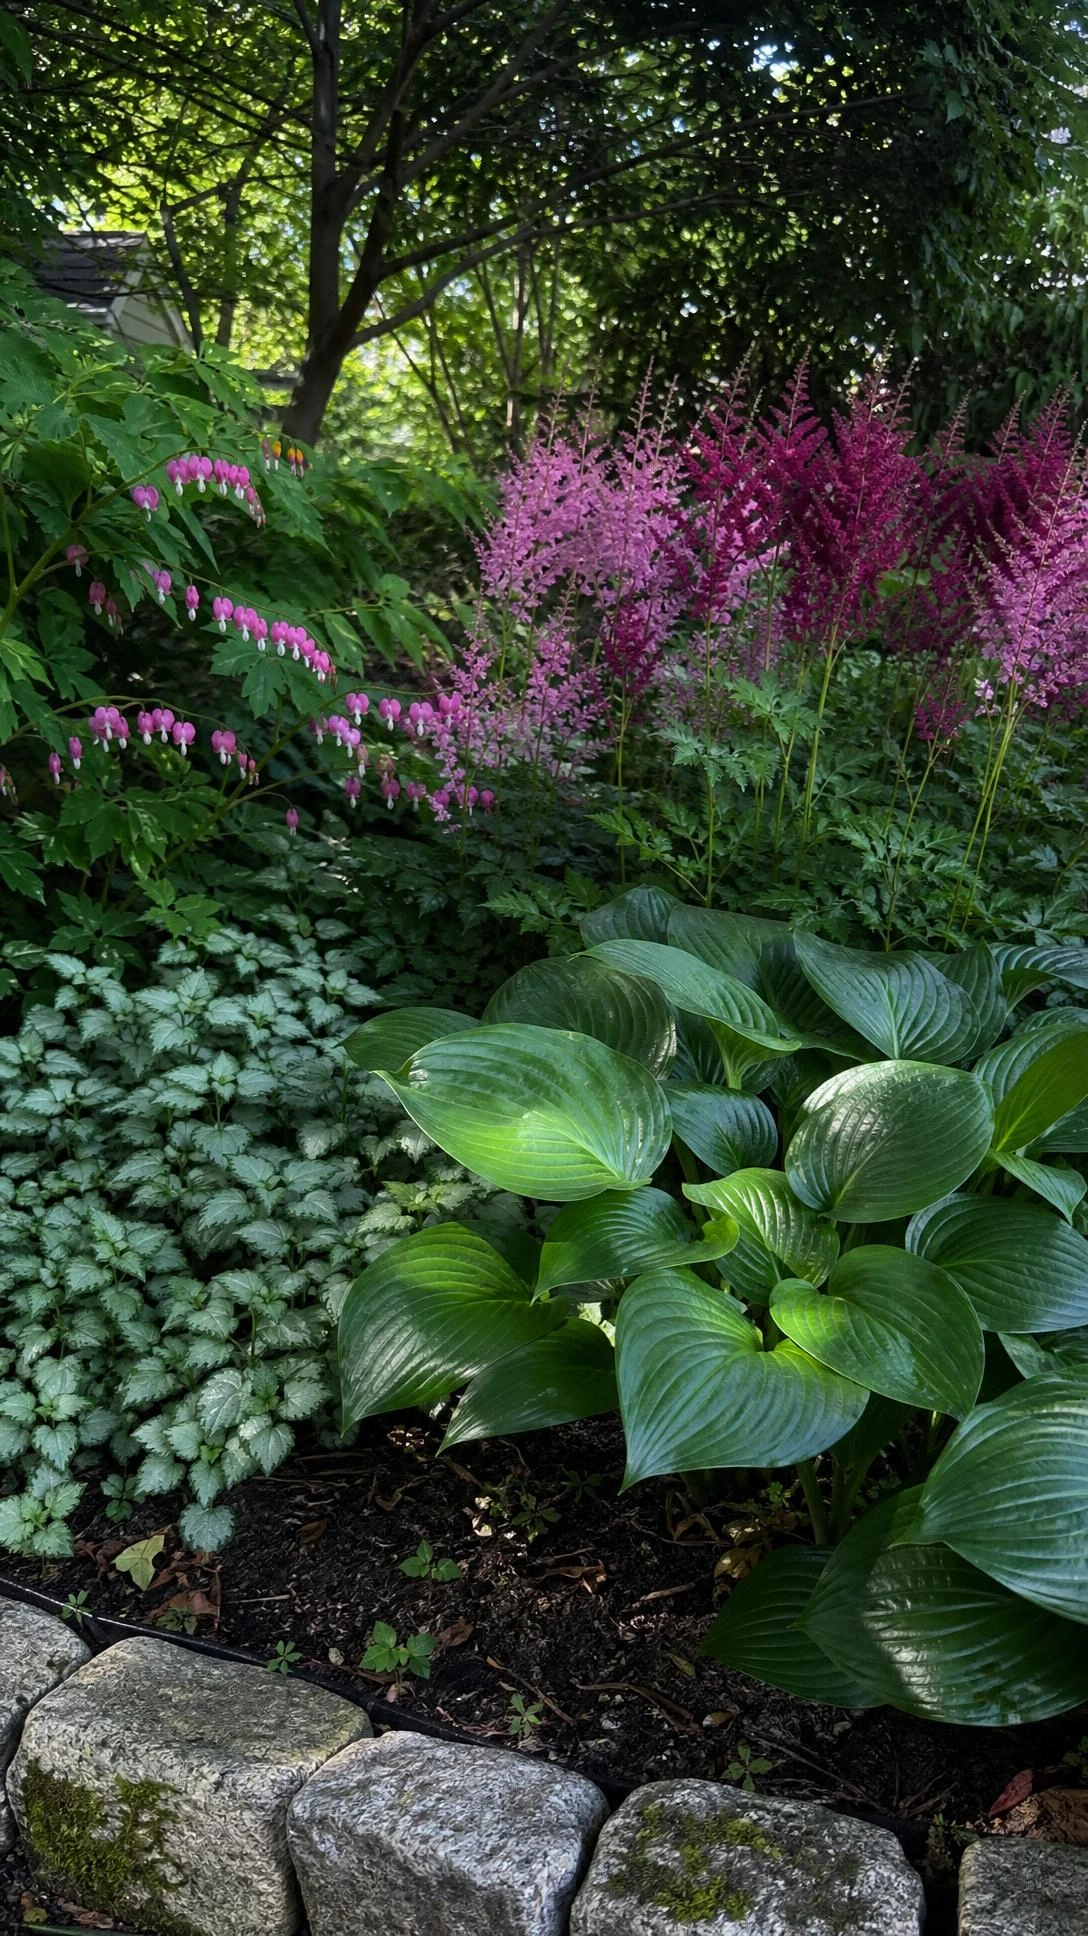
Most people have at least one corner of their yard where nothing seems to grow, usually because it is too shaded for the sun-loving plants they keep trying to put there.
Plants like hostas, astilbe, bleeding heart, and ferns are built for low light and will actually fill in those awkward spots beautifully without constant intervention.
Hostas in particular come in a huge range of sizes and leaf colors, from pale chartreuse to deep blue-green, and some varieties get wide enough to act as ground cover under trees.
The mistake most people make in shady spots is overwatering because they assume shade means the soil stays wet, but drainage still matters just as much as in sunny beds.
Once the right plants are in the right spots, those problem areas tend to become some of the most low-effort and most interesting parts of the garden.
11- Using Chicken Manure Safely as Fertilizer
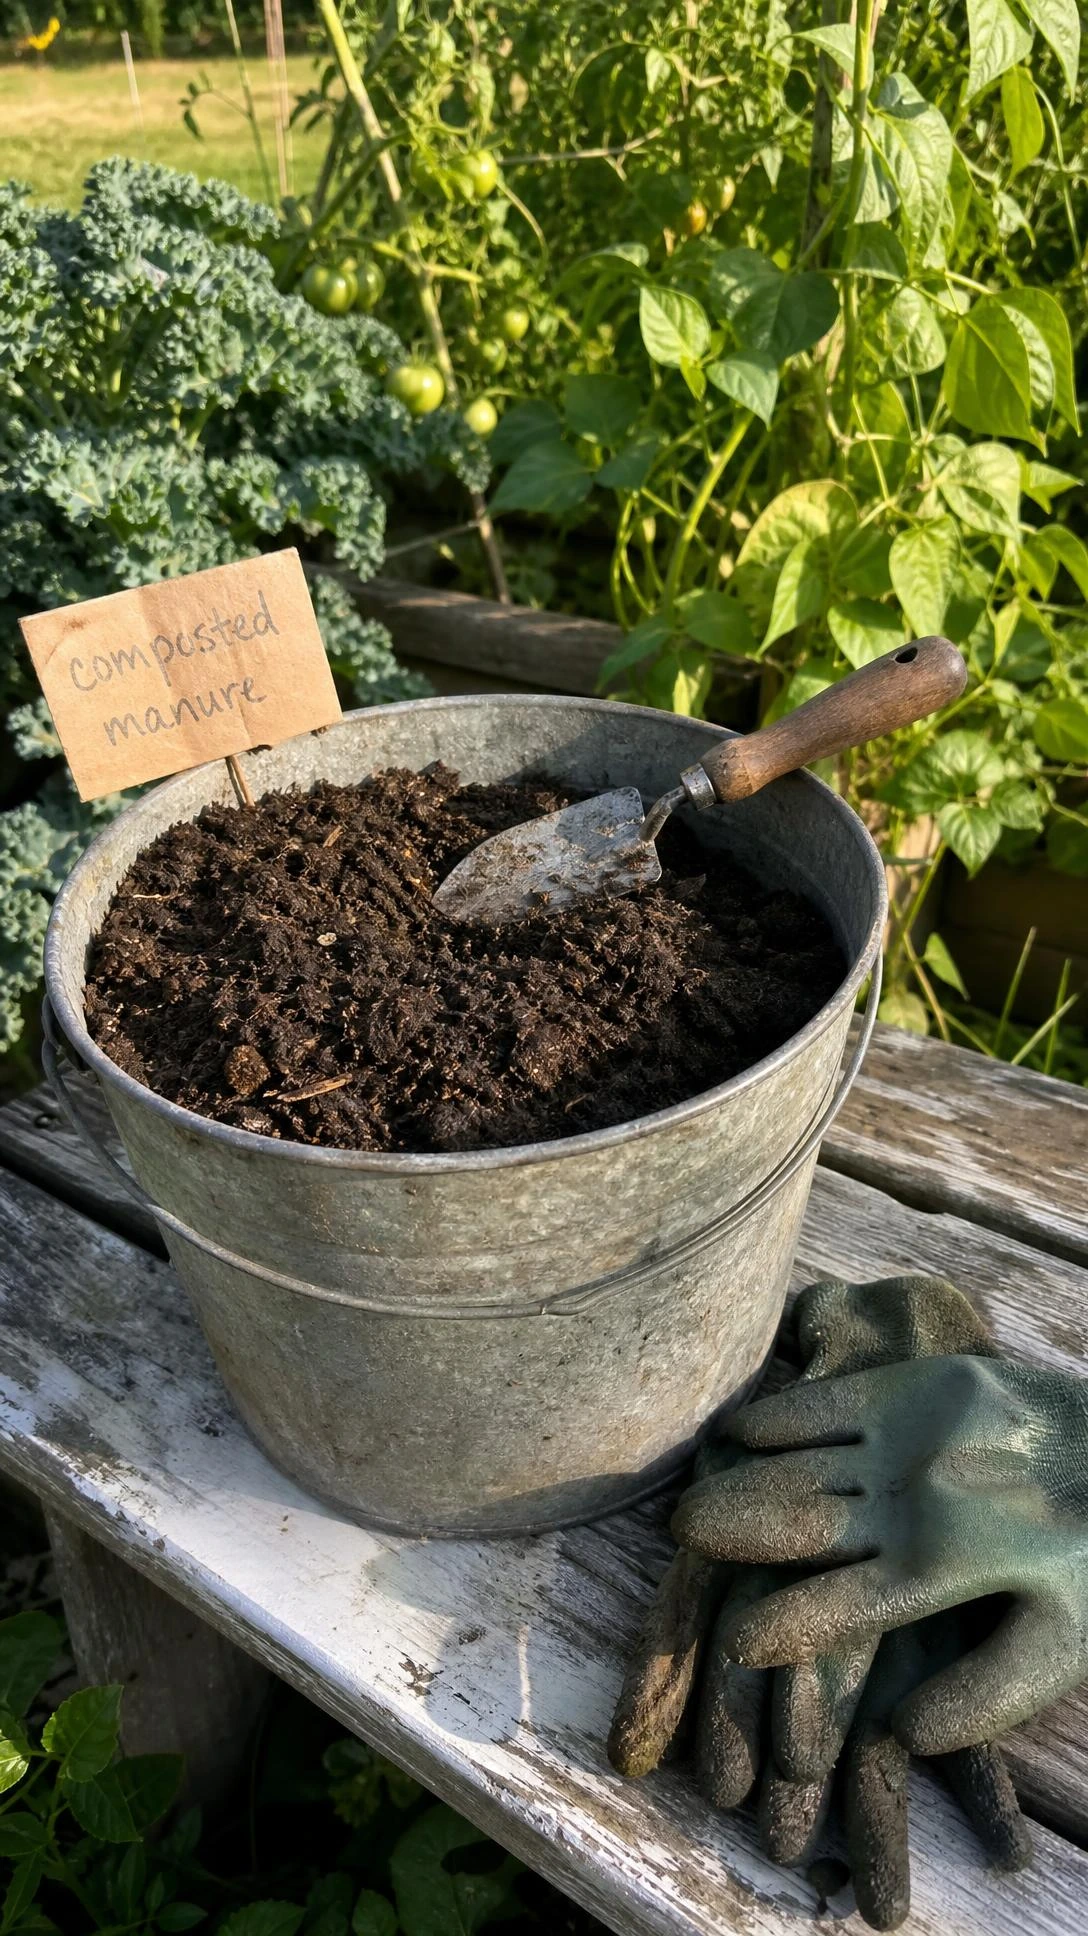
Chicken manure is one of the most nutrient-dense organic fertilizers available, but using it fresh straight onto garden beds is a fast way to burn plants and create a smell situation nobody in the neighborhood will appreciate.
Fresh chicken manure needs to be composted first, which means either hot composting it for at least 45 days or cold composting for around six months before it is safe to use.
Once composted, it works as a slow-release fertilizer that is especially good for heavy feeders like tomatoes, corn, and leafy greens.
Buying bagged composted chicken manure from a garden center is the easier option for most home gardeners, and it usually runs around eight to twelve dollars for a 25-pound bag.
I think composted manure is underrated compared to synthetic fertilizers, mostly because it improves the actual soil structure over time rather than just feeding the plant temporarily.
12- Propagating Houseplants from Cuttings
Buying new houseplants adds up fast, which is one of the main reasons propagating from cuttings is worth understanding even if it sounds more complicated than it is.
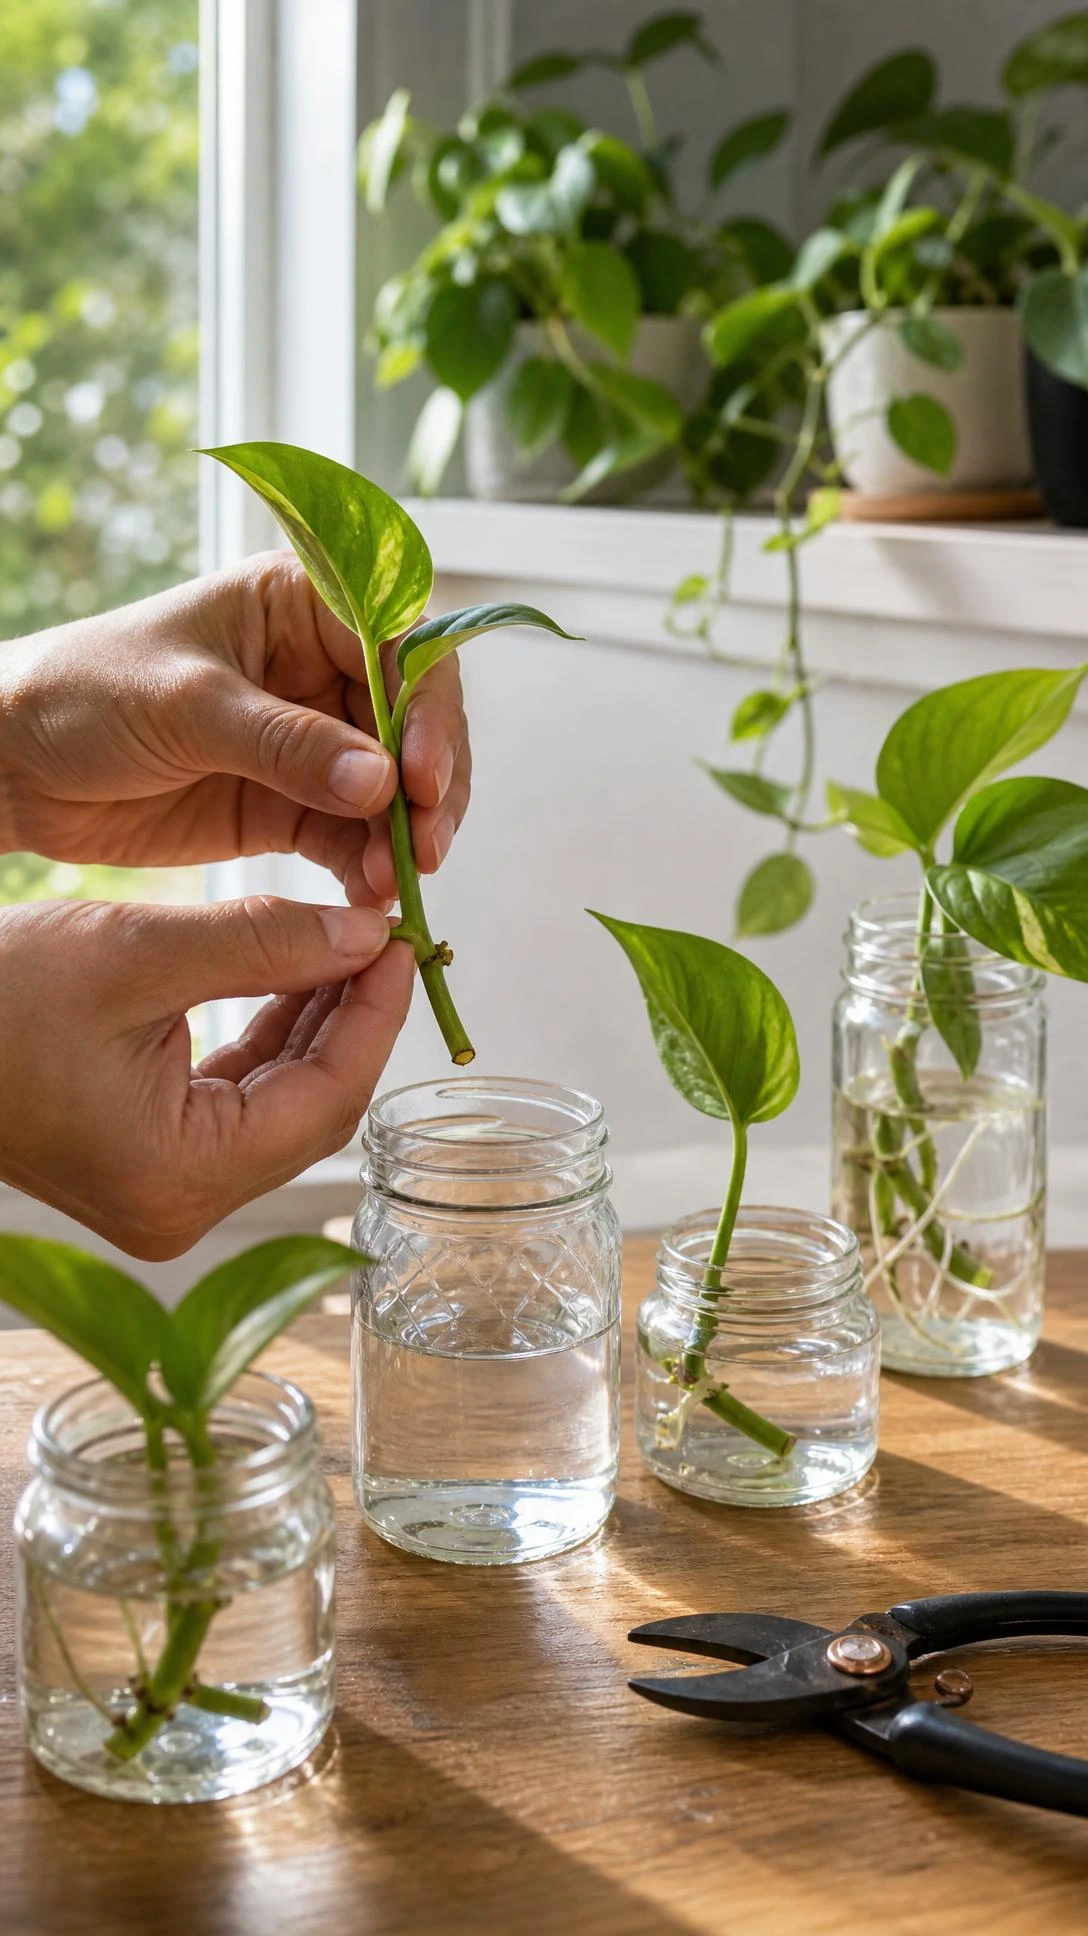
Most popular houseplants, including pothos, philodendron, tradescantia, and begonias, root from stem cuttings placed in a glass of water on a bright windowsill within two to four weeks.
The cutting needs at least one node, which is the small bump or joint on the stem where roots will eventually grow, and any leaves below the water line should be removed to prevent rot.
Changing the water every few days keeps it clean and gives the cutting a better chance of rooting without developing mold or slimy stems.
Once the roots are about an inch long, potting the cutting into a small container with well-draining potting mix tends to produce a plant that establishes quickly without transplant shock.
13- Moss Growing with Buttermilk on Garden Surfaces
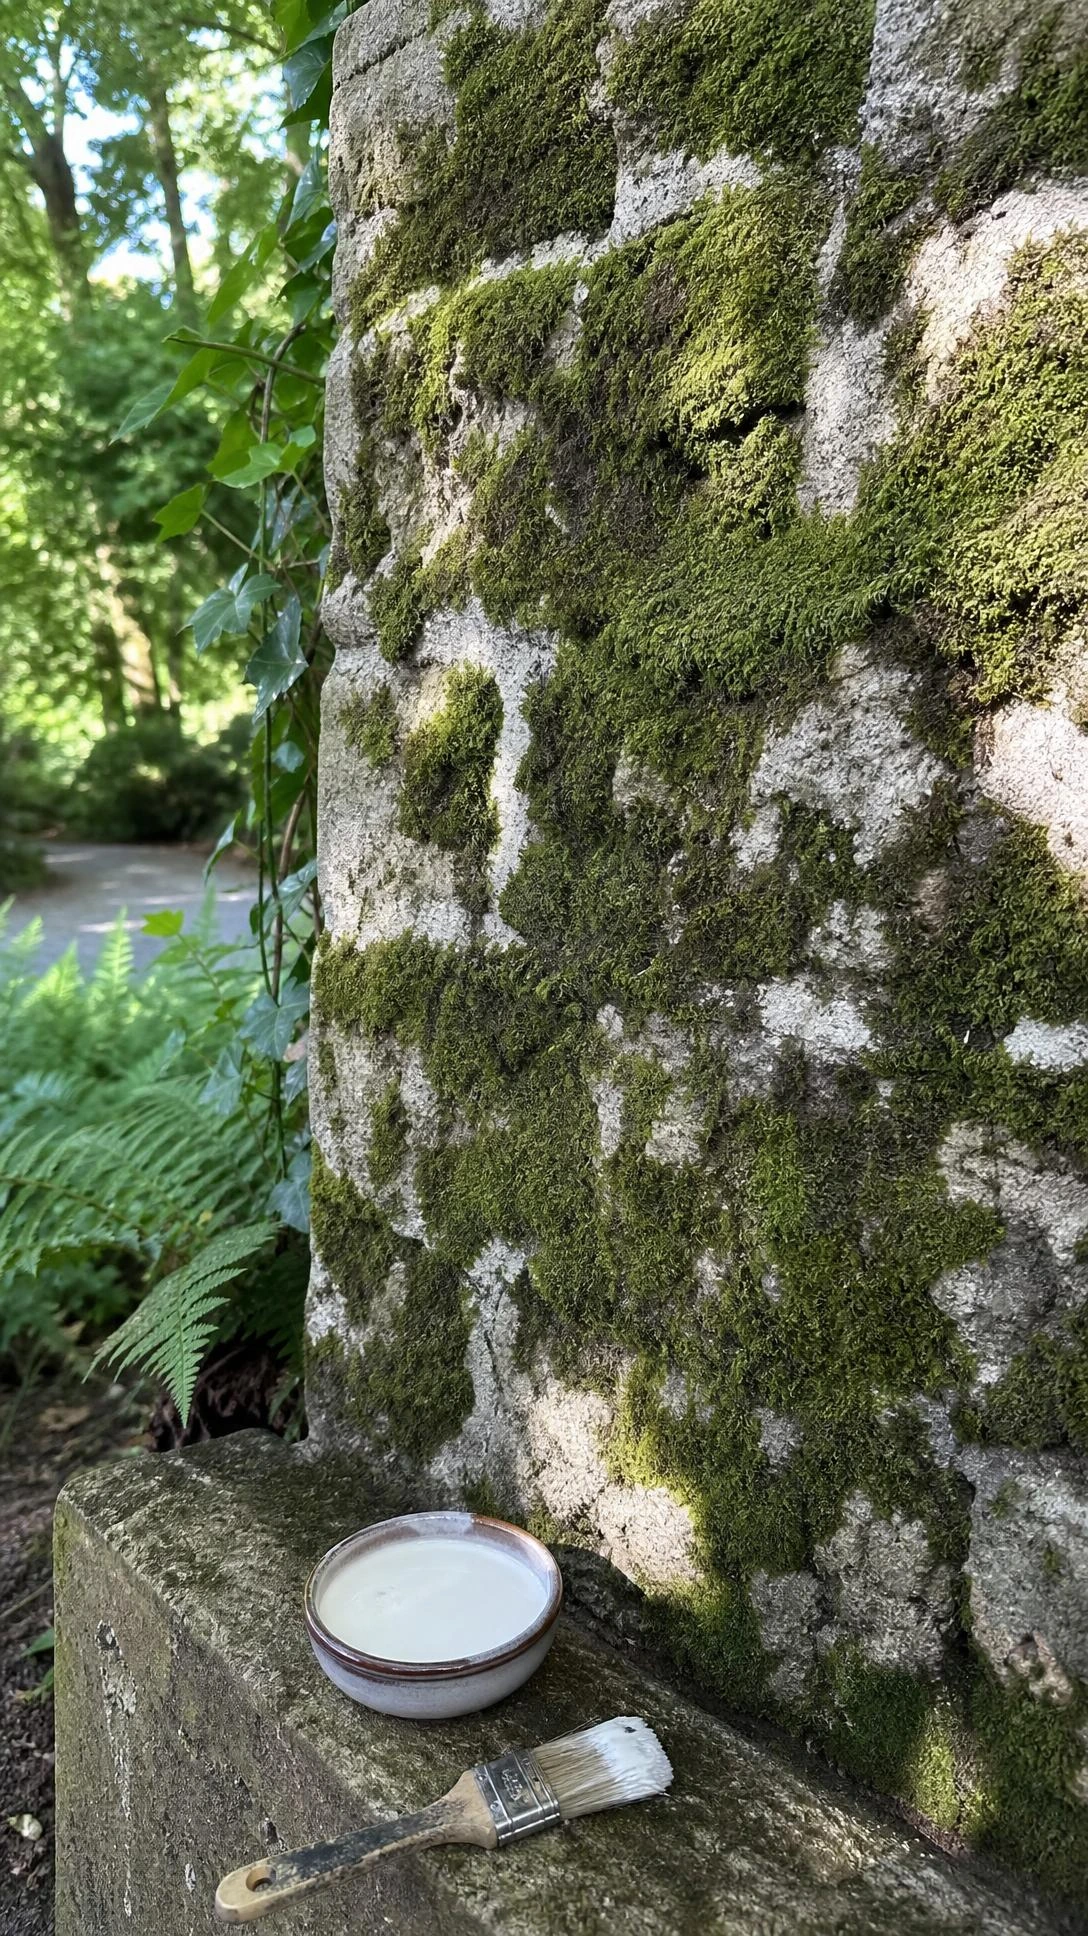
Getting moss to grow on a garden wall, a terracotta pot, or a stepping stone is one of those things that people assume takes years and a lot of luck.
Blending a handful of live moss with about a cup of buttermilk and applying it to a clean, slightly damp surface with a paintbrush is genuinely one of the easiest ways to encourage it to take hold.
The buttermilk creates a slightly acidic environment that moss loves, and keeping the surface damp for the first few weeks while it establishes is the most important part of the process.
Shaded, north-facing surfaces work best because moss does not thrive in full sun or in spots that dry out quickly between waterings.
It takes about four to six weeks before visible growth appears, so this is not an instant result, but watching it slowly spread across a surface is oddly satisfying once it starts.
Gardening Tips That Are Worth Coming Back to Every Season
None of these tips require a big investment or a perfectly designed garden to work.
Most of them just require paying a little closer attention to what the plants are actually doing and making one small adjustment at a time.
Gardening gets easier the more seasons a person moves through, not because it becomes simpler, but because the patterns start to feel familiar.
The best place to start is with whichever one of these feels most relevant to what is already growing in the garden right now.

Hi, I’m Alizabeth, the creator of Pretty Home Hacks. I share practical home decor ideas, easy DIY projects, organization tips, and budget-friendly ways to make your home feel more beautiful and functional. From small room updates to everyday home hacks, my goal is to share approachable ideas you can actually use in your own space.