
10 IKEA Hacks Home Decor Ideas That Look Nothing Like IKEA
Most people walk into IKEA with a budget and walk out with a cartful of flat boxes and a quiet anxiety about the assembly instructions.
The pieces are affordable and they work, but there is something about the look that everyone recognizes immediately, that particular combination of clean pine and simple lines that says “IKEA” louder than any price tag.
The frustrating part is that most people assume changing that means buying completely new furniture, which defeats the whole point of shopping affordably in the first place.
The thing is, a few small changes to an IKEA piece, the right paint color, some new hardware, a bit of trim, can make it look like something that cost four times as much.
These are the IKEA hacks home decor ideas that actually hold up, the ones worth the afternoon of effort because the result genuinely stops people from recognizing where the piece came from.
1- BILLY Bookcase Built-ins with Trim and Paint
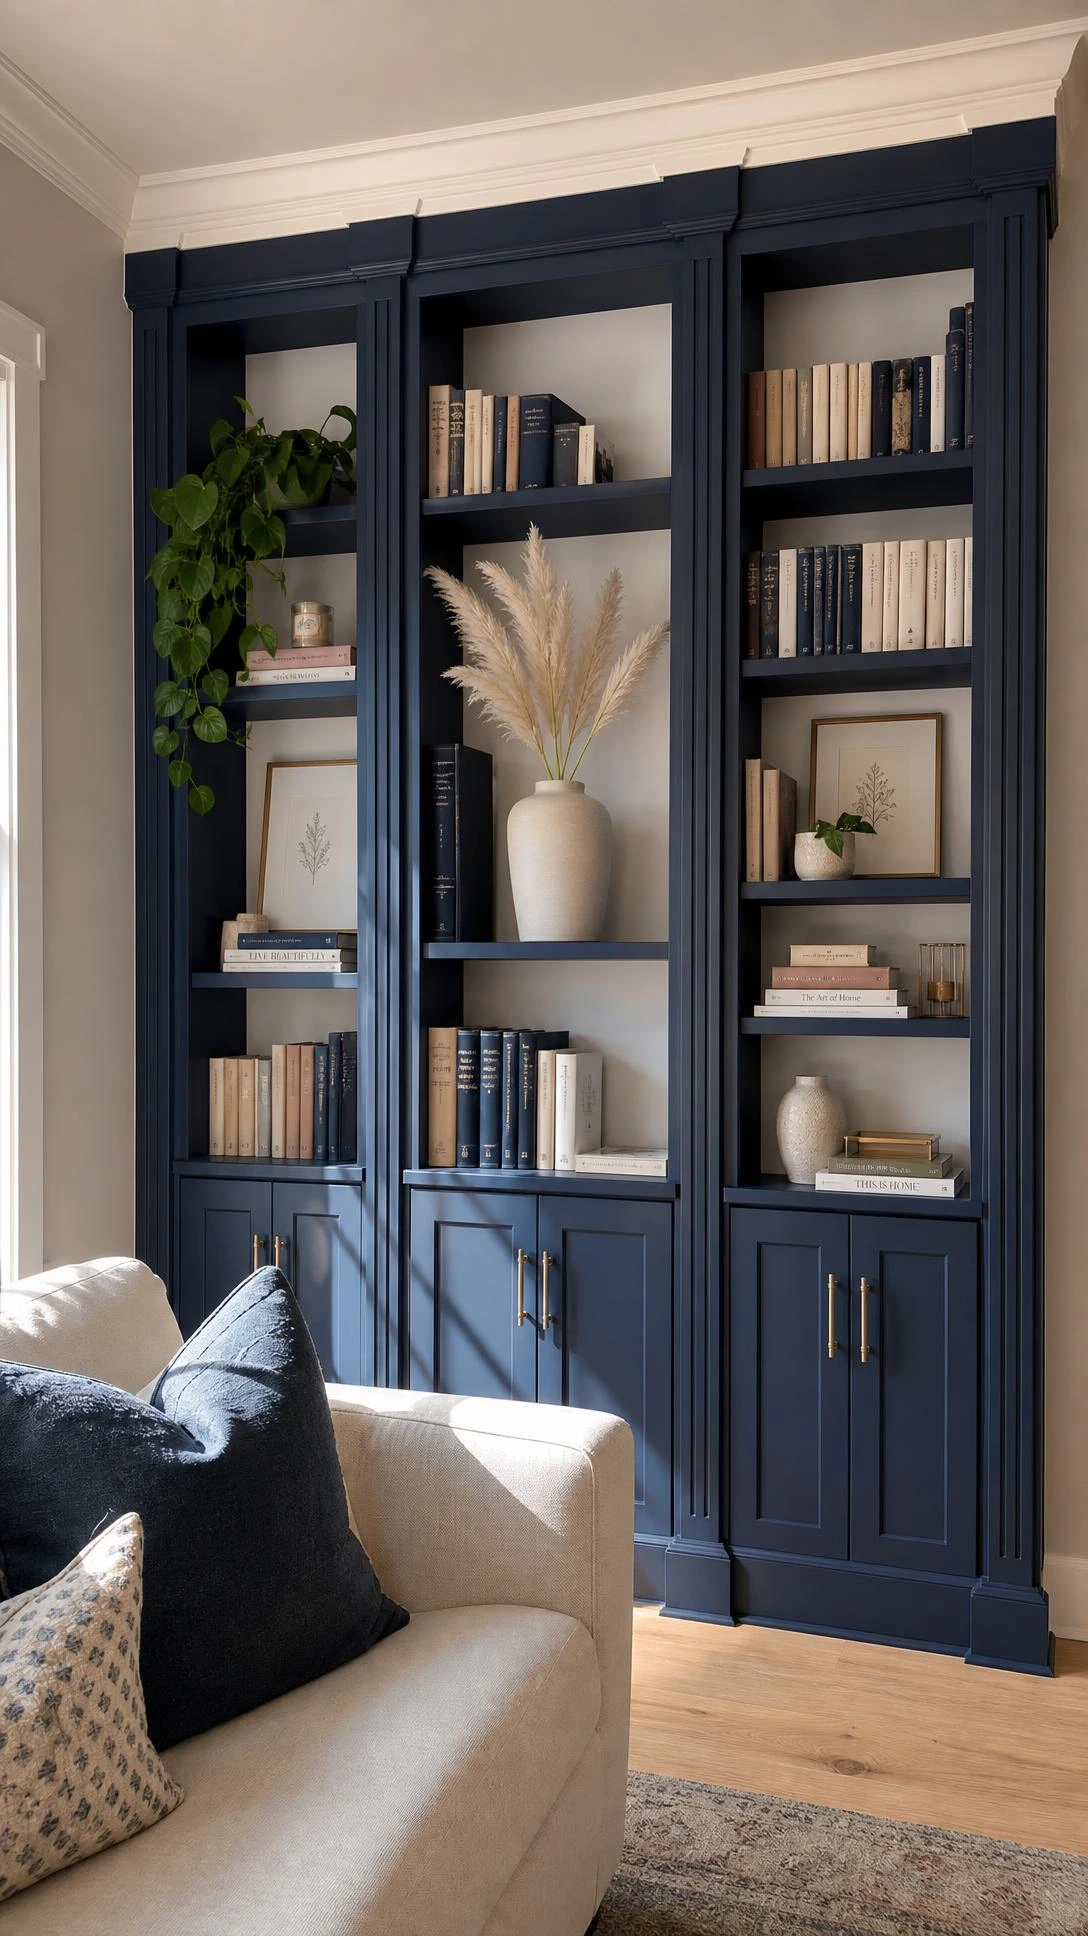
The BILLY bookcase is probably the most recognized piece of furniture IKEA has ever made, which is exactly why it is such a satisfying hack when it stops looking like one.
Adding crown molding along the top, base molding at the bottom, and thin trim along the sides gives it the weight and detail of proper built-in shelving.
The key is painting everything, the bookcase and the trim, in the same color so it reads as one seamless unit instead of a piece of furniture with molding glued onto it.
A soft white like Benjamin Moore Chantilly Lace or a moody deep green both work well and make the whole thing look intentional and architectural rather than assembled from a box.
This works best when two or three BILLY units are lined up side by side so the built-in effect is convincing from across the room.
Most people underestimate how much the crown molding does on its own, it is genuinely the thing that makes the bookcase look like it has always been part of the wall.
2- LACK Table Upgrade with Marble Contact Paper and New Legs
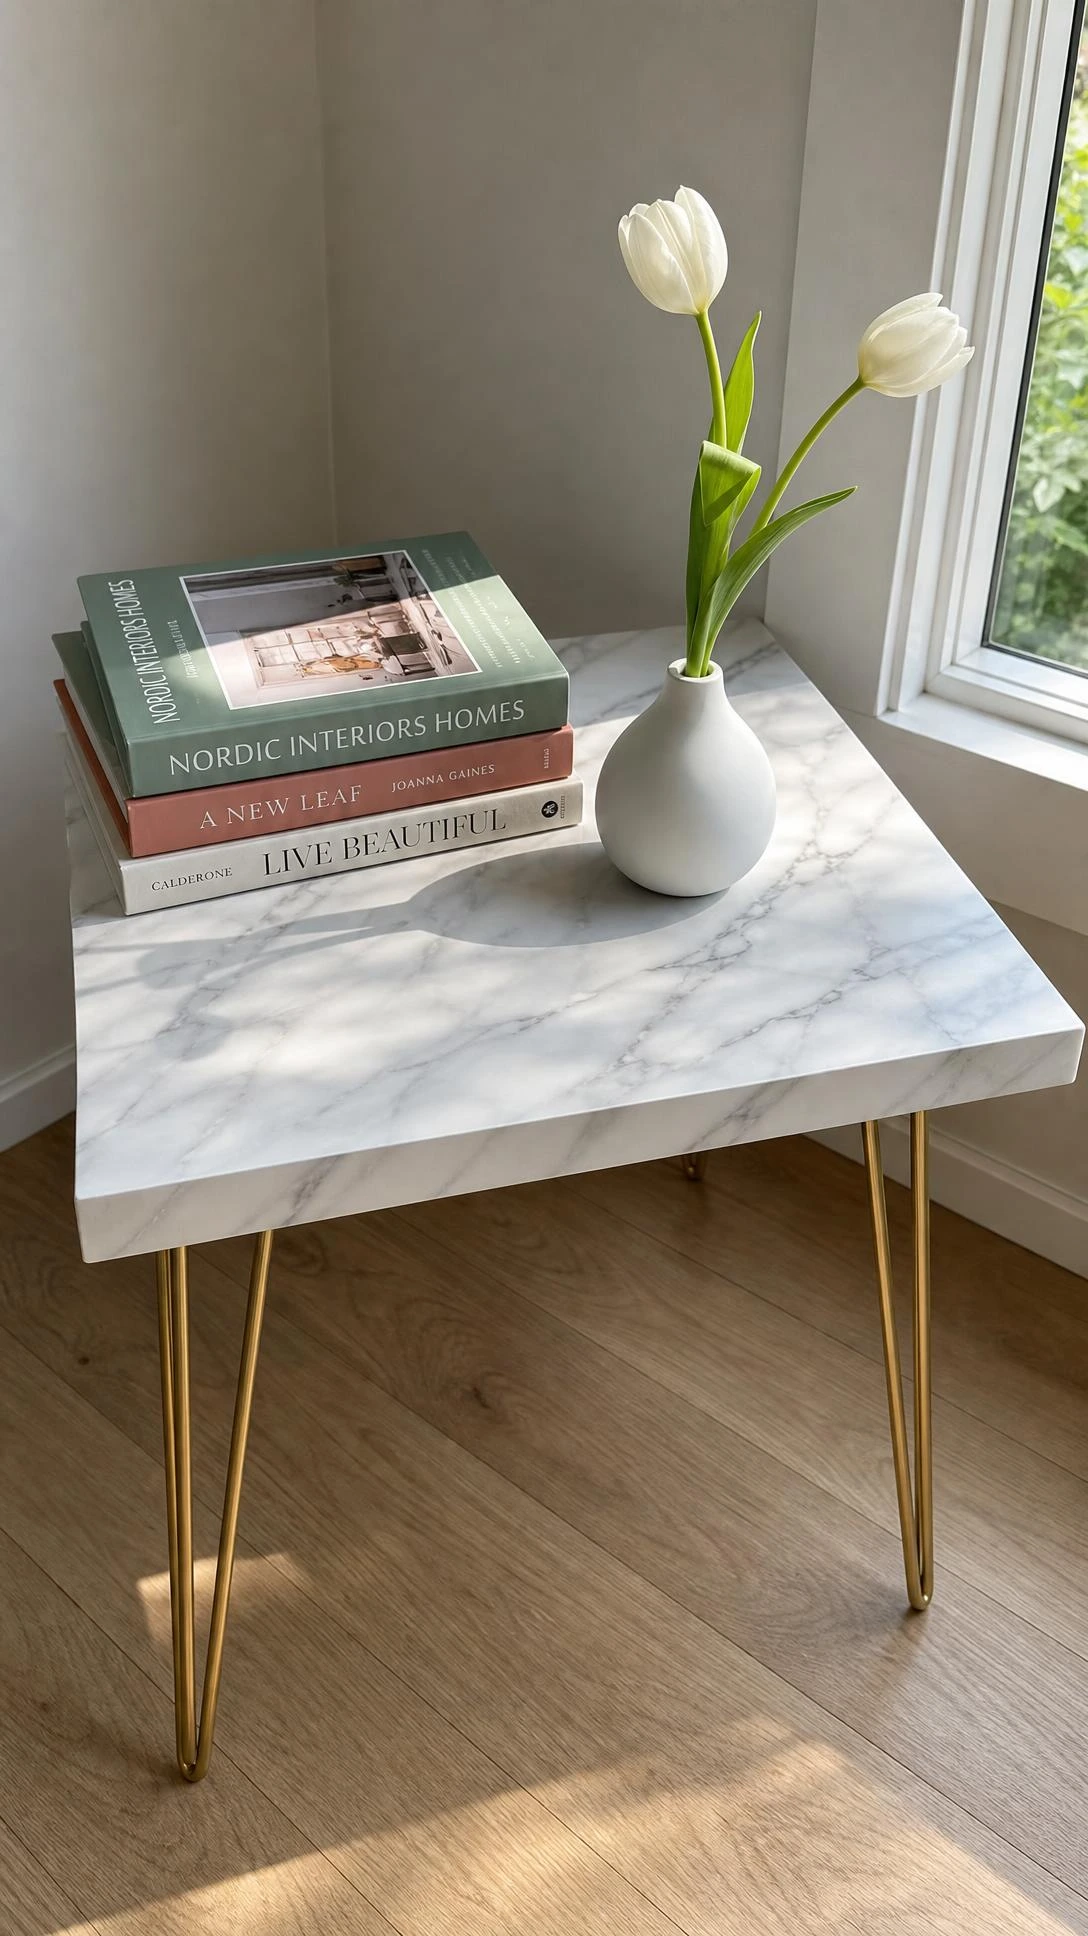
The LACK side table retails for around ten dollars, which is almost funny considering what it can look like after about an hour of work.
Wrapping the top surface in marble contact paper, the kind with realistic veining in white and gold, immediately pulls it out of the budget furniture category.
Swapping the original legs for hairpin legs or tapered brass legs is the second move, and that combination of marble top and metal legs reads as something from a boutique home store.
The contact paper takes patience around the corners but a craft knife and a slow hand get it looking clean with no visible seams.
This hack works in living rooms as a coffee table alternative and in bedrooms as a nightstand, and most people genuinely cannot tell what the base piece was.
3- TARVA Dresser with Wood Stain and Brass Hardware
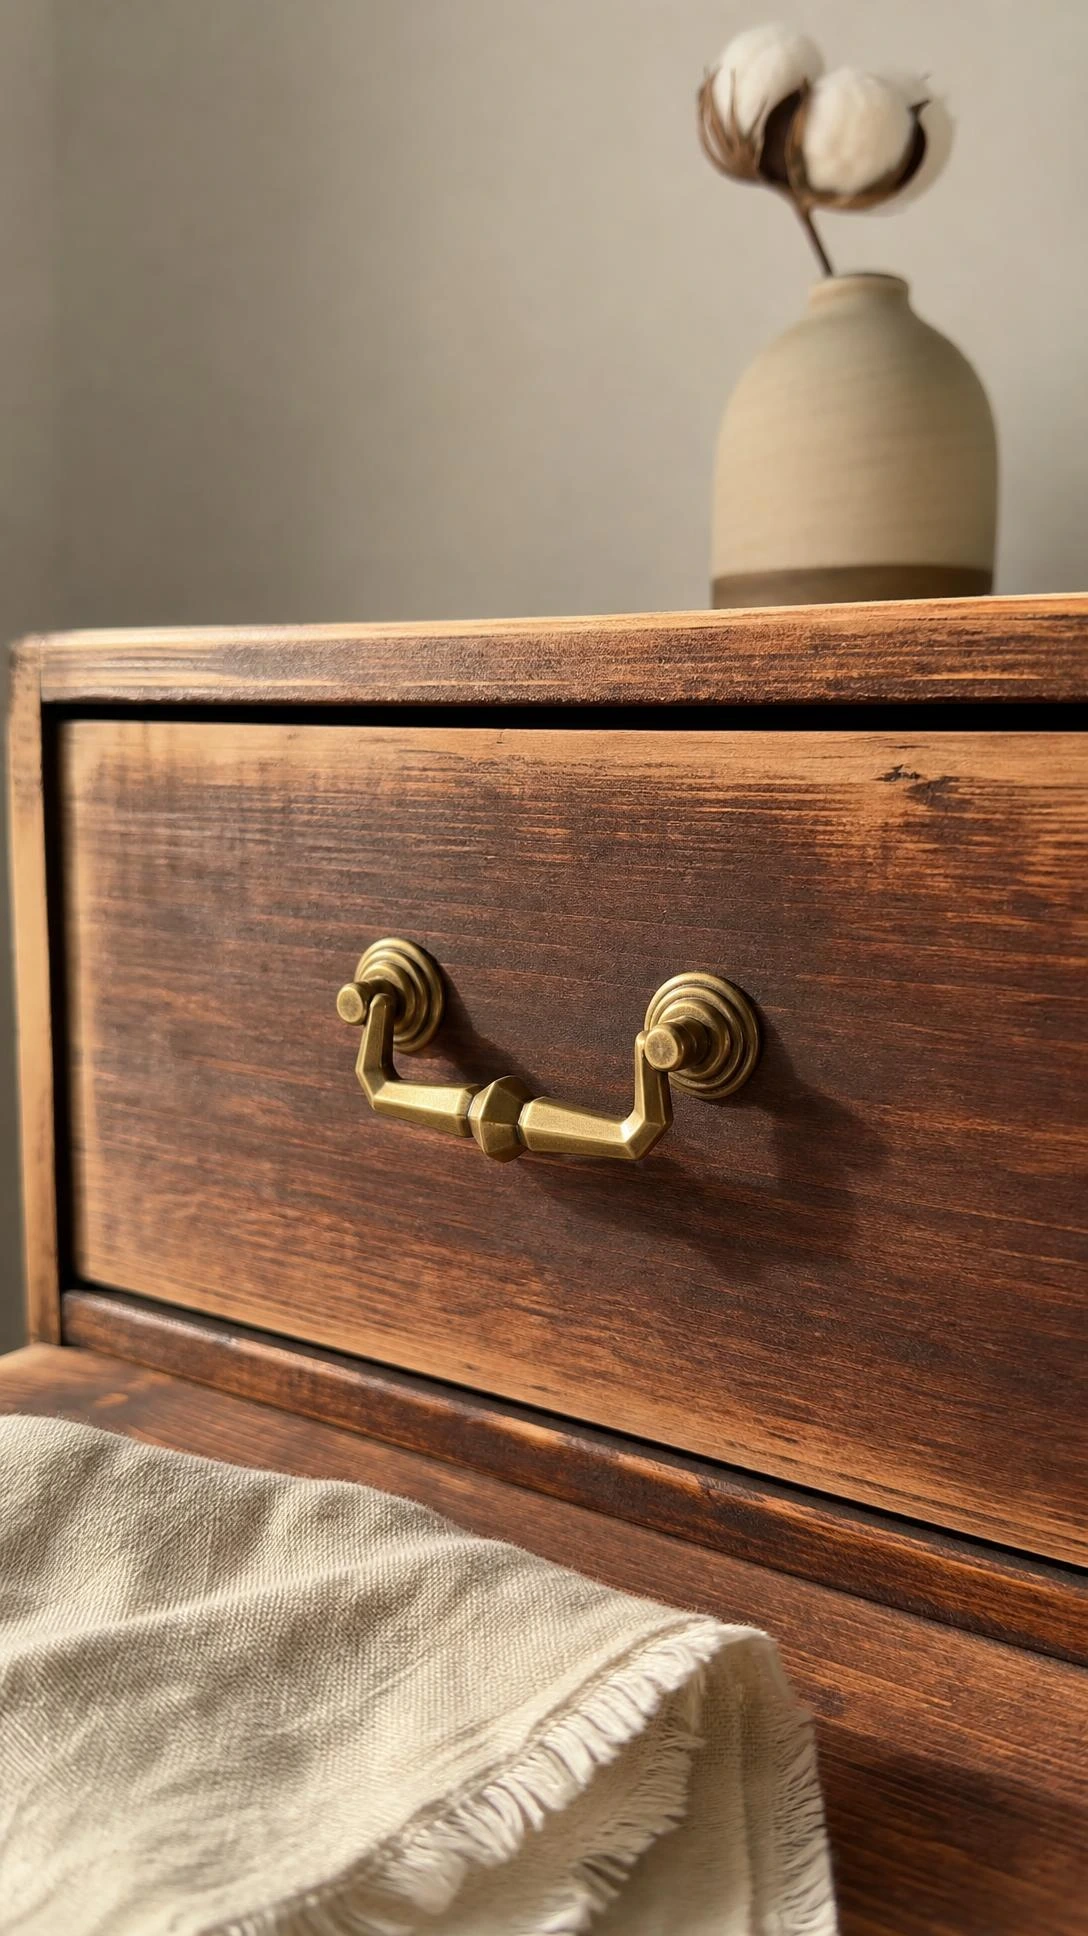
The TARVA dresser comes in raw pine, which some people see as a flaw and others immediately recognize as an opportunity.
Staining it in a warm walnut or medium oak tone gives it the kind of wood depth that normally comes on furniture that costs several hundred dollars more.
Replacing the basic hardware with solid brass drawer pulls, something in a curved or arch shape, pushes it completely into designer territory.
A light sanding before staining and one coat of clear matte sealer after is all the prep it needs, and the whole project takes one weekend.
Leather strap pulls are another option that works especially well if the dresser is going in a bedroom with natural textures like linen and rattan already in the mix.
4- IVAR Cabinet with Cane Webbing Door Inserts
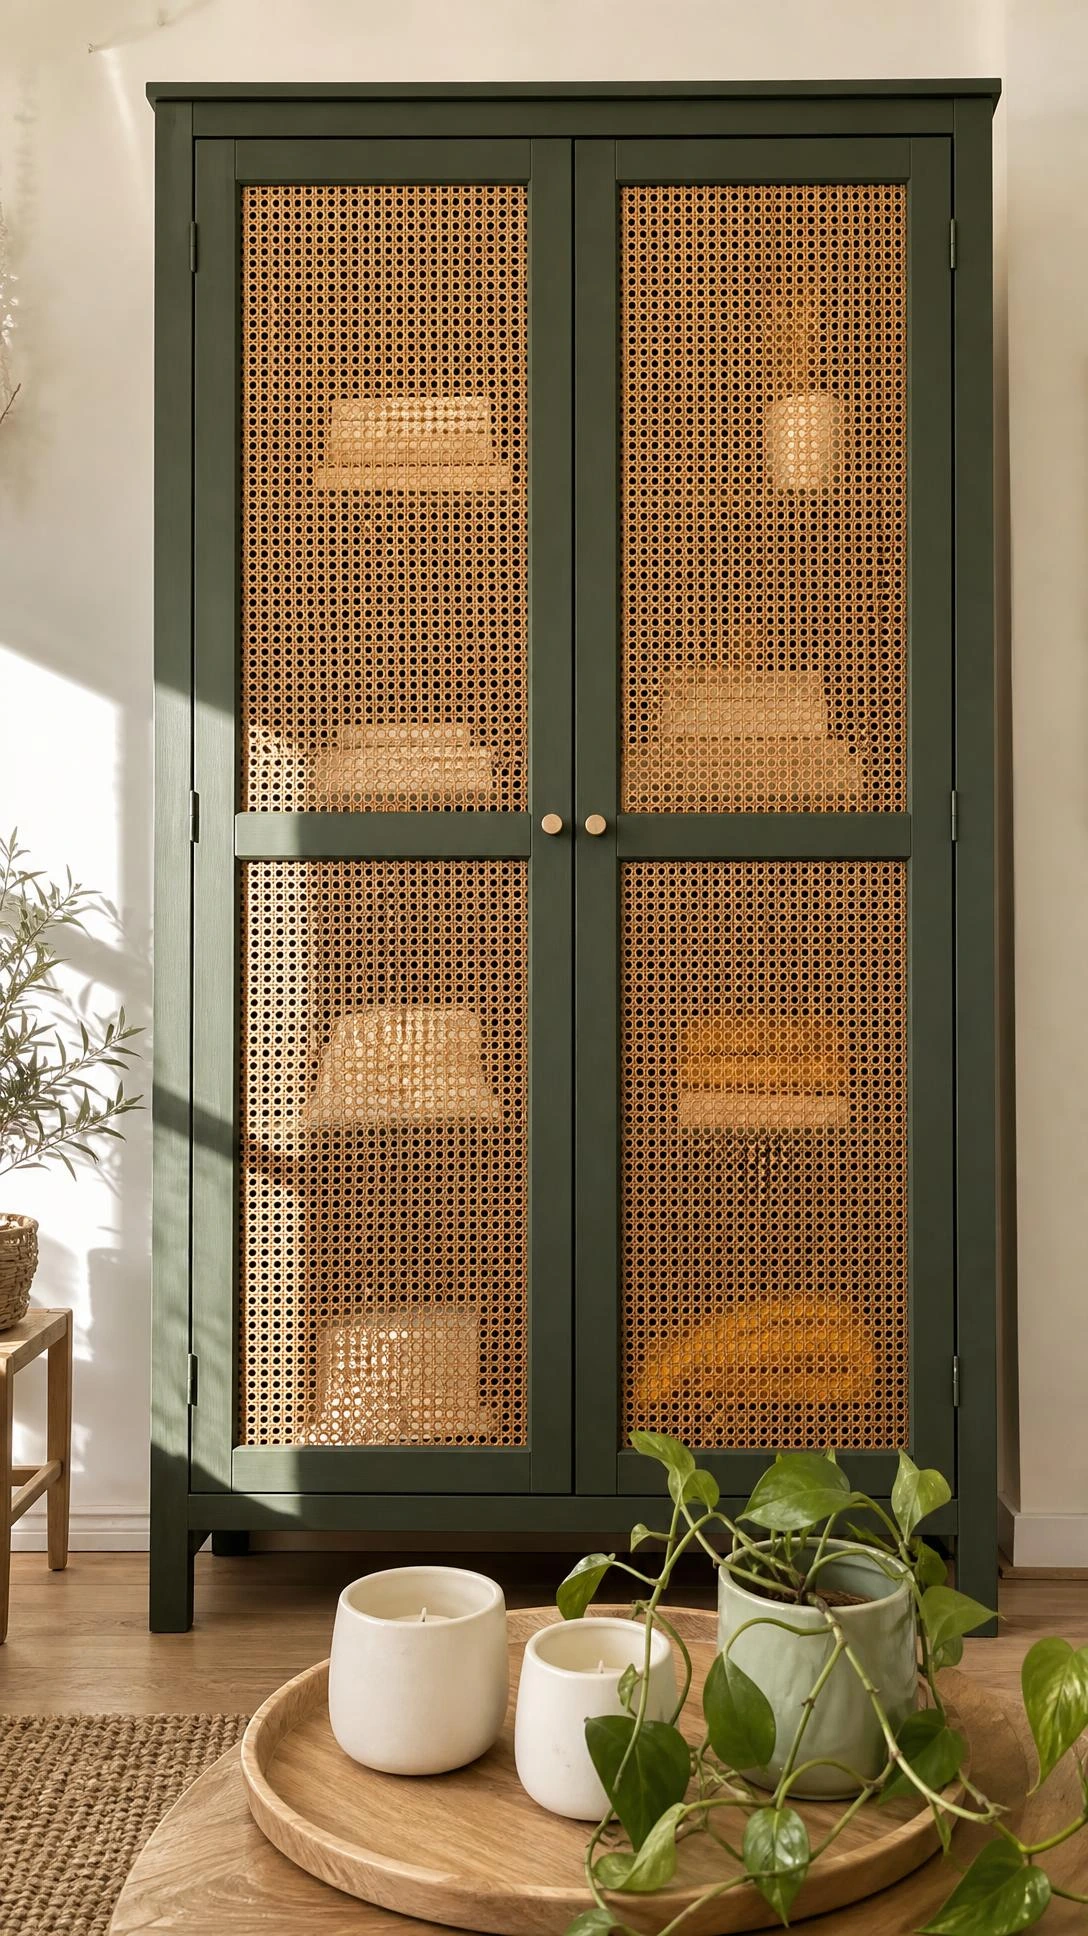
IVAR cabinets are plain by design, which is part of what makes them a useful starting point for something that looks much more considered.
Removing the solid wood panels from the doors and replacing them with cane webbing inserts is the move that completely changes the personality of the piece.
Painting the cabinet in a dusty sage green or terracotta and mounting it on the wall rather than leaving it on the floor adds another layer of intention to the whole look.
The cane webbing is available by the yard online and attaches with a staple gun along the interior edge of the door frame, which is less complicated than it sounds.
Once it is up on the wall with the cane doors and a fresh coat of paint, it looks like something from a boutique interiors shop rather than a flat-pack warehouse.
5- KALLAX Shelving Unit Turned Banquette Seating
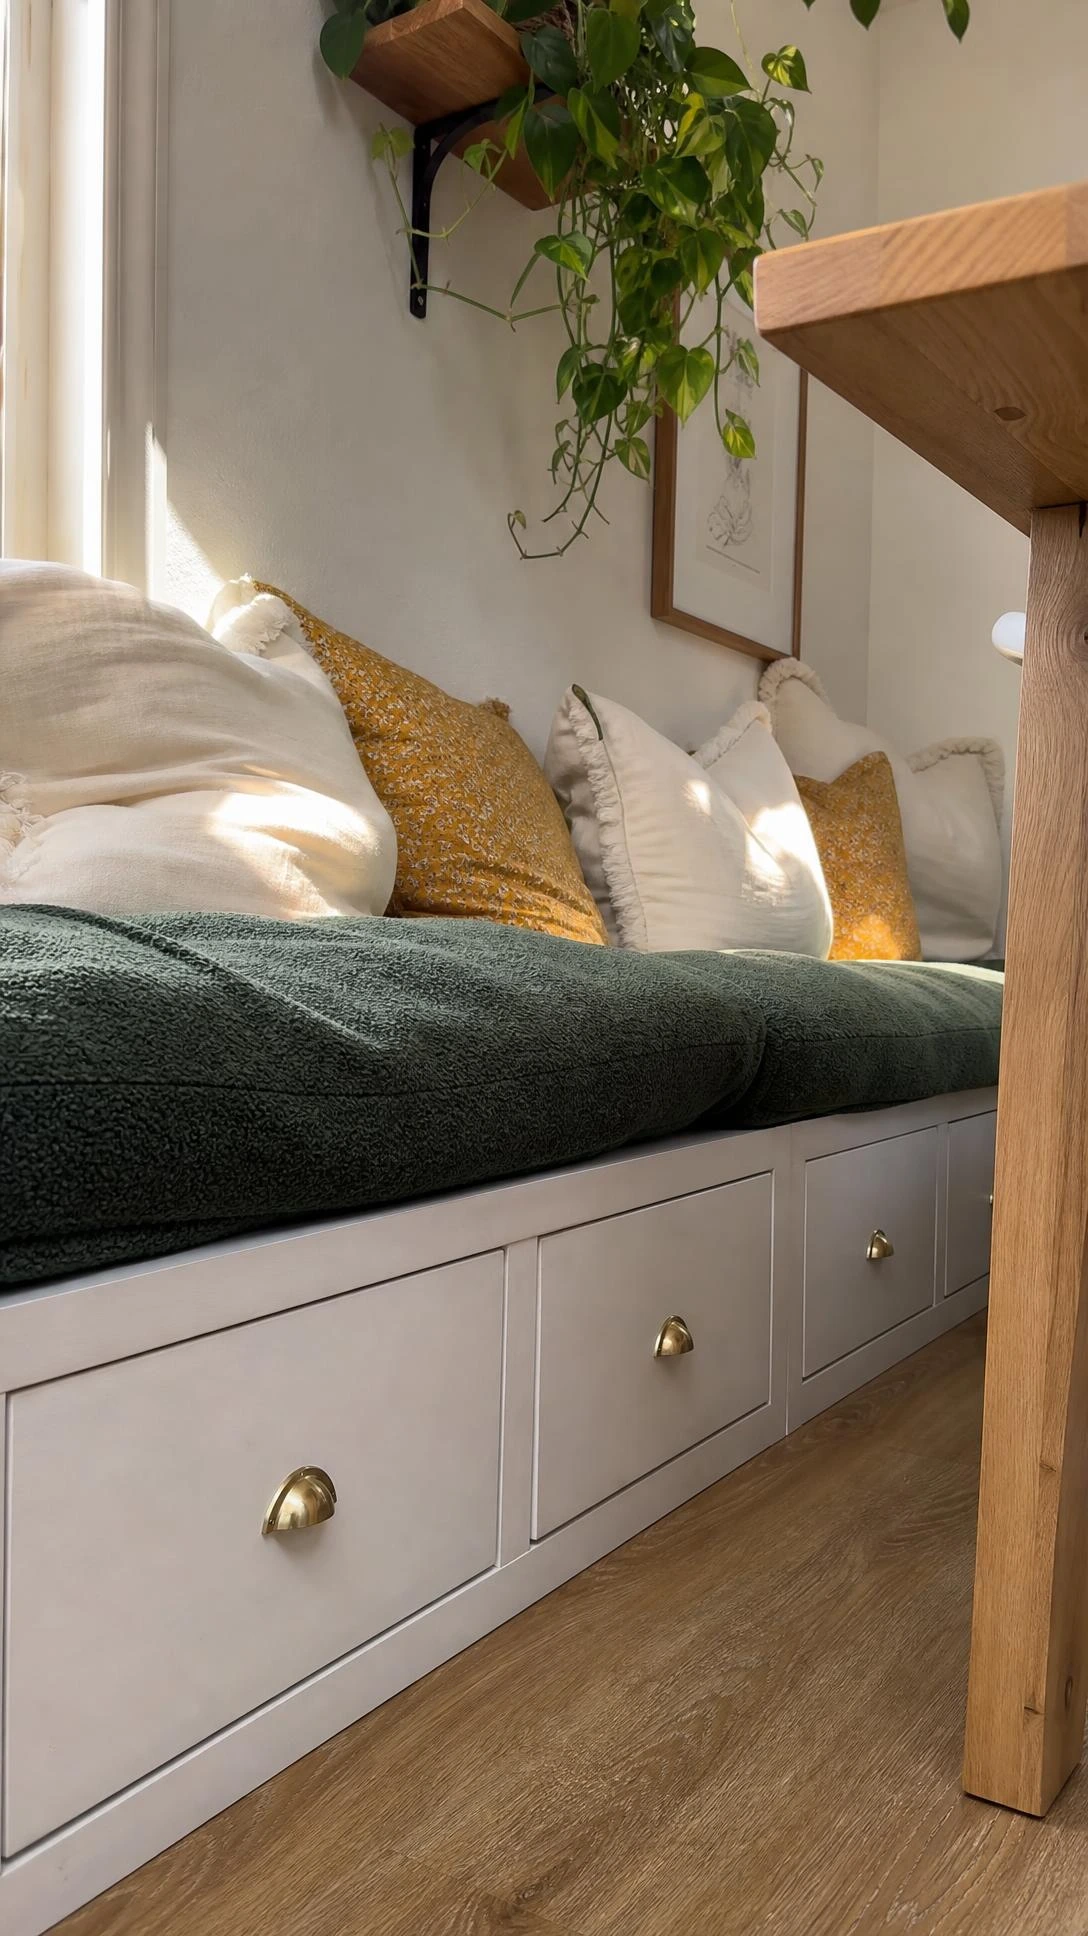
A KALLAX unit on its side with a cushion on top is one of those IKEA hacks that sounds almost too simple until people see it done well in a real space.
Positioning two units side by side under a window or along a dining room wall creates a bench with built-in storage, which is a genuinely useful thing to have in most homes.
A custom foam cushion cut to size and covered in a durable fabric like a textured boucle or a water-resistant linen blend makes it look finished and intentional.
Adding a simple shiplap or beadboard panel as a backrest behind the bench pulls the whole setup together and makes it look like it was built into the room.
The KALLAX cubbies underneath can hold baskets, books, or storage boxes, so none of the space is wasted, which is always a practical bonus.
6- RAST Nightstand with Molding and Vintage Hardware
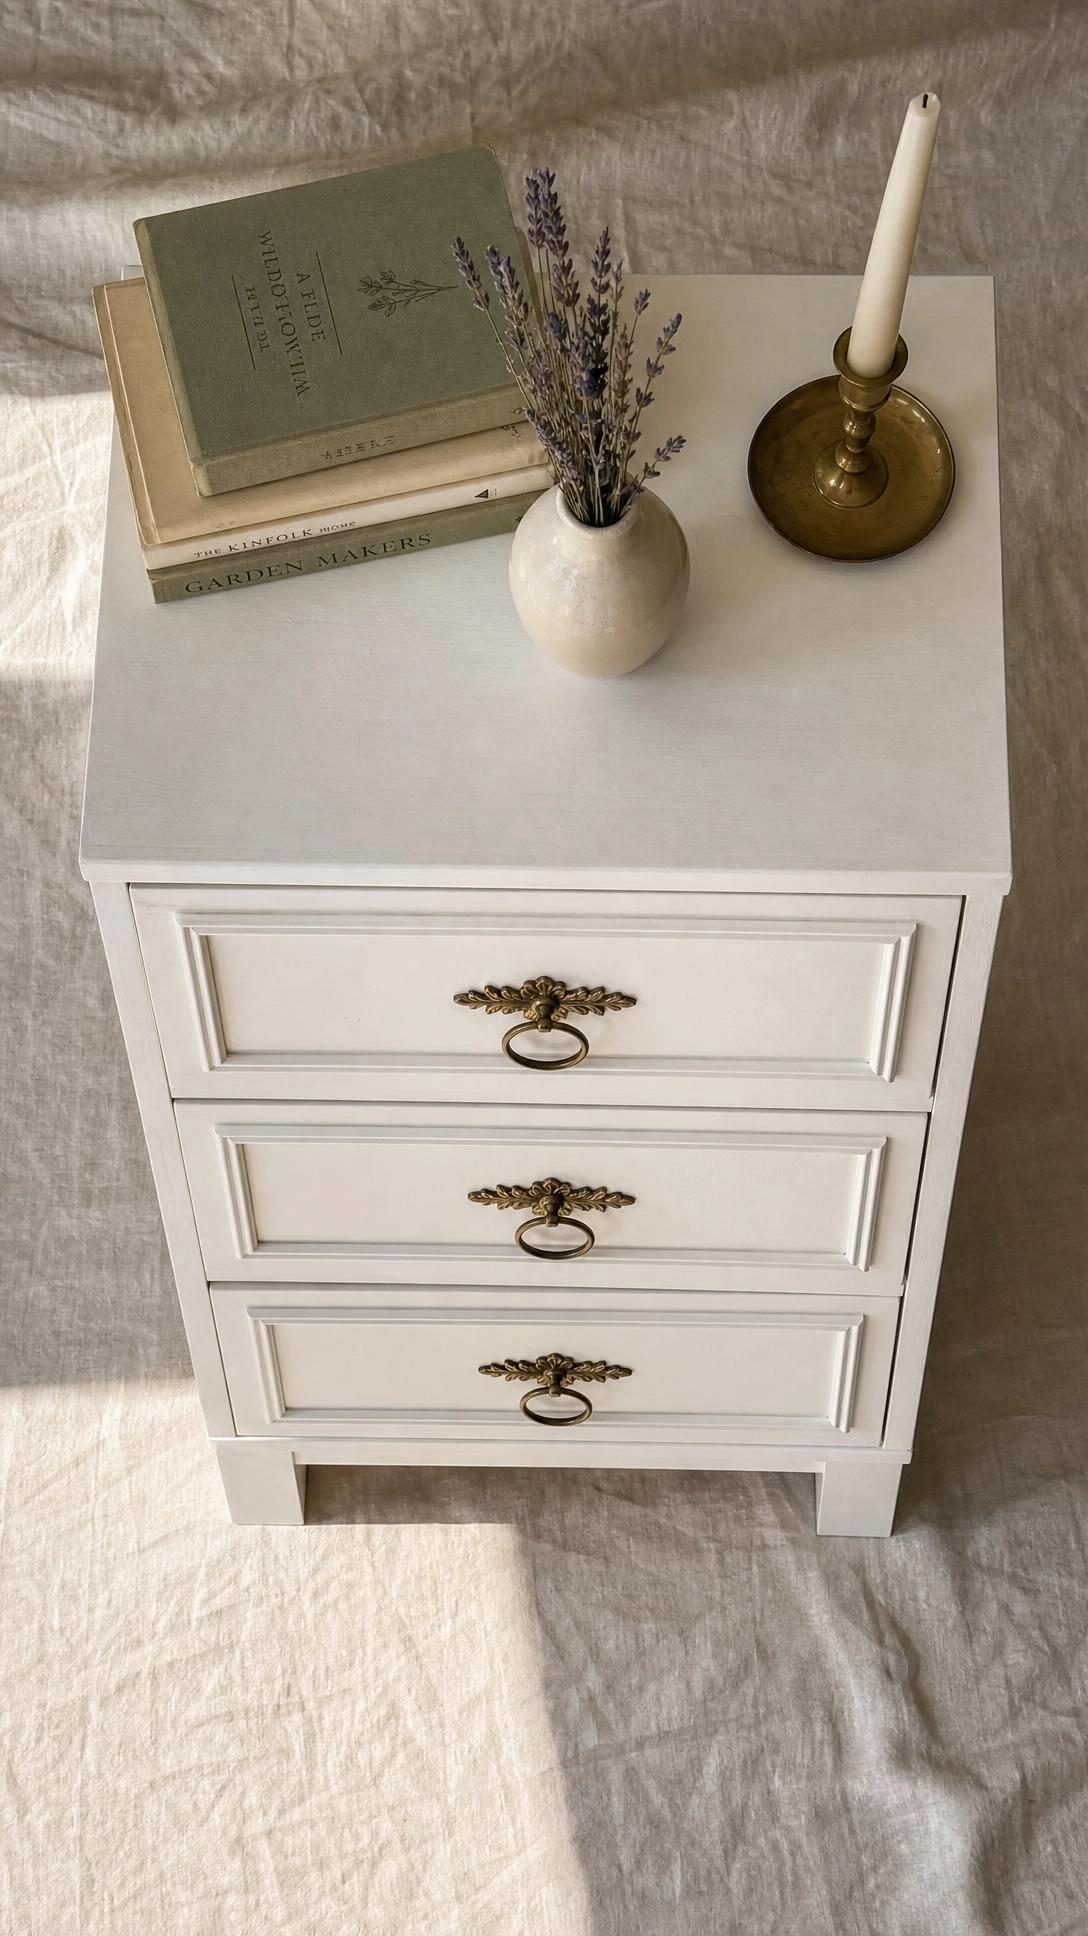
The RAST nightstand is one of the cheapest pieces in the IKEA range and also one of the most popular to hack, mostly because the shape is simple enough to work with anything.
Adding picture frame molding to each drawer face and the sides of the nightstand immediately gives it a furniture-maker quality that the original simply does not have.
Painting it in a deep color like charcoal, navy, or even a warm black and then finishing it with antique brass or ceramic knobs makes it look like something vintage rather than flat-pack.
The molding is easy to find at most hardware stores and attaches with wood glue and small finishing nails, with any gaps filled using paintable caulk before the color goes on.
I think this is one of the most satisfying hacks on this list because the before and after difference is genuinely hard to believe for something that costs under thirty dollars to start.
7- HEMNES Dresser Converted to Bathroom Vanity
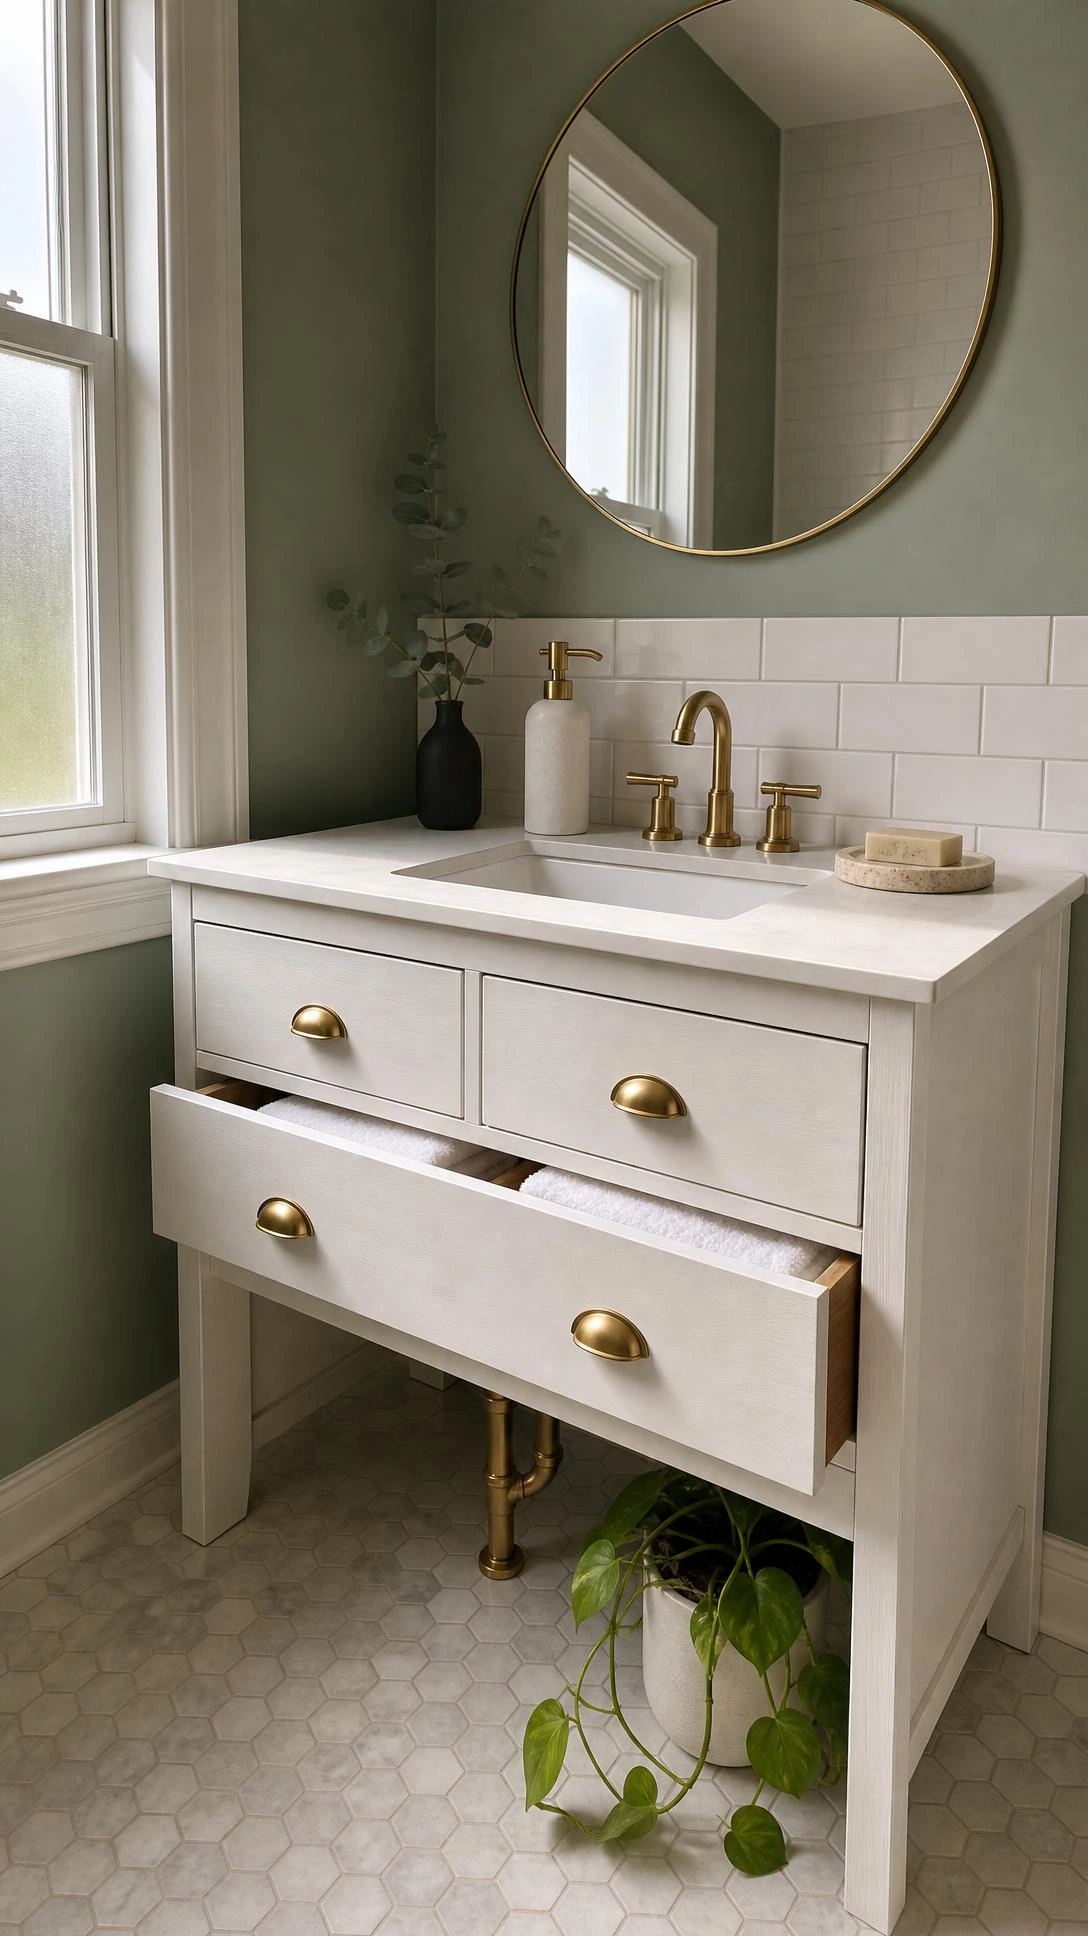
Converting a HEMNES dresser into a bathroom vanity is one of the more involved IKEA hacks home decor projects on this list, but the result looks like a proper custom bathroom piece.
The process involves removing the top drawers, cutting a hole in the surface to fit an undermount or drop-in sink, and sealing all the wood surfaces thoroughly to handle bathroom moisture.
A marine-grade polyurethane sealer works well for this and keeps the wood protected even in a humid bathroom environment over time.
Pairing a white ceramic sink with a matte black faucet and painting the dresser in a warm greige or deep slate creates a bathroom that looks like it had a professional renovation rather than a weekend project.
This works best in a bathroom with decent ventilation, and the sealing step is not optional, skipping it is the reason some versions of this hack do not hold up long term.
8- NORRAKER Table with a Two-Tone Finish
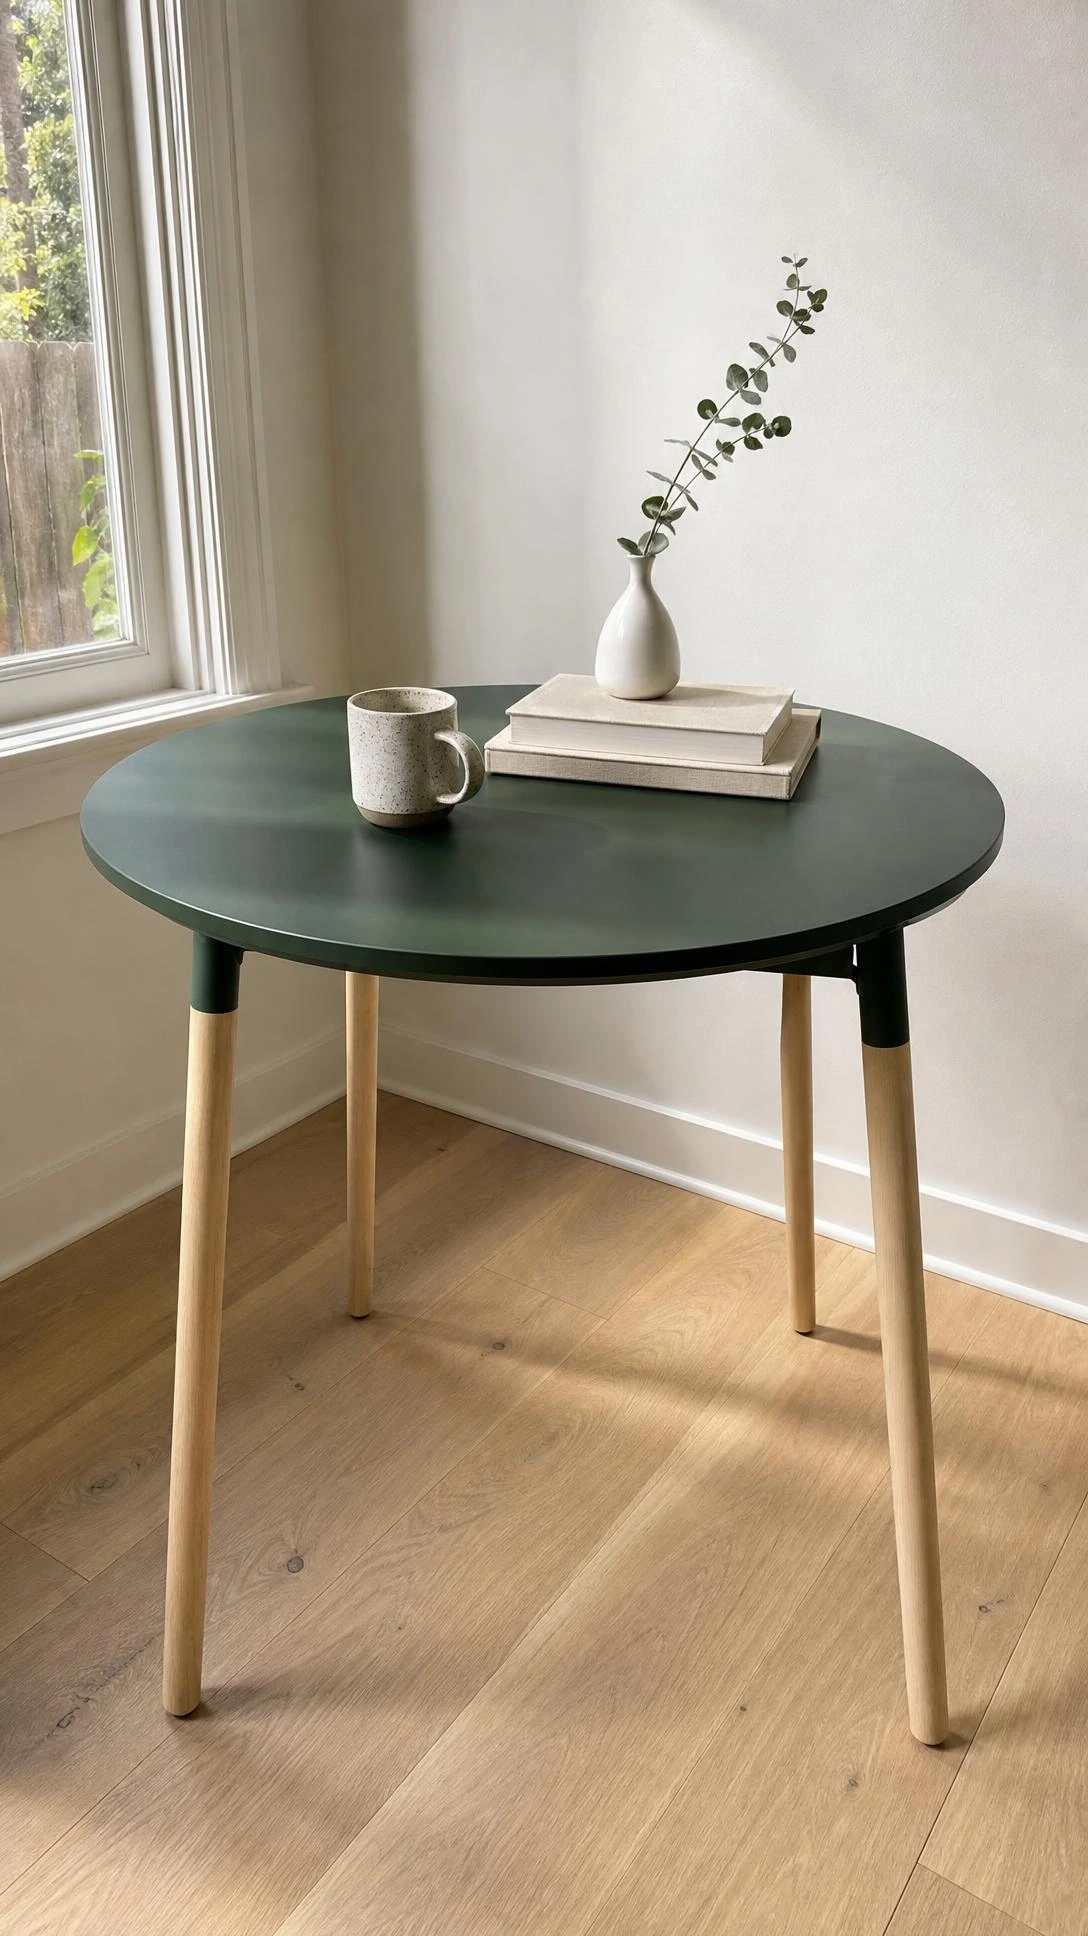
The NORRAKER table has a solid birch top and painted metal legs, which makes it a natural candidate for a two-tone treatment that looks much more deliberate than the original.
Staining the birch top in a dark espresso or deep walnut while painting the legs in matte black or an off-white creates that contrast that shows up all over interior design accounts right now.
The wood top takes stain easily after a light sand, and the metal legs clean up well with a spray paint designed for metal surfaces, which keeps the finish smooth and chip-resistant.
This works in dining rooms, home offices, or as a kitchen island alternative in smaller spaces, and the two-tone look makes it feel custom rather than catalog.
Most people do the legs first and let them dry fully before doing the top, which avoids any accidental overlap where the two finishes meet.
9- BEKVAM Spice Racks as Picture Ledge Bookshelves
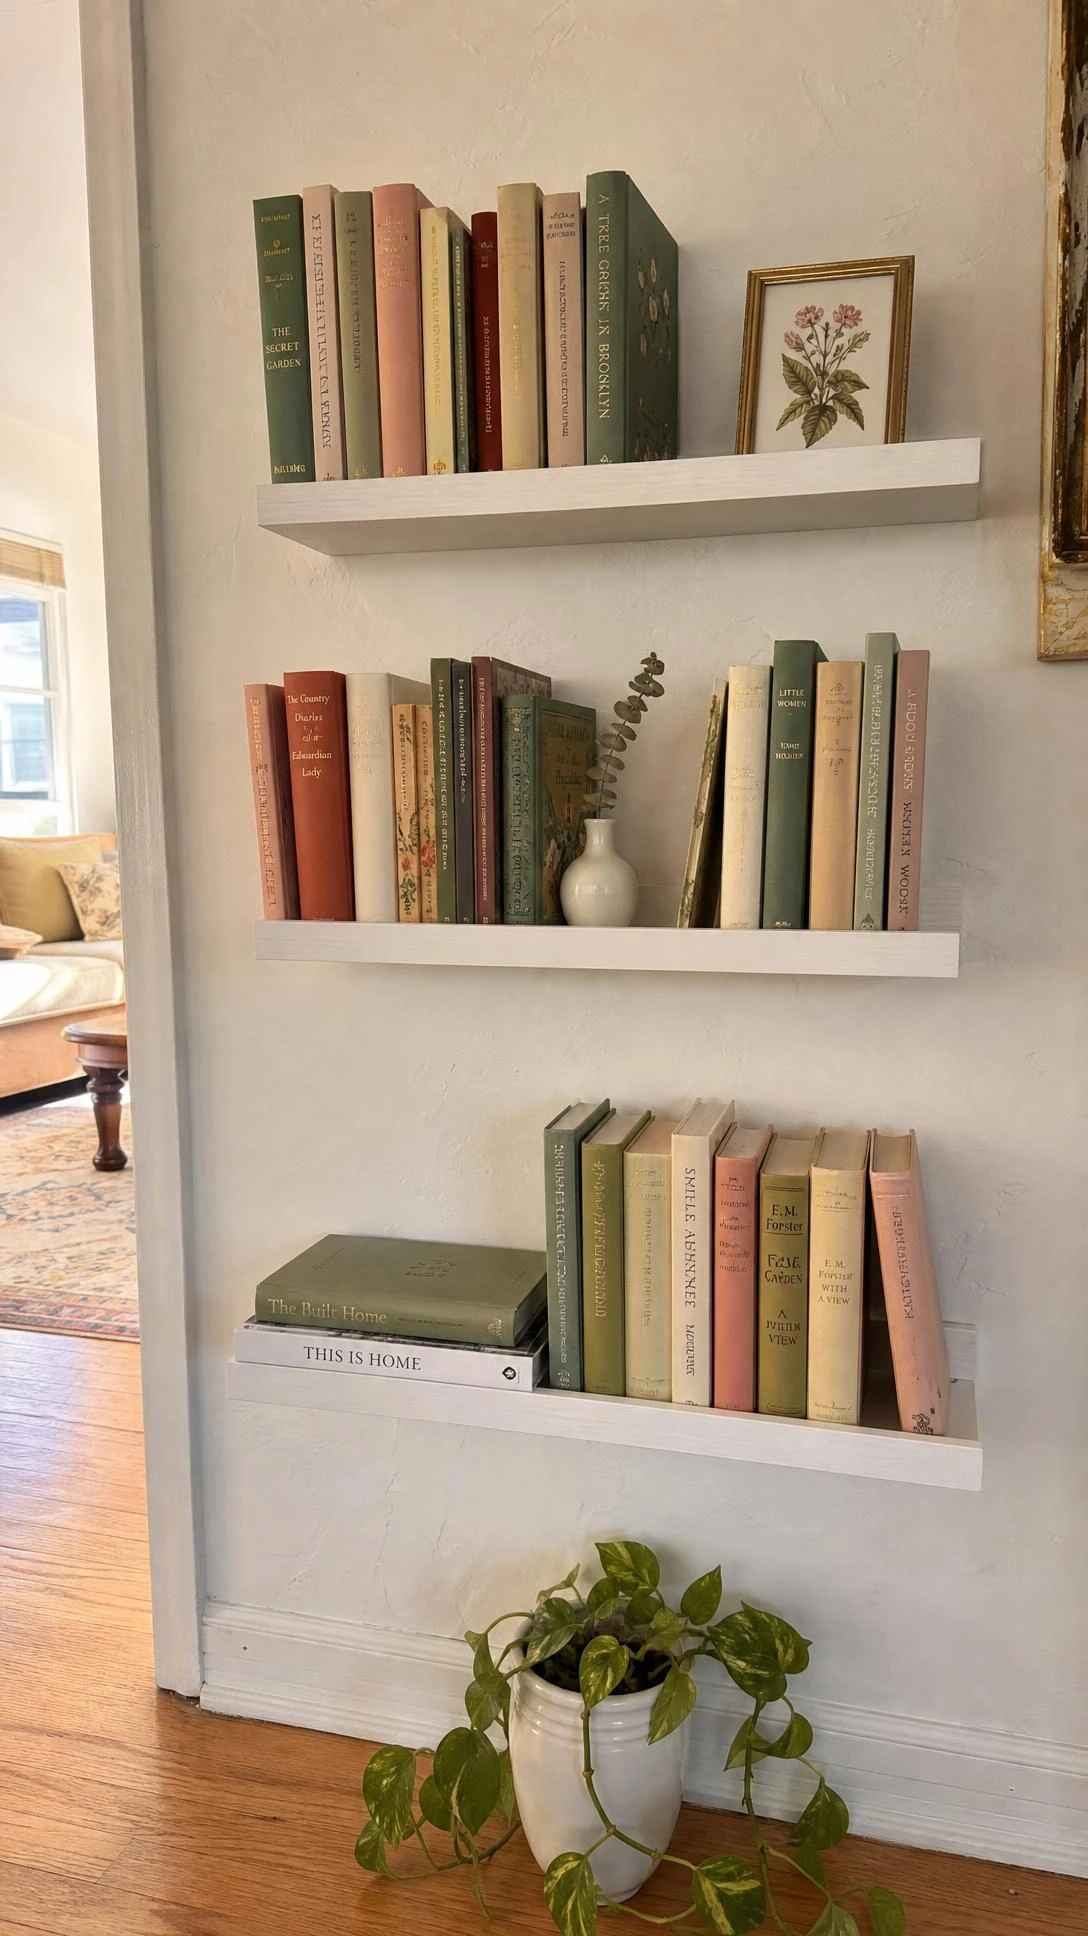
BEKVAM spice racks are tiny, inexpensive, and one of the most versatile pieces in the entire IKEA range once people stop thinking of them as kitchen items only.
Mounted horizontally on a wall and painted the same color as the wall behind them, they become almost invisible picture ledges that can hold small books, plants, or framed prints.
In a bathroom they work as minimalist shelves for small bottles, candles, or rolled hand towels, and because they sit flush to the wall they do not eat into already tight space.
Painting them in the exact same shade as the wall, something like a warm greige or a soft sage, is what makes them look designed-in rather than added on as an afterthought.
They cost around five dollars each, so stacking a few across one wall creates a full shelving display for under twenty dollars, which is hard to argue with.
10- RASKOG Utility Cart Turned Bar Cart
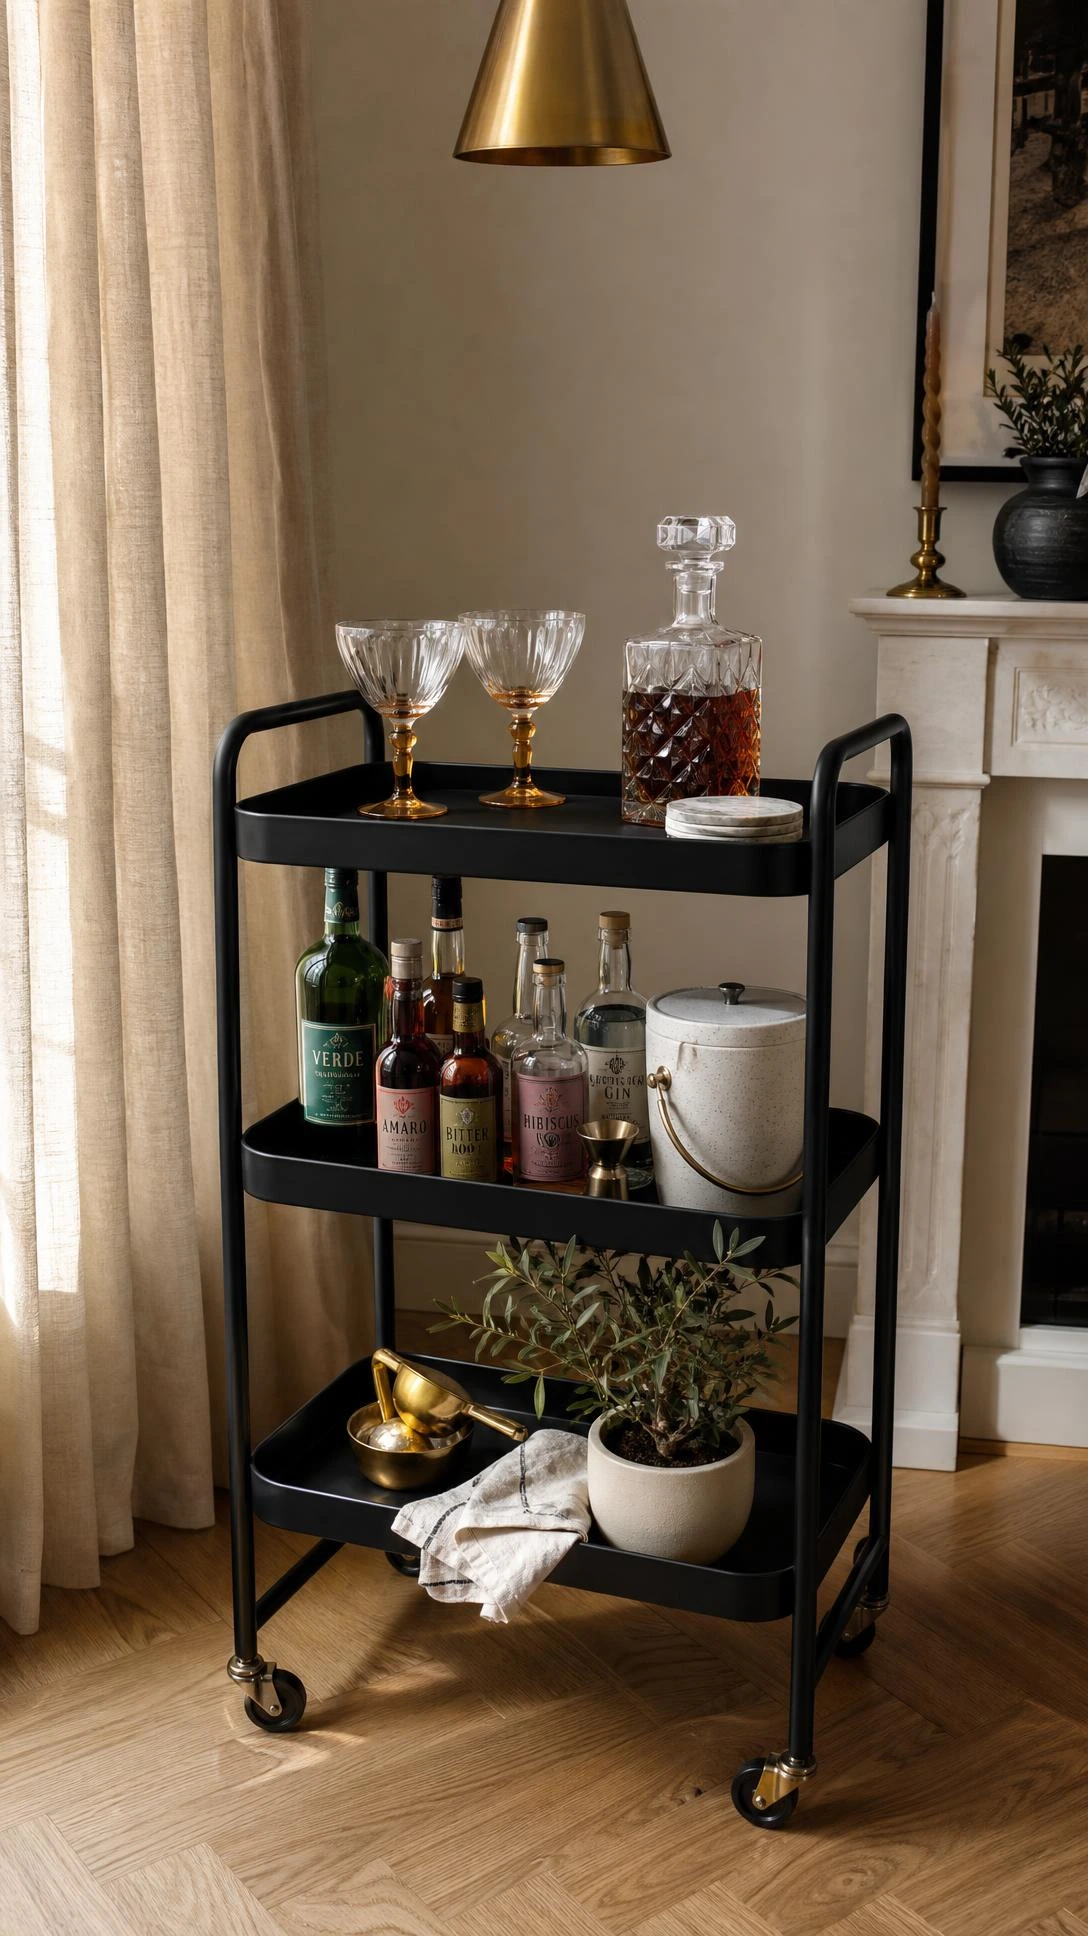
The RASKOG cart is one of those IKEA pieces that feels too casual for most rooms until someone spray paints it and suddenly it belongs everywhere.
A coat of glossy gold or warm brass spray paint, the Rust-Oleum metallic range has a good option, pulls it completely out of the utility-storage category.
Lining the wire shelves with small pieces of mirrored acrylic or a peel-and-stick marble paper adds a finished base for glassware, bottles, and a small ice bucket.
The three-tier layout works perfectly for a bar cart setup, top shelf for spirits and a cocktail shaker, middle for glasses, bottom for extras like napkins or a small tray.
I think the RASKOG hack surprises people the most out of anything on this list because the original is so utilitarian that most people never look at it and see something stylish waiting underneath the powder coat.
These Pieces Never Have to Look Like IKEA Again
None of these projects require a workshop or a background in furniture making, just a free afternoon and a willingness to try something on a piece that was already affordable enough to experiment with.
The common thread across all of them is that the details do the work, paint, hardware, trim, and texture are what close the gap between flat-pack and custom.
Starting with one piece is the most realistic approach, pick the one room where the furniture bothers you most and go from there.
A RAST nightstand with the right knobs and a fresh coat of paint is still a good place to start, and most people find the whole thing takes less time than they expected.

Hi, I’m Alizabeth, the creator of Pretty Home Hacks. I share practical home decor ideas, easy DIY projects, organization tips, and budget-friendly ways to make your home feel more beautiful and functional. From small room updates to everyday home hacks, my goal is to share approachable ideas you can actually use in your own space.