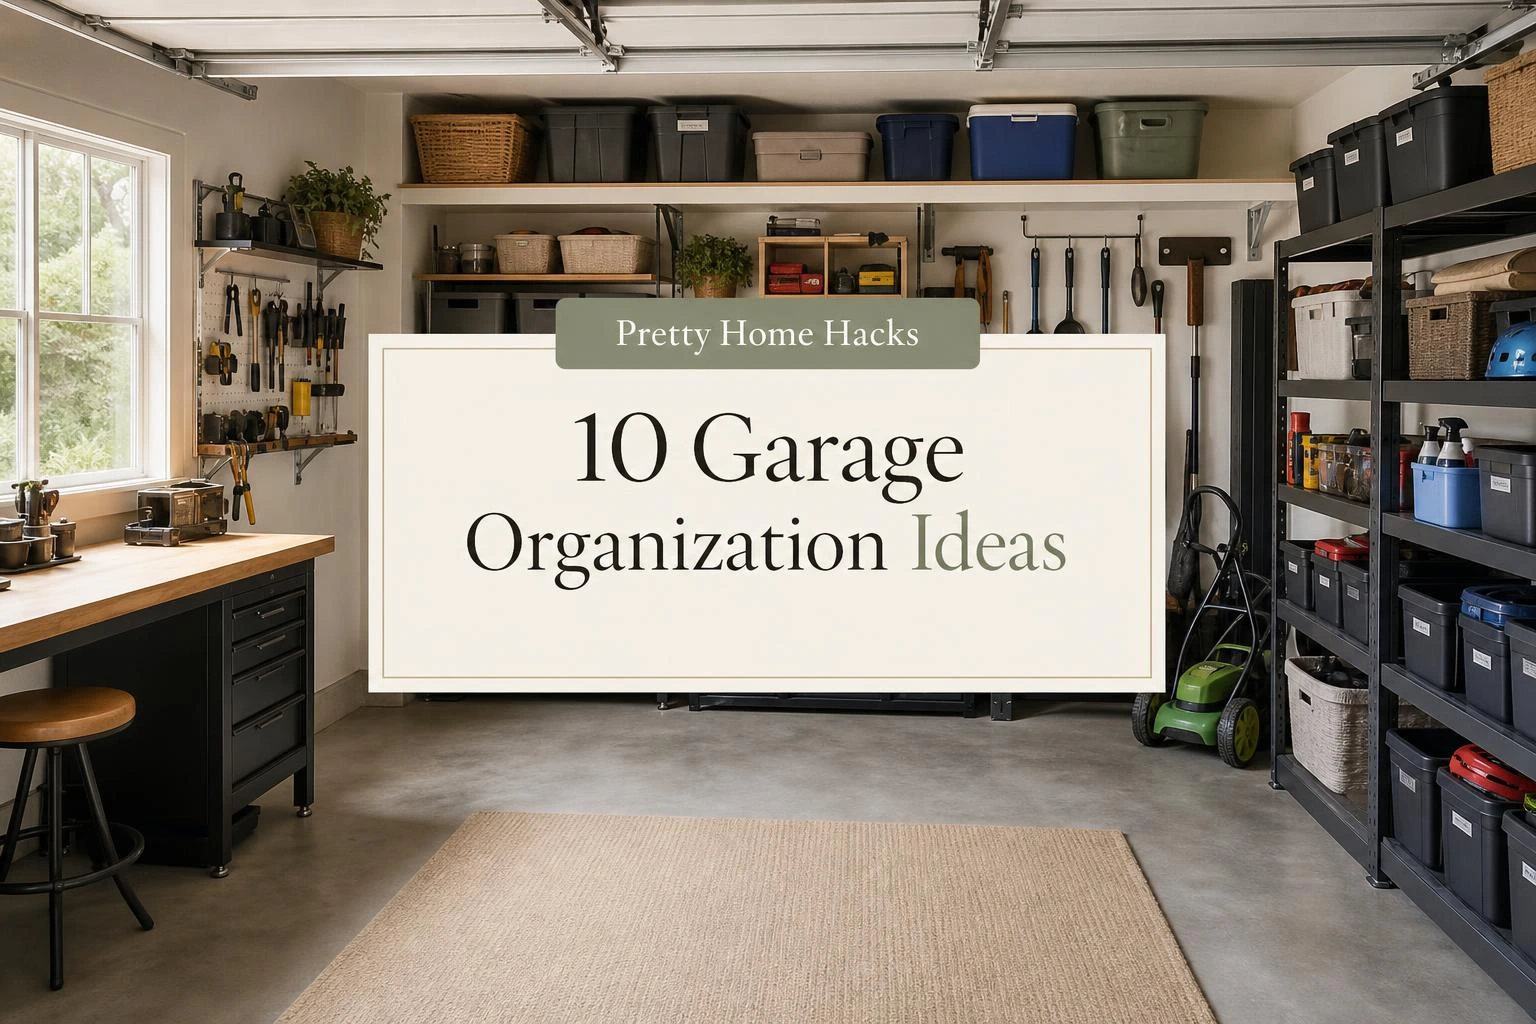
10 Garage Organization DIY Ideas Any Beginner Can Do
The garage is one of those spaces that slowly becomes the room nobody talks about.
Things get dropped in there with the best intentions and then somehow a fishing rod, three half-empty bags of potting soil, and a box labeled “misc” from 2019 are all just living on the floor together.
Most people assume getting a garage under control is a multi-weekend project that requires a truck, a dumpster, and some kind of organizational genius to pull off.
The truth is a lot of it comes down to a few smart moves that any beginner can pull off with basic tools, a free Saturday, and maybe a Sunday morning to finish up.
These ten garage organization DIY ideas are all doable without hiring anyone or buying expensive custom systems, and most of them cost under fifty dollars to get started.
1- Declutter Into Four Piles Before Touching Anything Else
Nobody wants to hear this one first, but it really does have to come first.
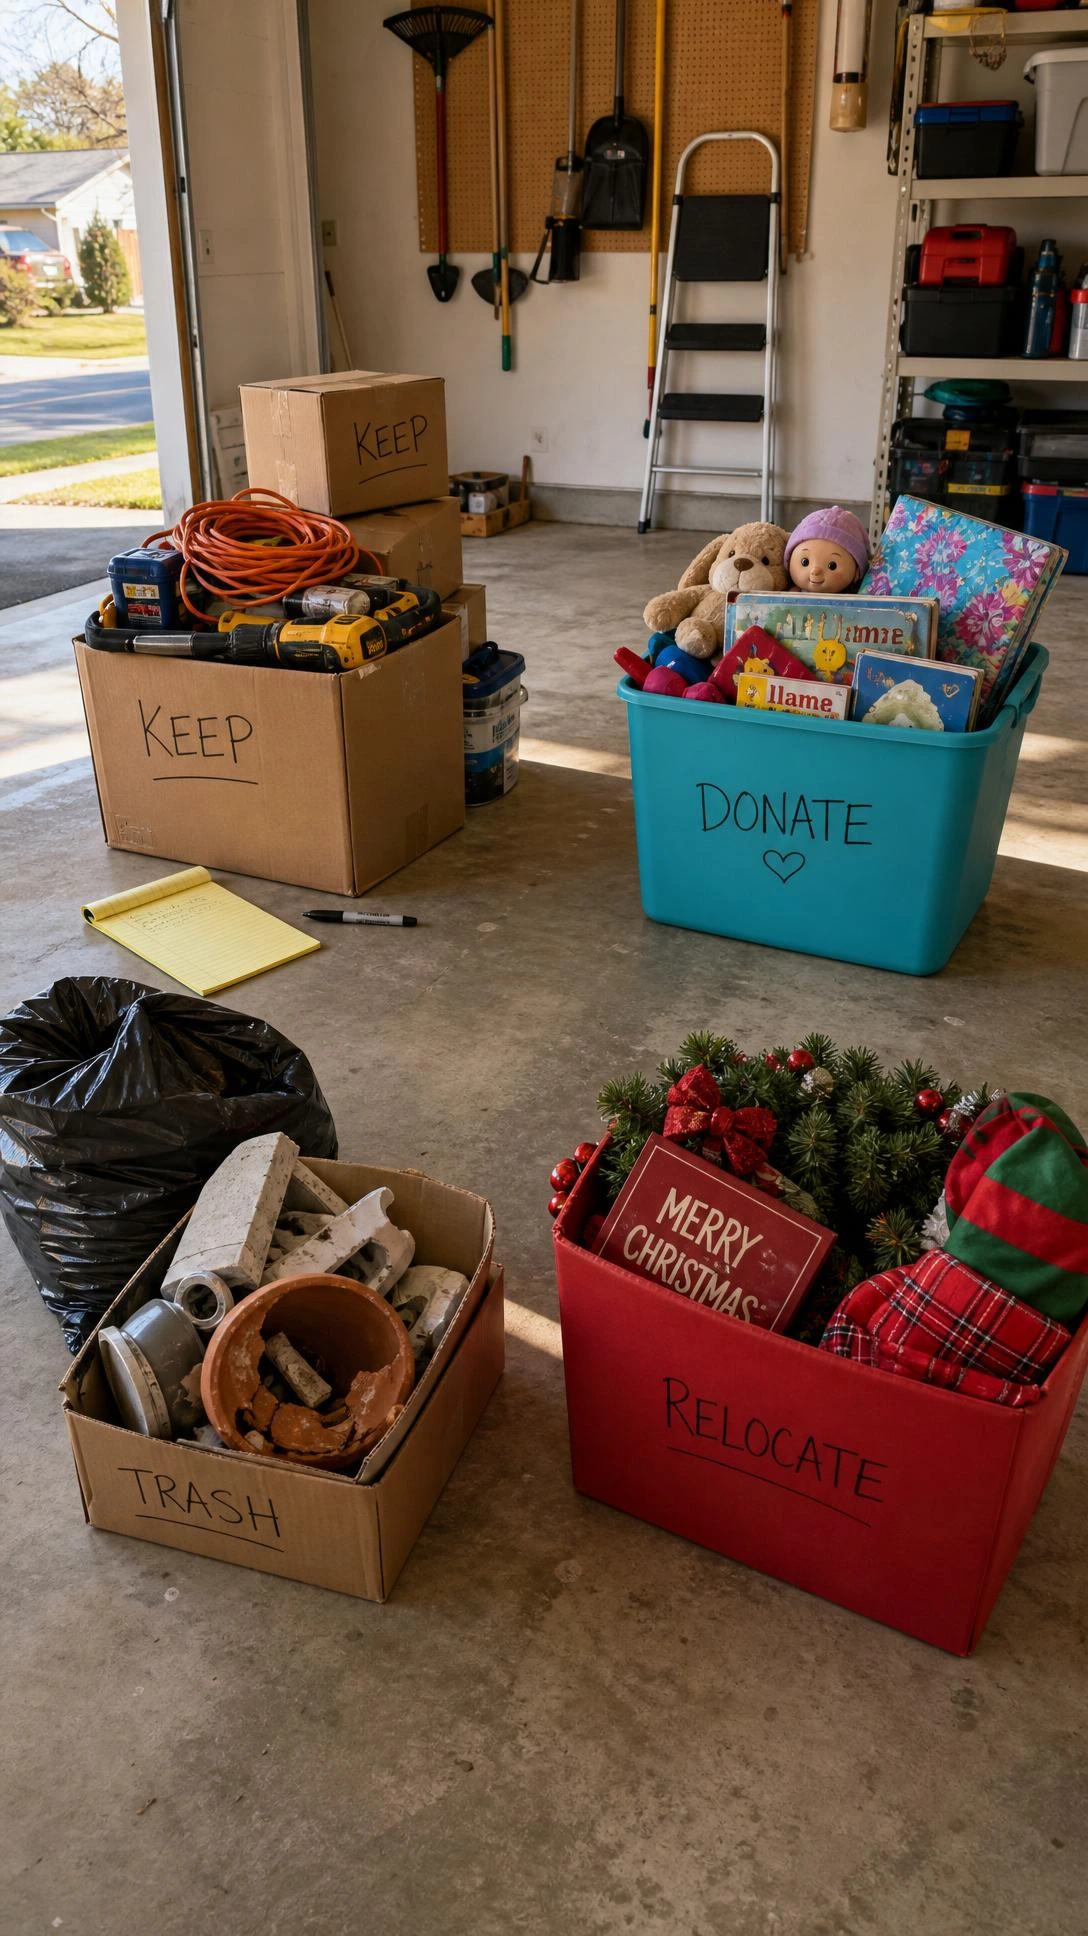
The four piles are keep, donate, sell, and trash, and the rule is that everything in the garage has to land in one of them before a single shelf goes up.
Skipping this step is exactly why a lot of garage organization attempts fail, because people end up organizing clutter instead of clearing it.
A folding table set up in the driveway makes sorting so much easier since there is actual room to spread things out and make decisions without tripping over stuff.
Most people are genuinely surprised how much floor space opens up just from removing things that were being kept out of habit rather than actual need.
Once the clutter is gone, the rest of these garage organization DIY ideas will actually make sense in the space.
2- Pegboard Wall for Tools
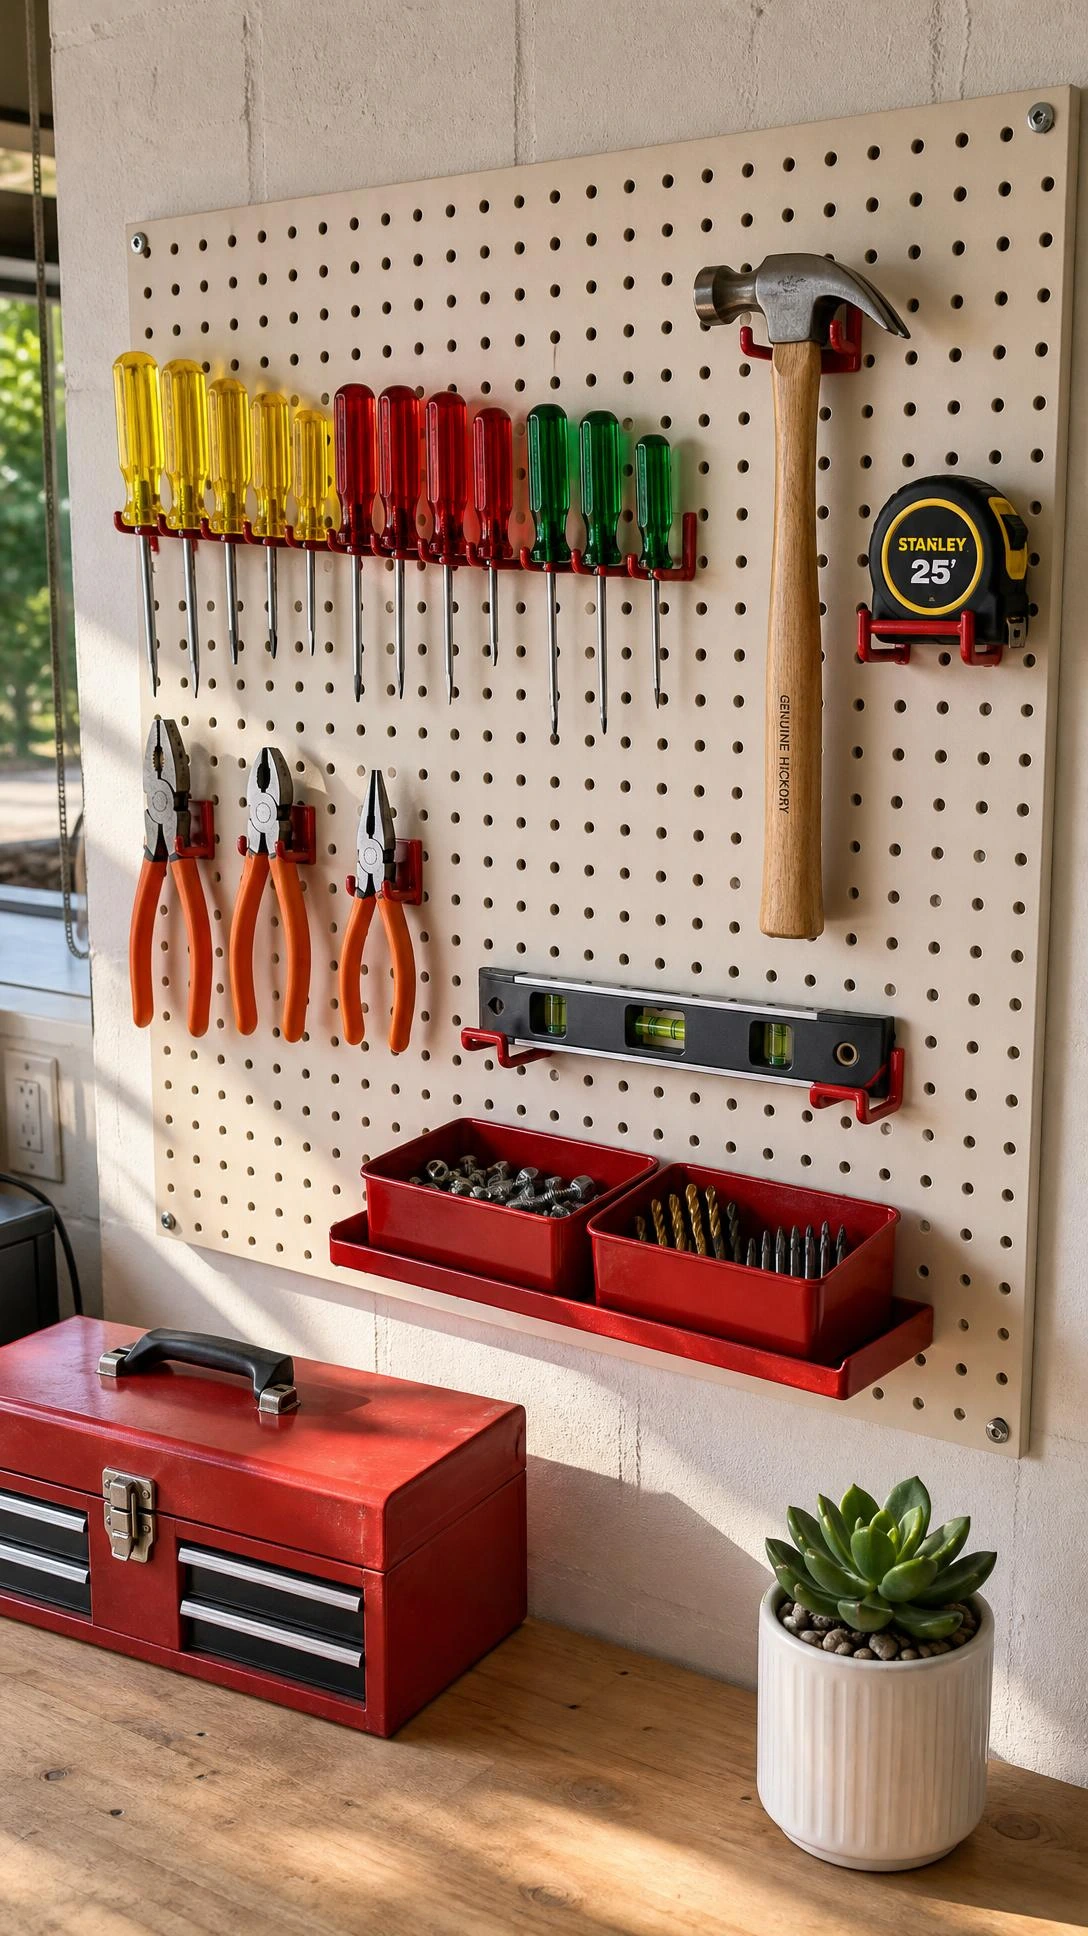
A pegboard wall is one of the most satisfying things to install in a garage because the before and after is almost instant.
A standard four by eight foot pegboard panel from a hardware store runs around twenty to thirty dollars and can be painted any color before mounting, which makes the garage feel way less like a storage unit and more like a real workspace.
The key is mounting it with about an inch of clearance behind it so the hooks actually fit, which means using furring strips between the pegboard and the wall studs.
Power tools, extension cords, wire bins, and even a small step stool can all hang from it once it is up.
I think the painted pegboard idea is underrated because most people go straight for the raw wood look when a coat of black or forest green paint makes the whole garage feel more intentional.
3- Overhead Ceiling Storage for Seasonal Bins
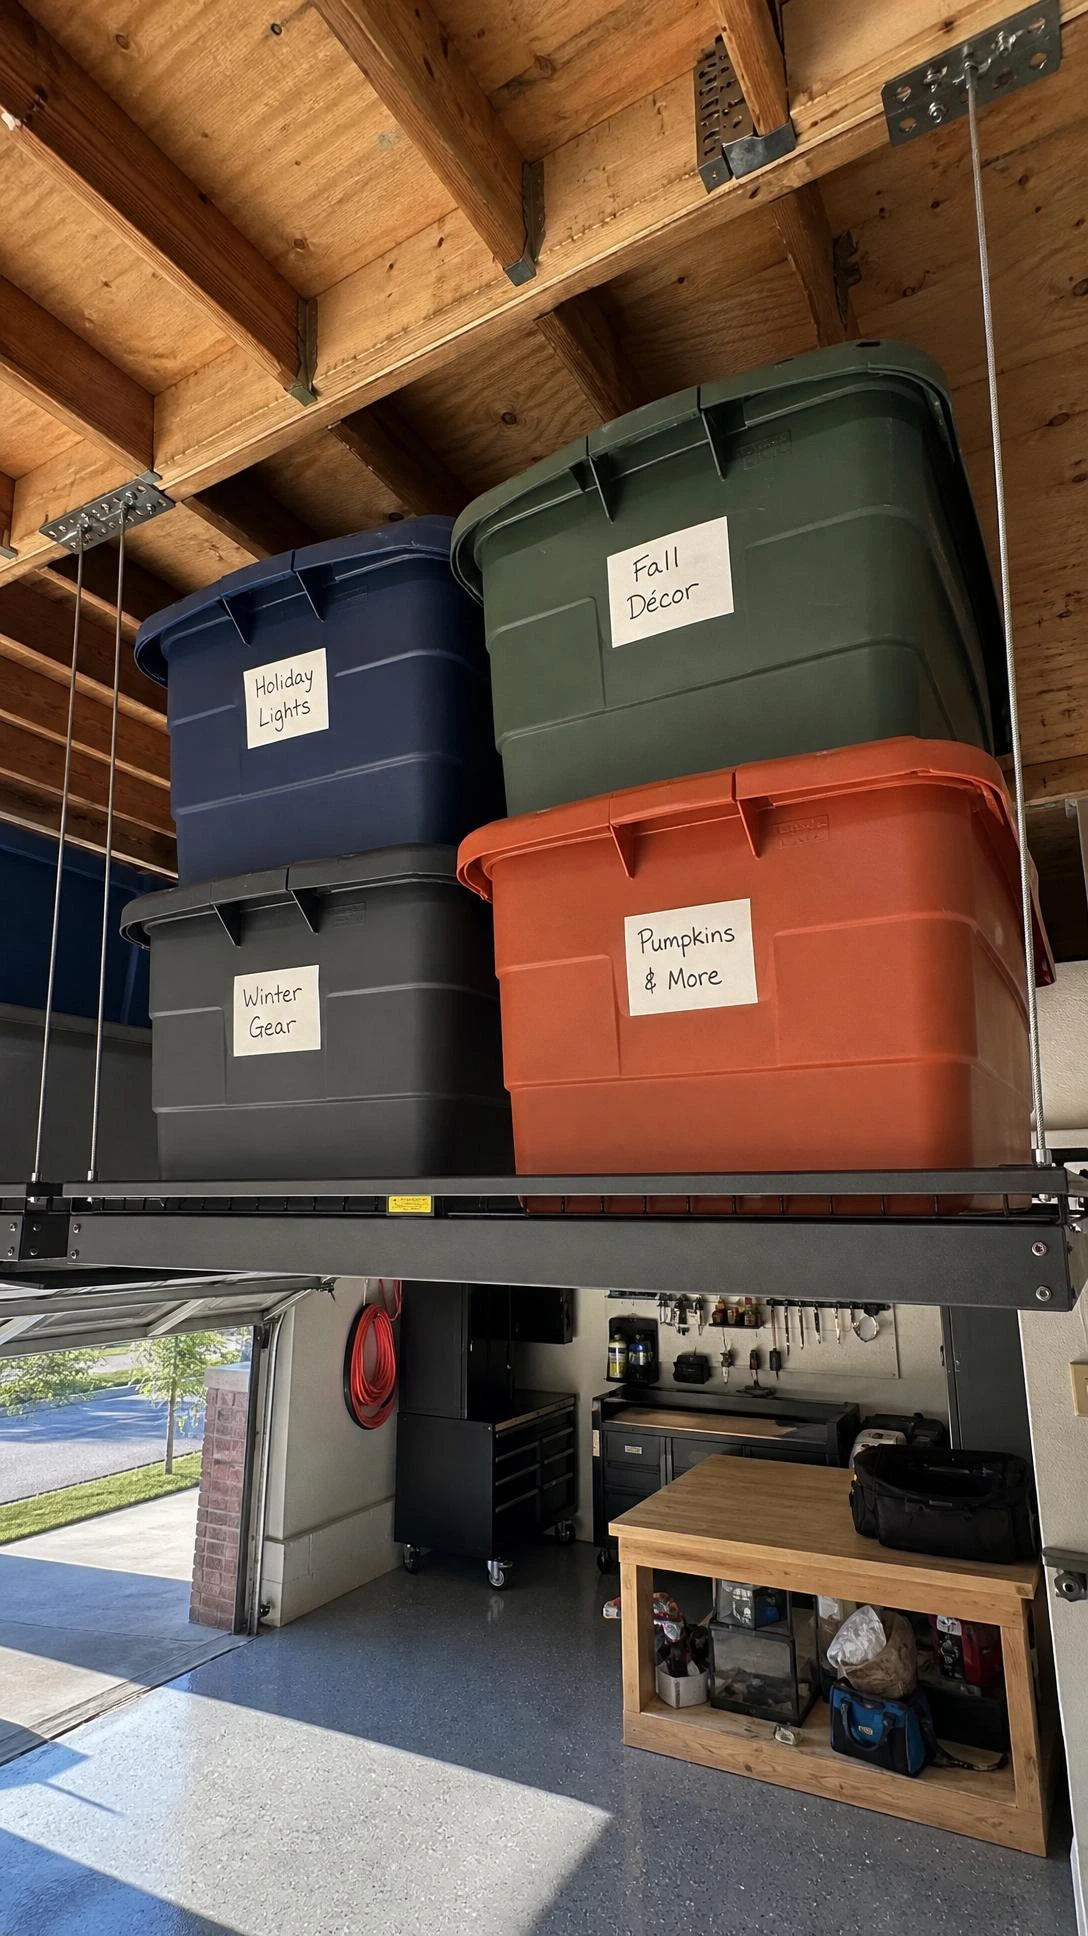
Ceiling space in a garage is basically free real estate that most people completely ignore.
A freestanding overhead storage rack from brands like Fleximounts or Rubbermaid runs about sixty to ninety dollars and suspends from the ceiling joists to hold heavy bins, holiday decorations, and camping gear that only comes down a few times a year.
The weight limit on most standard racks is around 250 to 600 pounds depending on the model, so it is more than enough for seasonal storage.
This works best in garages with at least eight foot ceilings so there is still clearance to open car doors without bumping into anything overhead.
Once the seasonal stuff is up and out of the way, the amount of floor and wall space that opens up below is what makes this one of the most impactful garage organization DIY ideas on this whole list.
4- Labeled Clear Bins by Category
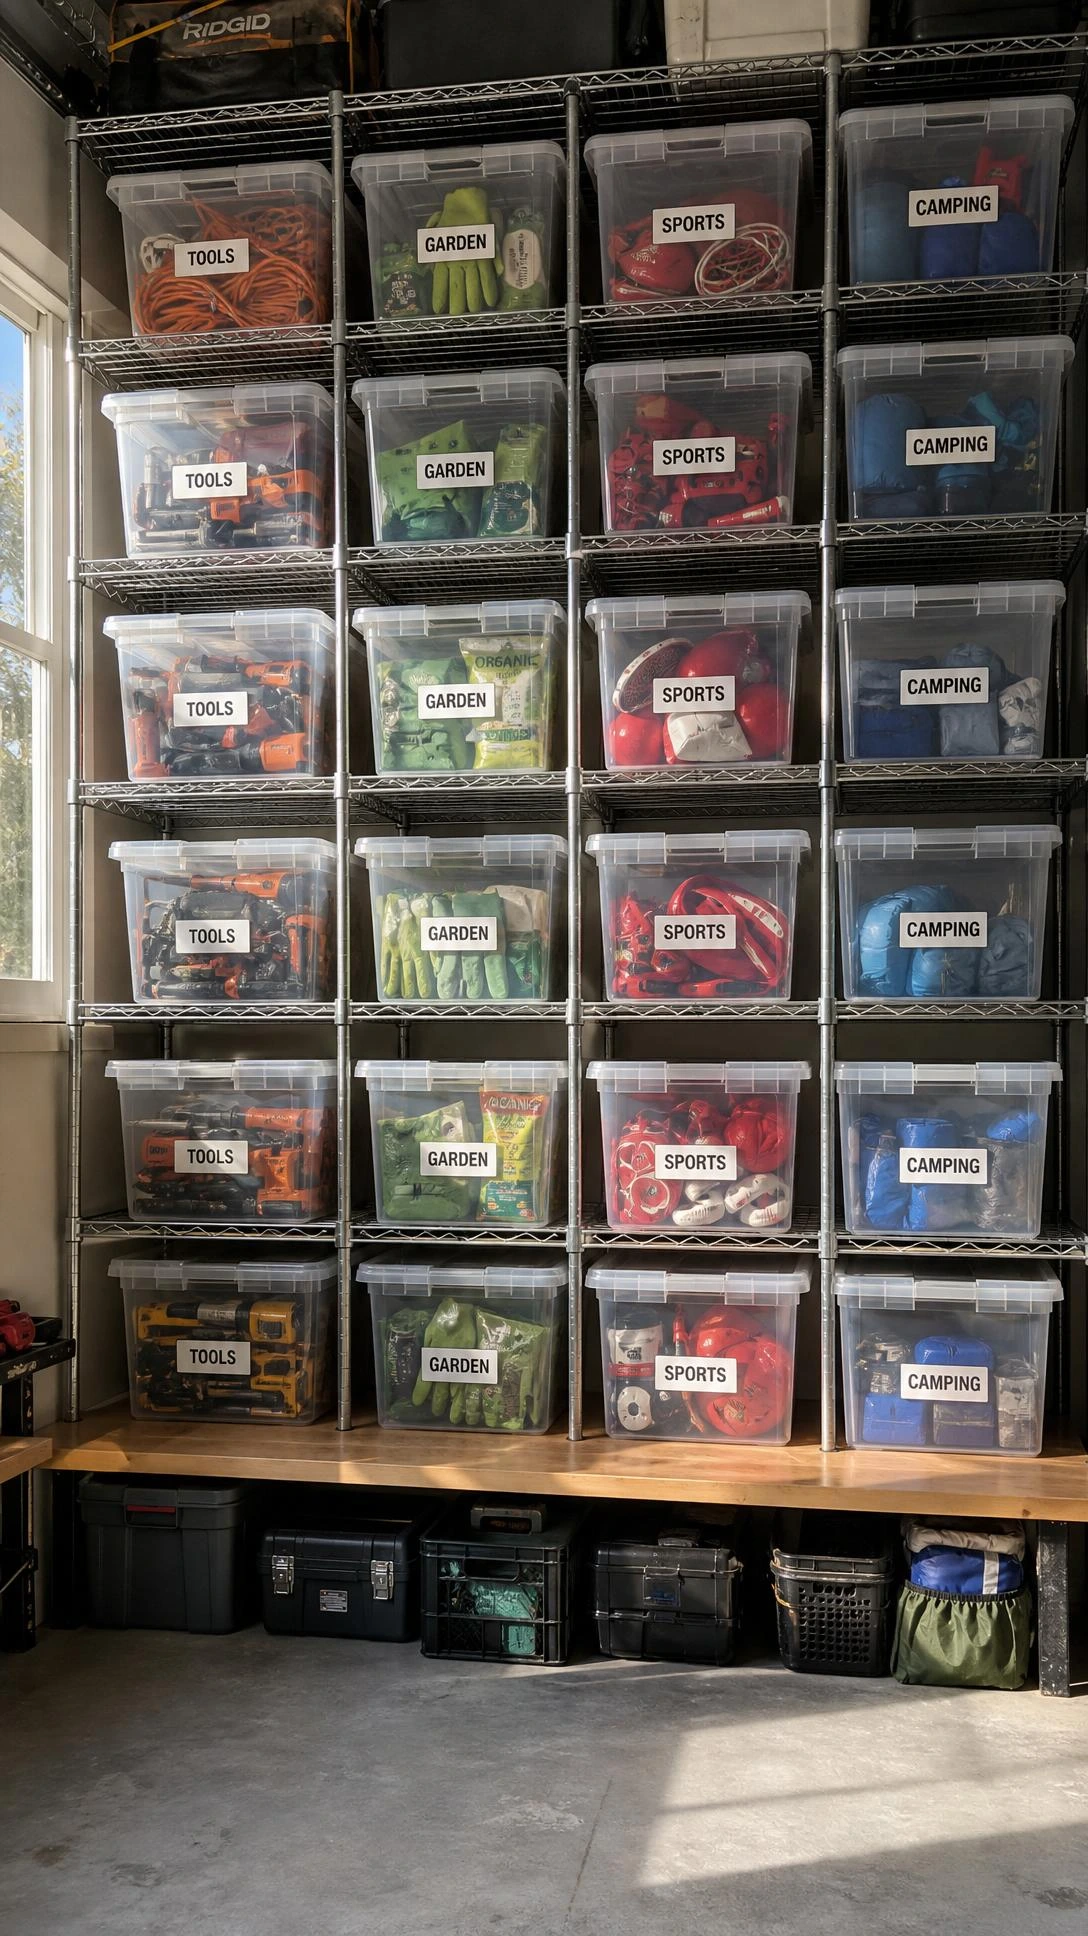
The category system sounds simple and it is, which is exactly why it works.
The basic idea is to group items by how they are used, so automotive supplies stay together, gardening tools stay together, sports gear stays together, and so on, and each category gets its own clearly labeled bin.
Clear plastic bins in the 18 to 27 gallon range from brands like Sterilite or IRIS USA run about eight to fifteen dollars each and let people see what is inside without pulling everything out to search.
Labels on the front and on the top make it easy to find things when bins are stacked, which is something most people do not think about until they are digging through a stack of identically sized containers.
The garage stays organized longer with this system because there is a clear home for everything, so putting things away takes no thought.
5- Wall Mounted Bike Hooks
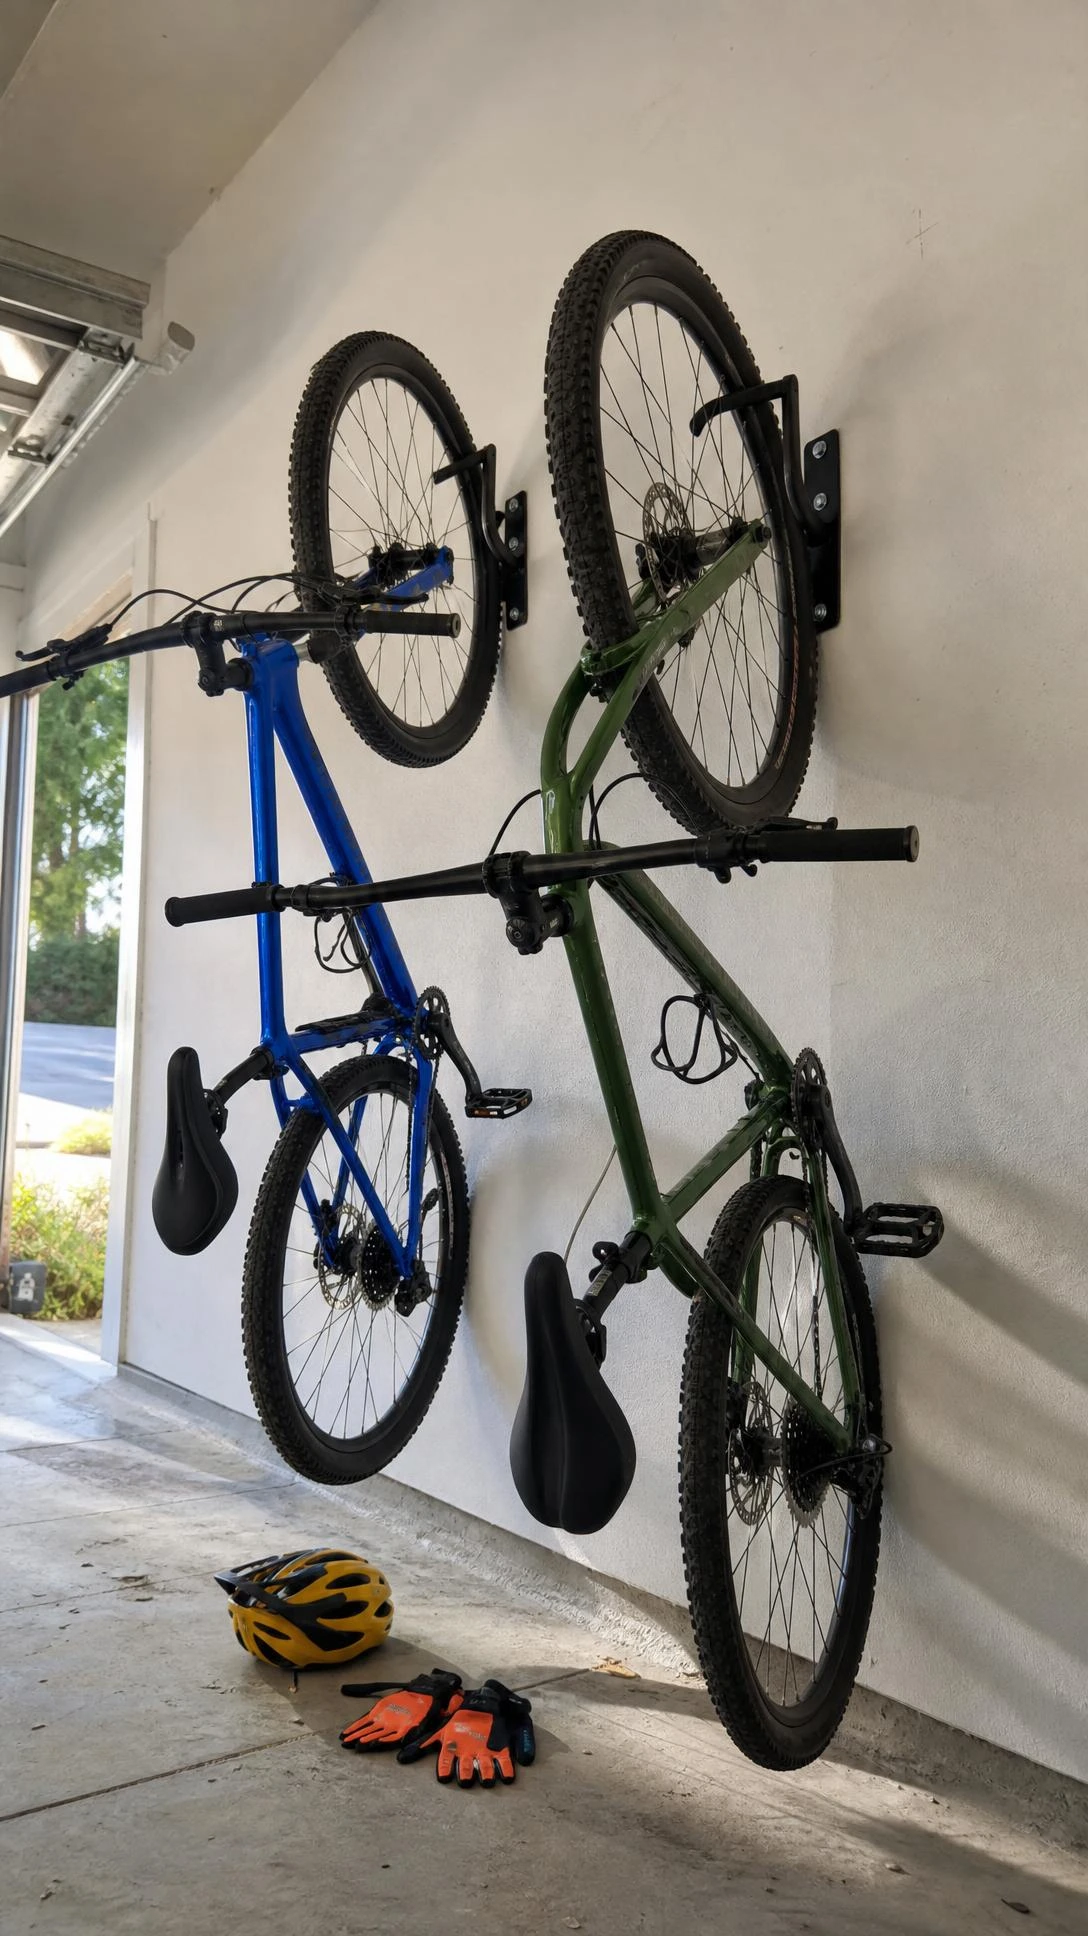
Bikes on the garage floor take up an enormous amount of space relative to how simple the fix actually is.
A single heavy-duty wall mounted bike hook runs about eight to fifteen dollars at any hardware store and the install takes maybe ten minutes with a drill and a wall anchor or stud finder.
Mounting bikes vertically on the wall instead of leaving them on the floor can free up four to six square feet of floor space per bike, which is a real difference in a one or two car garage.
Scooters, small electric bikes, and kids bikes all work the same way, so the same approach scales for the whole family without needing a complicated rack system.
The one thing to check first is wall material, because drywall alone will not hold a loaded bike hook and finding the stud or using a toggle anchor matters here.
6- DIY Slatwall Panel Organizer
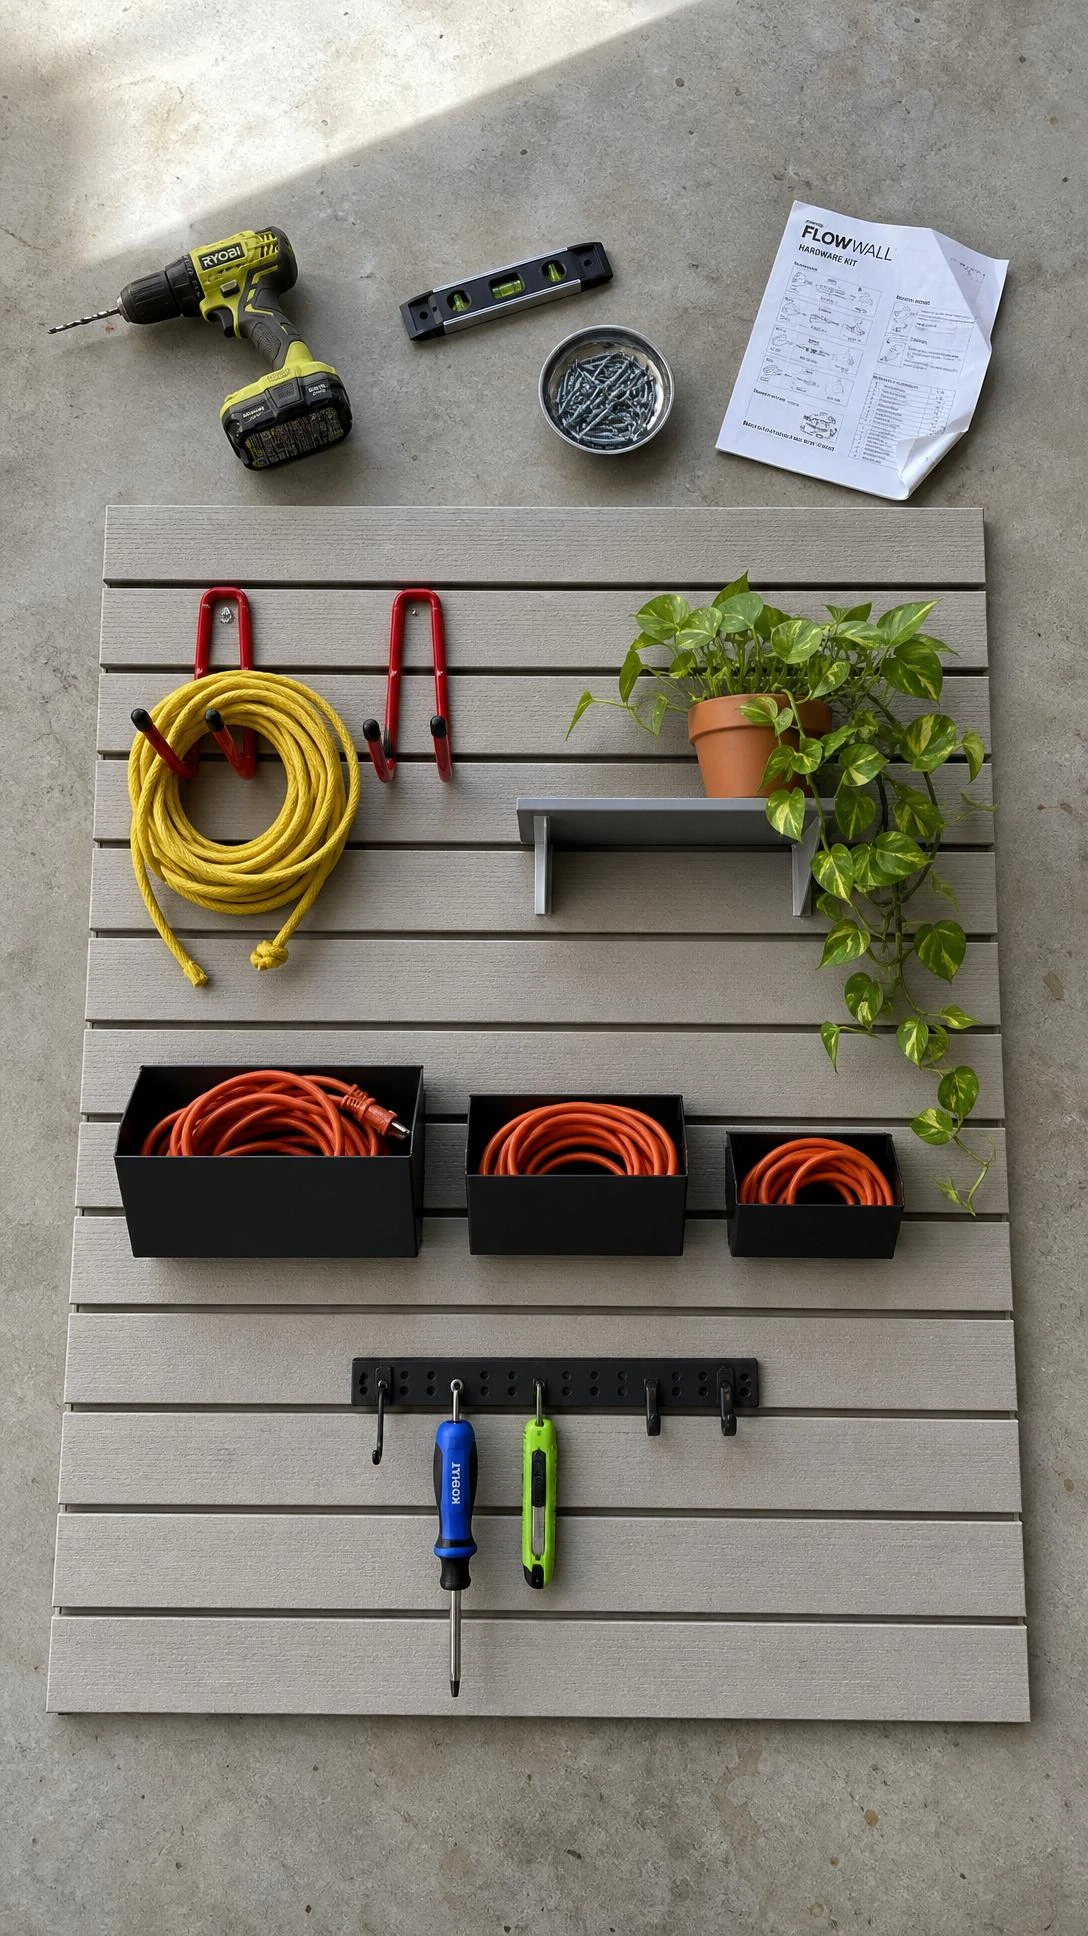
Slatwall panels are the slightly more polished version of pegboard and they work really well for garages that need a mix of hooks, baskets, and shelves all in one system.
A four by eight foot slatwall panel runs about forty to sixty dollars and the accessories, meaning the hooks, wire baskets, and small shelves, are sold separately and can be rearranged without any tools whenever the layout needs to change.
This makes it a good option for garages that serve multiple purposes, like a workshop area on one side and a sports gear wall on the other, since the configuration is flexible.
Slatwall holds more weight per hook than standard pegboard in most cases, which matters when hanging heavier items like extension cords, garden hoses, or power tool cases.
Most people set it up in an afternoon and rearrange the accessories a few times before landing on a layout that actually makes sense for how they use the space.
7- Freestanding Shelving Unit for Non-Tool Storage
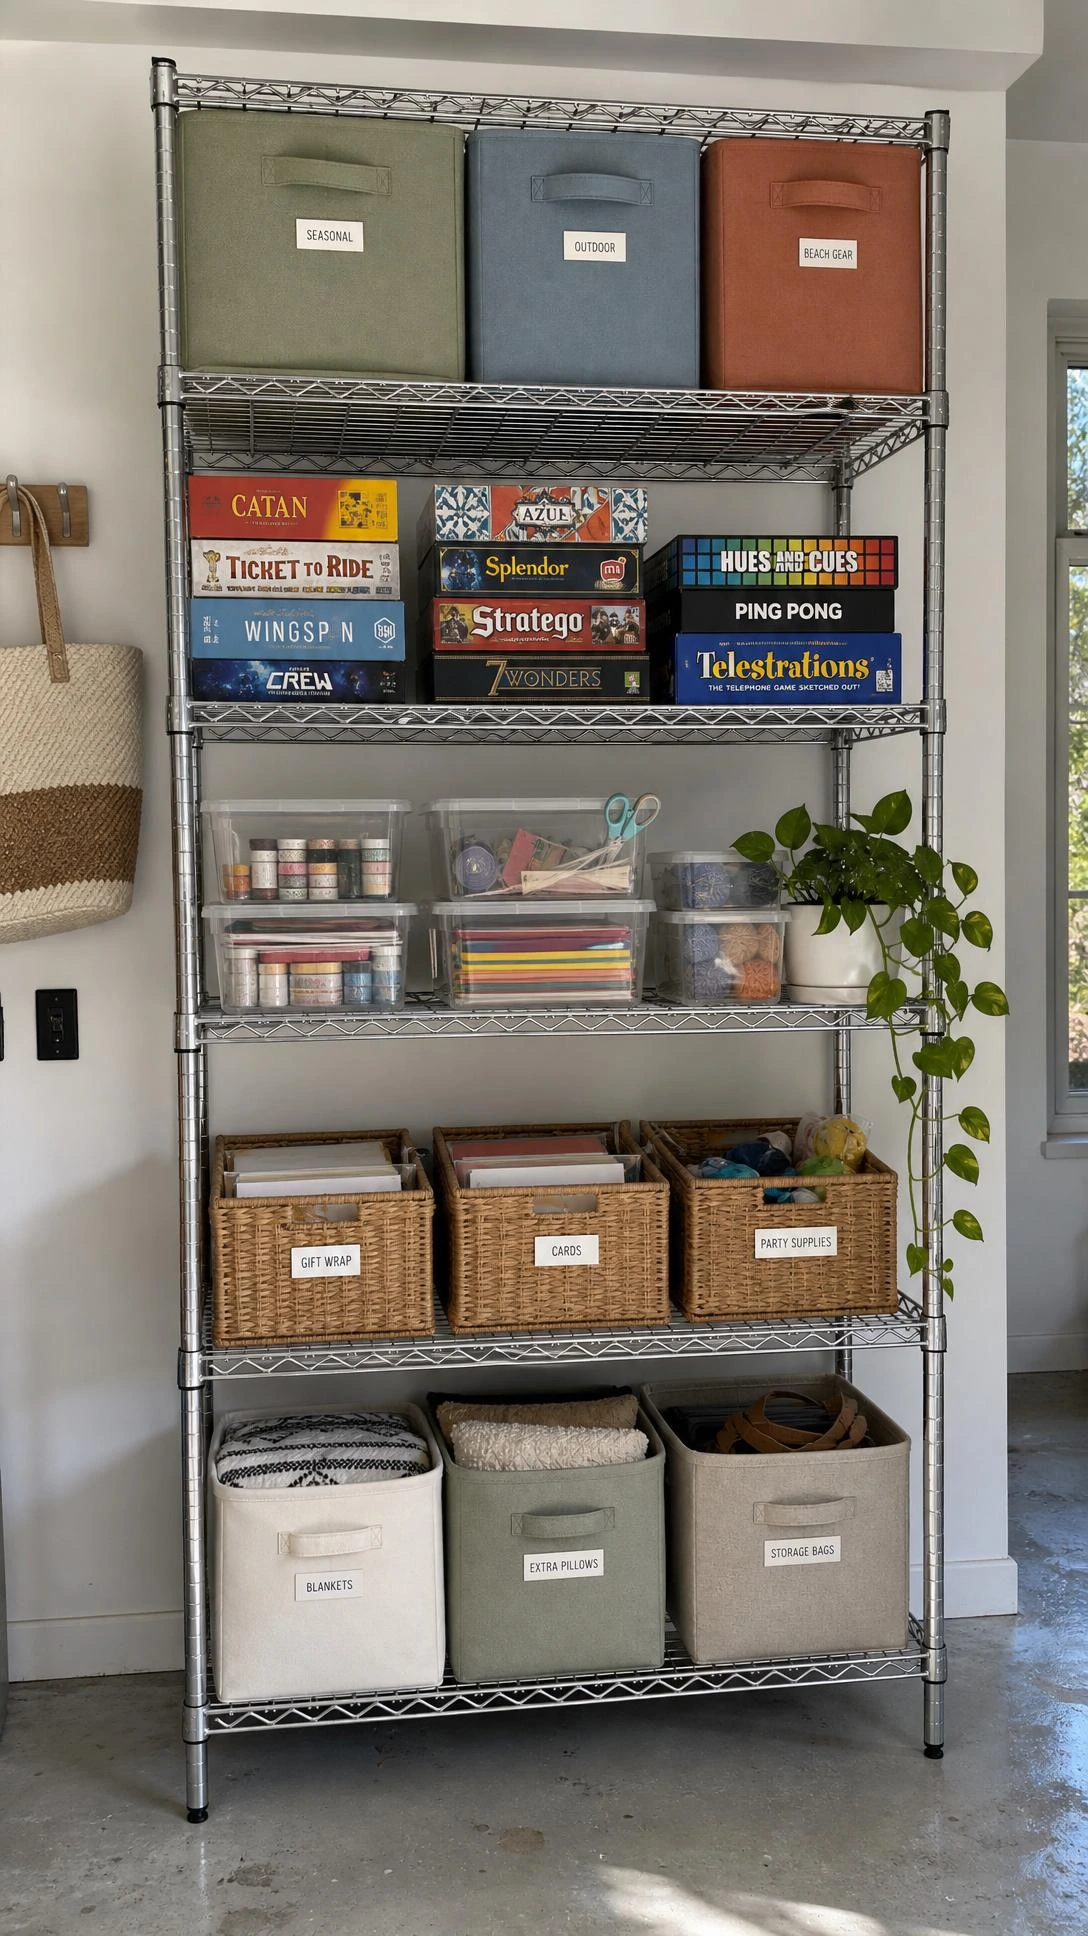
Not everything in a garage needs to be wall mounted, and a sturdy freestanding shelving unit does a lot of heavy lifting without requiring any drilling.
A metal wire shelving unit like the kind from Edsal or Gorilla Rack in the 72 inch height range holds about 2000 pounds across five shelves and costs around forty to seventy dollars, which is one of the better value moves in any garage organization project.
This is the right home for cleaning supplies, extra paper products, bulk pantry overflow, and anything else that is too light or oddly shaped for a heavy duty ceiling rack.
Wire shelving also lets air circulate, which matters in garages that get hot or humid since solid shelves can trap moisture against stored items.
Freestanding units are also a good pick for renters who cannot make permanent changes to the walls, since the whole thing just rolls out or breaks down when it is time to move.
8- Grab and Go Basket Station Near the Door
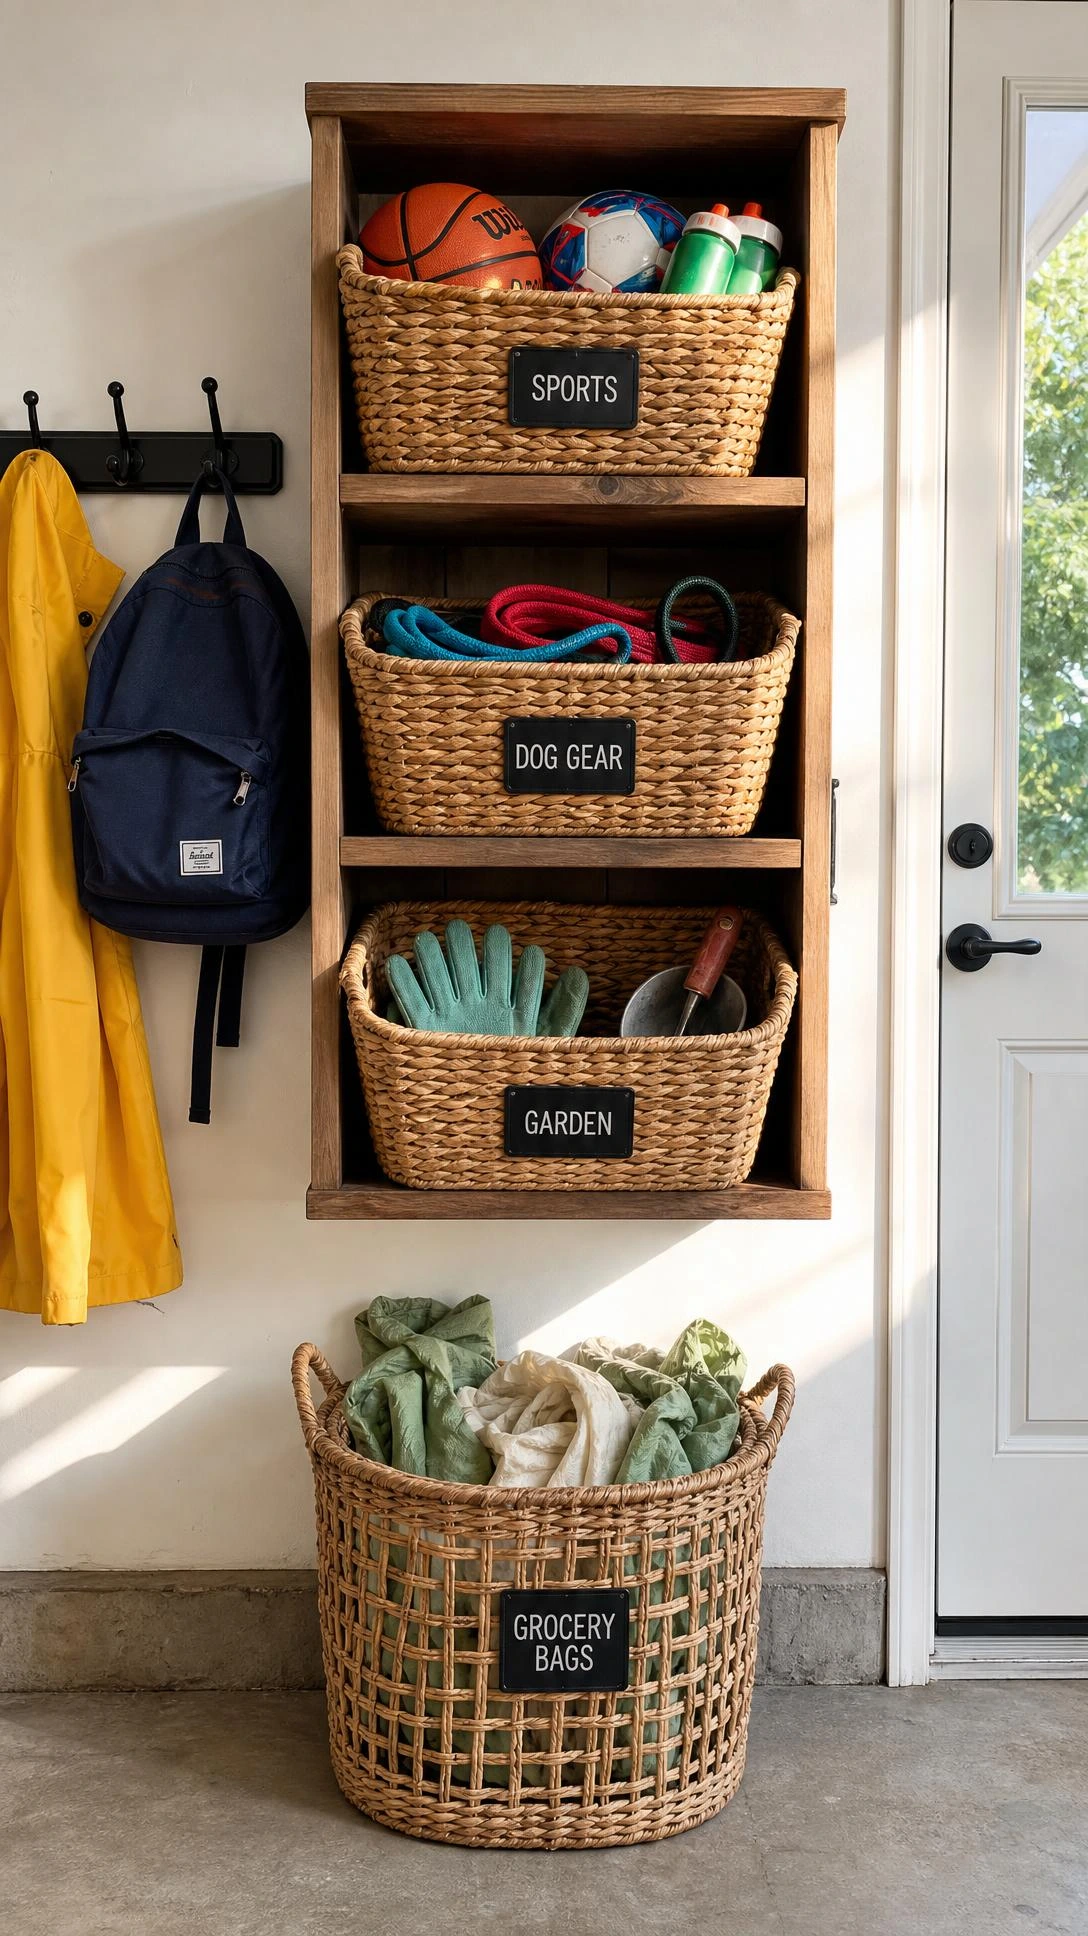
The area right inside the garage door is where chaos usually starts because things get dropped there and never actually make it to where they belong.
A tiered hanging organizer or a small row of labeled wire baskets mounted near the entry point gives that transitional stuff like reusable shopping bags, umbrellas, dog leashes, and sports gear a place to actually land.
Deep wire baskets in the six to eight inch depth range work well here because they are easy to grab from and easy to toss things back into without precision.
The grab and go station idea works best when each basket has one clear category so nobody has to think about where something goes, it just goes in the right basket.
It is one of those small changes that quietly keeps the rest of the garage organized because stuff that used to get dropped on the floor finally has a home right at the point of entry.
9- Zone Layout Planning With Painter’s Tape
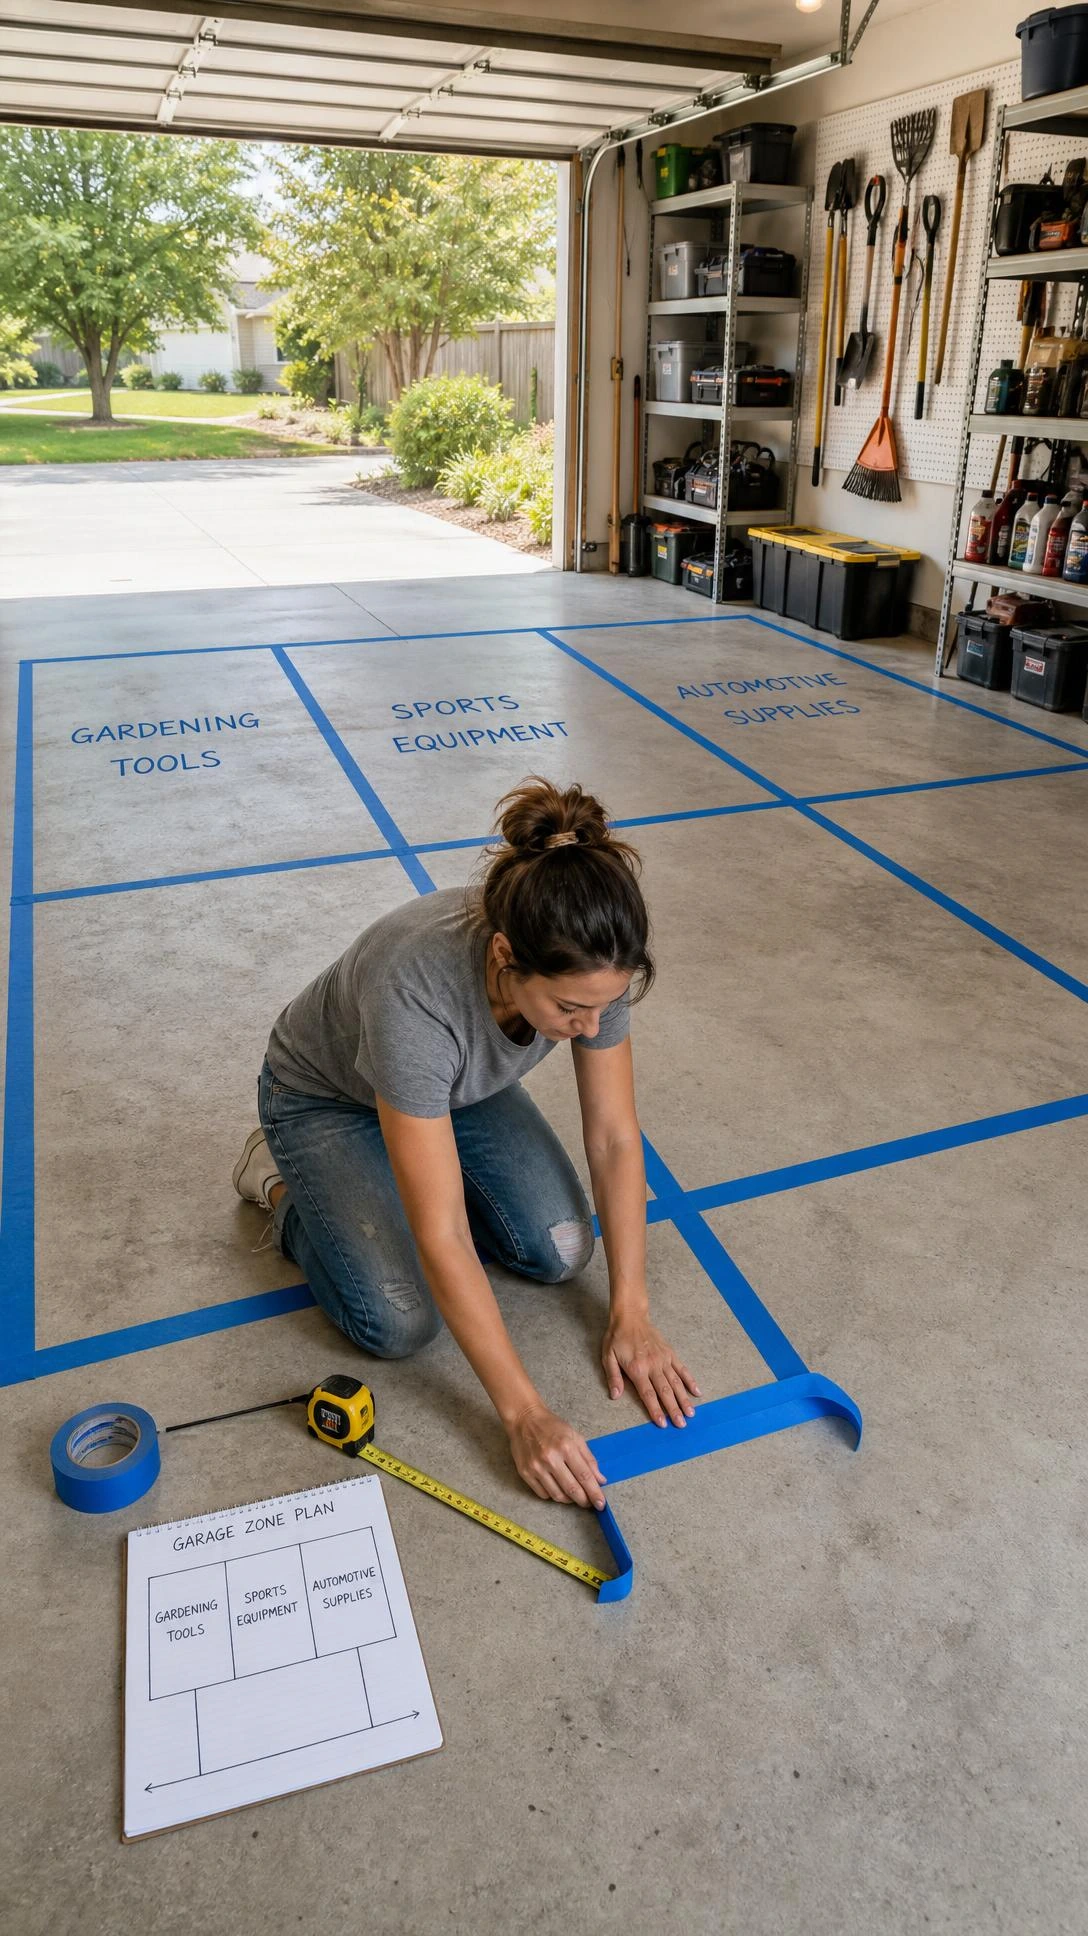
Before buying a single shelf or hook, taping out zones on the garage floor with cheap painter’s tape is one of the most useful things a beginner can do.
The idea is to block out where each category of stuff will live, so lawn equipment near the door, tools on the back wall, sports gear in one corner, and the car still fits where it is supposed to, before committing to any permanent storage.
Painter’s tape costs about four dollars and can be rearranged as many times as needed until the layout makes actual sense for how the garage gets used day to day.
Most people skip this step and end up installing shelves in a spot that blocks something they did not plan for, like the path to the breaker box or the spot where the lawnmower needs to roll out.
Spending thirty minutes with tape on the floor before spending money on storage is probably the highest return thirty minutes in any garage organization project.
10- Repurposed Cabinets for a Cleaner Look
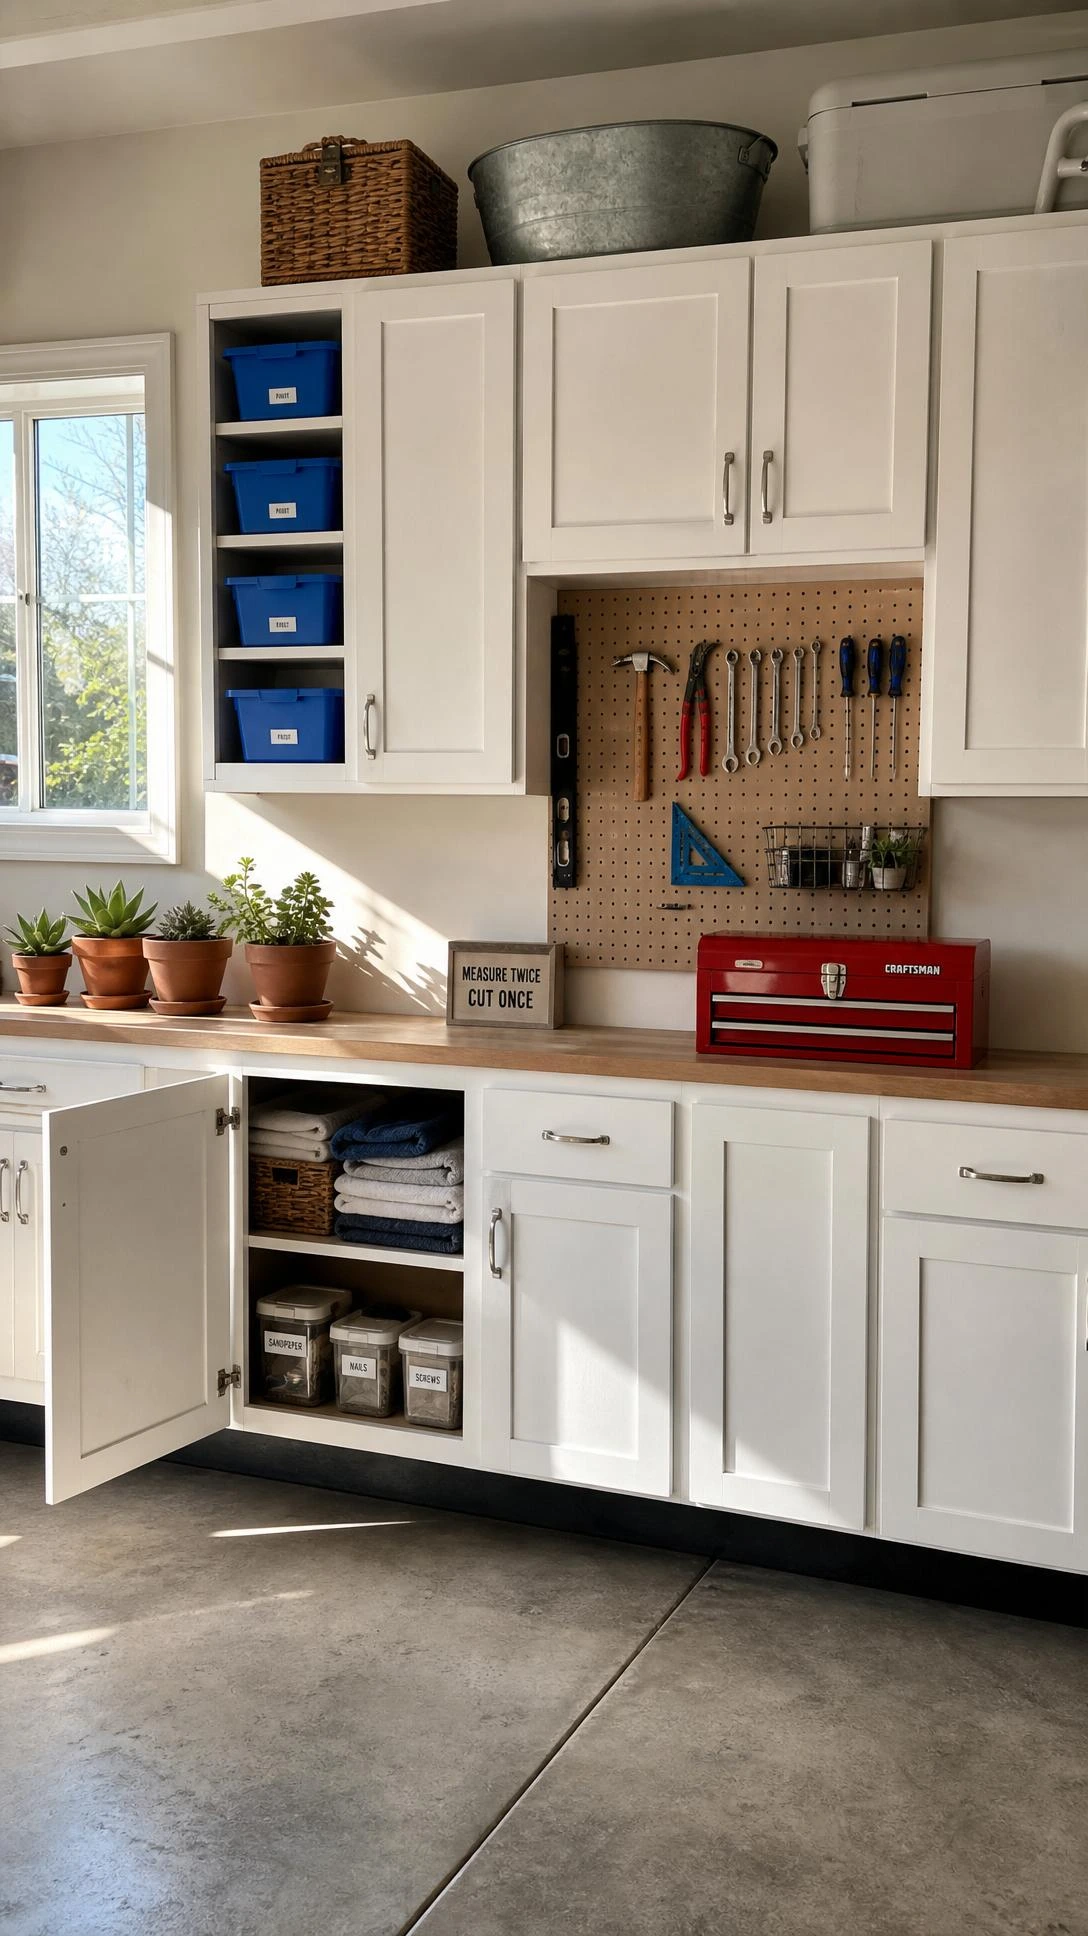
Old kitchen cabinets that have been swapped out during a renovation are one of the most underused free resources for garage storage.
Mounting them on the garage wall gives a clean closed door look that hides the messier categories of storage, like half-used paint cans, automotive fluids, and lawn chemicals that are not exactly pretty to look at.
Facebook Marketplace and Craigslist regularly have used kitchen cabinets listed for free or under fifty dollars when someone is remodeling, and upper cabinets in the 30 to 36 inch width range fit well on a standard garage wall stud layout.
The cabinets do not need to match or look polished since a coat of the same color paint across all of them pulls the look together enough that the garage feels put together rather than random.
I think this is the most underrated garage organization DIY idea on this list because the result looks like a real finished space instead of a place where things go to be forgotten.
The Part Nobody Talks About After the Weekend Is Done
The hardest part of garage organization is not actually the weekend, it is the two weeks after it.
Every system in here works best when the zones, baskets, and labels get used the way they were set up, which sounds simple until the fourth trip in from the car with grocery bags and nobody wants to walk the camping gear back to its corner.
The good news is that most of these setups are forgiving enough that a ten minute reset once a month keeps everything from sliding back to the way it was before.
A finished, organized garage is a genuinely useful space, and getting there on a beginner budget with two days of work is a lot more doable than most people think it is going to be going in.

Hi, I’m Alizabeth, the creator of Pretty Home Hacks. I share practical home decor ideas, easy DIY projects, organization tips, and budget-friendly ways to make your home feel more beautiful and functional. From small room updates to everyday home hacks, my goal is to share approachable ideas you can actually use in your own space.